Screen Shows One Straight Line That Won't Move? Panel Row/Column Driver, Signal & Display-Chain Diagnosis Guide
Key Takeaways
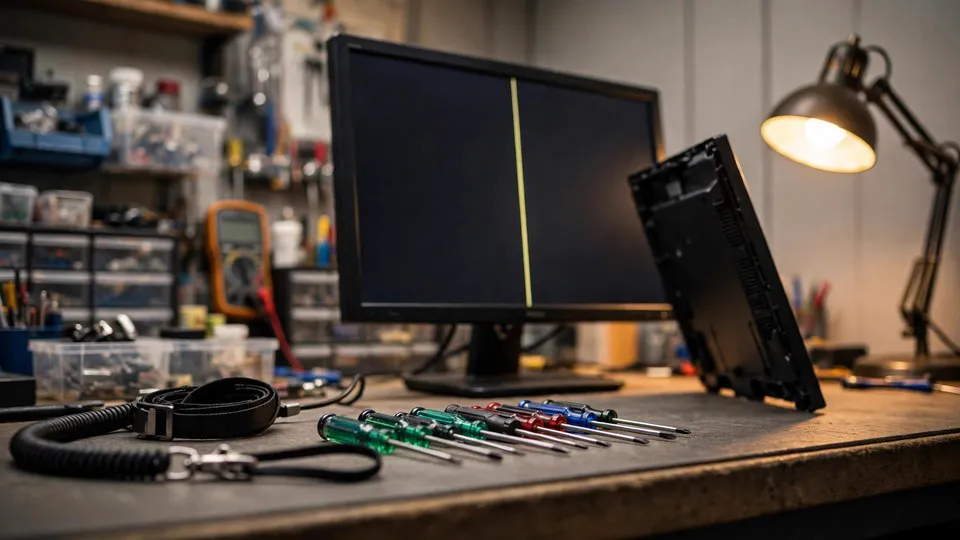
One straight line that stays put while the rest of the picture looks normal is a different problem from speckles, stripes, or half the screen going wrong. The line points at the panel's row or column driver chain, but a screenshot, the monitor's own menu, and a second source can show whether the fault is in the panel or upstream.
First, Count the Lines
Before anything else, look carefully and count. This guide is about exactly one straight line — vertical or horizontal — running from one edge of the screen to the other, staying in the same place, while the rest of the picture is normal. Not several lines. Not a band of stripes. Not half the screen. Not a single dot.
If you see many horizontal stripes or a rippling pattern, that is a different problem, covered in the site's guide on horizontal stripes and ripples. If half the screen is wrong and the other half is normal, that is a half-screen problem, and the line you see is the boundary between the two halves, not a faulty line of its own. If the fault is a single dot, that is a dead or stuck pixel, and the tests for a dot are different from the tests for a line. Counting the lines first is not pedantry — it decides which guide you should be reading, and the wrong guide wastes the diagnosis.
Once you have confirmed it is one line, record five facts about it before you change anything: its direction (vertical or horizontal), its position (roughly where on the screen, and that it does not move), its colour (black, white, red, green, or blue), its width (about one pixel wide, or wider), and when it appears (from the moment the machine is switched on, or only after Windows loads, or only in a particular program). A line that is there from power-on and a line that only appears inside Windows are different evidence, and the distinction matters in step 4 below.
How an LCD Panel Draws a Picture
An LCD panel does not light up all at once. A timing controller, known as the T-Con, takes the incoming picture signal and hands it out to two sets of drivers: row drivers, also called gate drivers, which control the horizontal rows, and column drivers, also called source drivers, which control the vertical columns. The column drivers are usually driver chips mounted on flexible film — chip-on-film, or COF — attached to the edge of the panel, carrying the signal to each column of pixels through a flexible flat cable. The row drivers pass their timing signal down the rows in a chain, one row handing on to the next, in what is called a bucket-brigade arrangement.
That structure explains why a single line appears. If one whole column of pixels receives the same wrong value — or receives no signal at all — the entire column shows the same line, from the top of the screen to the bottom. If one whole row goes wrong, the entire row shows a line from one side to the other. The line is straight and fixed because the fault is in one fixed channel of the driver chain, not in the picture being drawn.
What a Vertical Line Means, and What a Horizontal Line Means
A vertical line and a horizontal line point at different parts of the driver chain, even though the tests used to isolate them are the same. The mechanism must be explained separately for each direction.
A vertical line points at the column driver side. Behind it there can be several possible causes, and this guide lists them as a family, without ranking them: a fault in one output channel of the T-Con; a broken conductor in the flexible cable carrying the column signal — in a laptop, the cable often passes through the hinge, where it is flexed every time the screen is opened and closed; a tab bond — the joint where the flexible cable is bonded to the panel — coming loose through heat cycling or moisture; the column driver chip itself failing; or a crack in the glass substrate. Different sources describe different members of this family as the most frequent, so this guide does not declare any one of them the most common cause. The honest statement is that a vertical line sits in the column driver family, and the isolation tests below are what separate the panel side from everything upstream of it.
A horizontal line points at the row driver side, and the same logic applies in the other direction: one row of pixels has gone wrong, and the cause sits in the gate driver chain. Row drivers have one feature worth understanding. Because they pass their timing signal down in a chain, a break at one point in the chain can affect the rows below it as well. That means one horizontal line and a bundle of horizontal lines are different situations, and they should not be written about as if they were the same thing. A single horizontal line is the subject of this guide; a bundle of lines below a break point is a related but different pattern, and it should be described as such when it appears.
The colour of the line can be described only in general terms, and never as a fixed lookup table. A black line often means that the row or column is receiving no signal. A coloured line — red, green, blue, or white — often means that the row or column is stuck at one particular value. Colour alone cannot determine the cause. It must always be combined with the isolation tests below before any conclusion is drawn.
Could the Fault Be Upstream? The Graphics Card, the Signal, and the Cable
A single straight line can also be produced before the frame buffer — by a graphics rendering error, a fault in one column of video memory, or a driver or scaling problem — but that situation is less common, and there is a decisive test that separates it from a panel fault. That test is the screenshot, in step 2 below. If the line appears in the screenshot, the fault was already in the picture before it reached the panel, and the panel may be innocent. If the screenshot is clean, the fault is after the frame buffer, in the panel or the signal chain.
The cable itself deserves a clear statement, because it is the part most often blamed first and most often innocent. A faulty cable very rarely produces one clean, thin, straight line. Cable faults usually show up as patches of wrong colour, speckled noise, intermittent black screens, or broad bands of stripes across the whole picture — not as a single fine line. A reader who replaces the cable the moment a line appears is usually spending money on the wrong part. The cable and port comparison in step 6 exists to test the cable properly, not to assume it is guilty.
The Diagnostic Flow, in Order
Work through these steps in order, and change only one thing at a time. Each step states what it proves and what it does not prove. The first three steps are the decisive ones: together, they draw the line between the picture calculation, the signal, and the panel.
| Step | What to do | What it proves | What it does not prove |
|---|---|---|---|
| 1 | Describe the line: one line, direction, position, colour, width, timing | Whether the symptom is a single line at all, and which guide applies | Nothing about the cause |
| 2 | Take a screenshot | Whether the line is in the frame buffer or after it | Which part after the frame buffer is at fault |
| 3 | Open the monitor's own on-screen menu (OSD) | Whether the line sits in the panel driver chain or the input signal chain | Nothing about the cause inside the panel chain |
| 4 | Check the BIOS or UEFI screen | Whether Windows, drivers, and programs can be ruled out | Nothing about which panel component is at fault |
| 5 | Connect a different source to the same monitor, and the same computer to a different monitor | Whether the fault follows the monitor or the computer | Nothing about the cause on the side it follows |
| 6 | Change the cable and the port, one at a time | Whether the cable or port connection is involved | That a cable fault is the cause of a clean single line — it rarely is |
| 7 | Change the resolution and note whether the line stays in the same relative position or moves with the pixel coordinates | An observation to record and bring to an inspection | Any fixed rule about what staying or moving means |
| 8 | On a laptop, note whether the line changes when the screen angle is moved — observation only | Whether the hinge cable is a suspect worth noting | Nothing, if you keep moving the screen to test it — do not do that |
| 9 | Stop if the tests point at the panel driver chain | That the next step is professional inspection, not more settings | — |
Step 1: Describe the Line
Write down the five facts from the opening section: one line, its direction, its position, its colour, its width, and when it appears. A line that is there from power-on points in a different direction from a line that only appears after Windows loads, and a line that only appears in one program points somewhere else again. This written record is also what you bring to an inspection, so make it while the line is in front of you.
Step 2: The Screenshot Test
Take a screenshot of the screen with the line visible. A screenshot reads the frame buffer — the picture the graphics system has calculated — not the picture the panel is showing. If the line is in the screenshot, the problem is in the frame buffer or before it: graphics rendering, video memory, the driver, or the program's output. The panel may be innocent. If the screenshot is clean and the line is only visible to your eyes, the problem is after the frame buffer — in the panel or the signal chain — and the graphics card did not draw the wrong picture. A clean screenshot proves only that everything up to the frame buffer is working; it does not prove that the whole display chain is fine. That limit is precisely what makes the test useful.
Step 3: The Monitor's Own Menu Test
Open the monitor's own on-screen display menu — the menu the monitor generates itself, without going through the graphics card. If the line lies on top of the menu, the fault is in the panel driver chain, because the menu is drawn after the input signal. If the menu is clean and the line sits underneath it, the fault is in the input signal chain, because the menu — which never passed through that chain — is unaffected. This test and the screenshot test together draw a tight boundary around the panel: a line that survives both tests has been shown to sit in the panel itself.
Step 4: The BIOS or UEFI Screen Test
Restart the machine and look at the BIOS or UEFI screen before Windows loads. If the line is already visible on the BIOS screen, Windows drivers, games, and programs can all be ruled out — none of them has loaded yet, so there is no point in reinstalling drivers. If the line only appears after Windows loads, the driver or rendering layer needs to be investigated. This test is about timing evidence: a line present before the operating system loads cannot be caused by the operating system.
Step 5: The Source Comparison
Connect a different source — another computer, or a games console — to the same monitor. If the line is still there, the fault is on the monitor side. If the line disappears, the fault is on the original computer, graphics card, or cable side. Do the comparison the other way round as well: connect the same computer to a different monitor. A fault that follows the monitor points at the monitor; a fault that follows the computer points at the computer. Do not change the cable at the same time as changing the source — changing two things at once makes the result impossible to attribute.
Step 6: The Cable and Port Comparison
Change the cable, then change the port, one at a time, testing after each change. If the line moves, flickers, or comes and goes when the cable or port is changed, suspicion of the cable or the port connection rises. If the line is completely unaffected by changing the cable and the port, the cable can be ruled out. Remember the point made above: a cable fault very rarely produces one clean straight line, so a cable change that makes no difference is the expected result for a panel driver fault, not a surprise.
Step 7: The Resolution Comparison
Change the resolution and note what happens to the line: does it stay in the same relative position on the screen, or does it move with the pixel coordinates? Record the observation and bring it to an inspection. Do not turn it into a fixed rule — this guide deliberately does not state that staying in place proves one cause and moving proves another. The observation is a piece of evidence for a professional to weigh alongside the screenshot, menu, and source tests, not a verdict on its own.
Step 8: The Laptop Screen-Angle Observation
On a laptop with a built-in screen, note whether the line changes when the screen angle is moved. If it does, the flexible cable at the hinge is a stronger suspect, because that cable is flexed every time the screen moves. This step is observation only: if you notice a change while opening or closing the screen in normal use, record it. Do not repeatedly move the screen back and forth to test it. Repeated flexing is not a diagnostic method, and it risks making a cable fault worse.
Step 9: The Stopping Line
If the tests point at the panel driver chain — the line is in the monitor's own menu, it is visible on the BIOS screen, and it survives changing the source and the cable — the next step is a professional inspection, and the question becomes one of panel repair or replacement. It is not a settings problem, and no further setting change will fix it. Do not open the monitor, do not take the panel apart, do not disconnect the internal cables, and do not try to re-bond a tab bond yourself. Internal inspection is professional repair work, and the isolation tests above are where the reader's part ends.
Boundaries: What This Is Not
Several neighbouring problems look similar at first glance. Each one below is a different mechanism, and each one belongs to a different guide.
- Many horizontal stripes or ripples. Broad bands of horizontal stripes or a watery ripple across the picture are an interference, shielding, or grounding matter. This guide is about one line. Count the lines first: many stripes go to the stripes guide, one line stays here.
- Half the screen wrong. When one half of the screen is abnormal and the other half is normal, the line in the middle is the boundary between the two halves, not a faulty line of its own. That is a half-screen problem, with its own diagnostic flow.
- A single dot, or light leaking at the edges. A dead or stuck pixel is one point, and edge light leakage is a border effect. A line is a whole row or column of pixels going wrong, which is a different mechanism, and the colour-by-colour test that helps with a dot is of no use for a line.
- A screen full of speckles or flicker. A screenshot that is clean while the whole screen flickers or shows speckles is a different symptom from one fixed straight line. This guide borrows only the screenshot test logic from that territory; the symptom here is a single fixed line, not a screen full of noise.
- A BIOS screen full of speckles, colour blocks, and lines. A boot screen showing many kinds of corruption at once is a different problem from one single line. The BIOS test in this guide is only one step in a complete diagnosis of a single line.
- A screen that is clean at boot and only goes wrong inside Windows. That timing pattern belongs to the driver-loading diagnosis. A single line in this guide can be present from power-on, so do not apply the Windows-only timing logic to it.
- A screen that only goes wrong at high resolution or high refresh rate. Bandwidth and signal-integrity problems show up as broad corruption at high settings. A single line that only appears at high resolution is a branch case, not the main subject of this guide, and it should be described as such.
- Intermittent black screens. A picture that goes black for a second or two and comes back on its own is an intermittent black-screen problem. A single straight line is continuously present and does not disappear by itself. The two are not the same thing.
- Video memory faults. A video memory fault usually shows up as broad speckles, colour blocks, or corruption across the picture. A single line can be a video memory branch case, but the screenshot test catches it — and video memory should not be written up as the main subject of this guide.
- An intermittent line. A line that comes and goes, or only appears when something is moved, is a boundary case. Intermittent appearance points toward a contact or cable direction, but the diagnostic order does not change. Do not write intermittent and continuous lines as if they were the same thing.
OLED Screens: A Boundary, Not the Same Structure
An OLED screen has no backlight, and each pixel produces its own light. It does not have the LCD structure of a T-Con handing signals to row and column drivers, so the LCD mechanism described in this guide must not be applied to OLED as if it were the same. What still applies to OLED is the isolation testing: the screenshot test, the monitor's own menu test, the BIOS screen test, and the source and cable comparisons all work the same way, because they test where the fault sits in the chain, not what the panel is made of. For an OLED screen, those tests can still prove whether the fault is in the panel or upstream of it. The internal cause inside an OLED panel should not be named using LCD terms.
Common Misconceptions
| Misconception | Correction |
|---|---|
| "A line means the graphics card is broken." | Wrong. A single straight line is usually in the panel driver chain. Only the screenshot, the monitor's own menu, and the source comparison together can determine the cause. Do not condemn the graphics card before those tests are done. |
| "A line means the cable is broken." | Wrong. A cable fault very rarely produces one clean straight line. Replacing the cable the moment a line appears is the most common waste of money on this symptom. |
| "Press the screen where the line is and it will go away." | Wrong, and dangerous. Do not press, bend, or tap the panel to test it. Pressure can turn a minor driver fault into permanent damage, and a change when pressed proves nothing about the cause. This site does not teach any bezel-pressure test, and no form of pressing the panel — not even a gentle press to see what happens — should be used. |
| "A screenshot will always capture the line." | Wrong. A screenshot only captures problems in or before the frame buffer. A line on the panel side leaves the screenshot clean — and that is exactly what makes the test diagnostically useful. |
| "Reinstalling the driver will fix the line." | Wrong. If the line is visible on the BIOS screen and on the monitor's own menu, the driver has not even loaded. Reinstalling it is useless. Only when the line appears in the screenshot — meaning the fault is before the frame buffer — should the driver layer be considered. |
| "One line means the whole monitor is finished." | Wrong. Isolate first. A panel driver chain problem is usually a question of panel repair or replacement, and that should be stated plainly — but it should not be declared before diagnosis, and it should not be presented as something a few setting changes can fix. |
| "A vertical line and a horizontal line are the same thing." | Wrong. A vertical line points at the column drivers and a horizontal line points at the row drivers. The internal chains are different. The diagnostic tests are the same, but the mechanism must be explained separately. |
When the Tests Point Beyond Settings
If the line is in the screenshot, the fault is upstream of the panel, and the driver or rendering layer is where the investigation continues. If the line is in the monitor's own menu and on the BIOS screen, and it survives changing the source and the cable, the fault is in the panel driver chain, and the question becomes one of panel repair or replacement — not a settings problem, and not something to open up at home.
HK GPU Fix offers a diagnostic inspection at its Shek Mun shop: Room 1209, Dali Plaza, Shek Mun. The published inspection fee range is HK$400–2,800 in total, and the actual price is subject to a post-inspection quotation. Phone 2186 8010, WhatsApp 6558 6806. There is no on-site service; inspection is carried out at the shop. Bring the record from your tests — the line's direction, position, colour, and width, whether the screenshot was clean, whether the line sat on top of the monitor's menu, and whether it was visible on the BIOS screen — because that record is what lets an inspection start from the right part of the chain instead of from the beginning.
Frequently Asked Questions
There is one straight vertical line on my screen. Is my graphics card broken?
Probably not. A single straight line is usually in the panel driver chain, not the graphics card. Take a screenshot first: if the line is in the screenshot, the fault is before the frame buffer and the graphics side is in question; if the screenshot is clean, the fault is after the frame buffer, in the panel or the signal chain. Do not condemn the graphics card before the screenshot, menu, and source tests are done.
The line is in the screenshot. What does that mean?
It means the fault is in the frame buffer or before it — graphics rendering, video memory, the driver, or the program's output. The panel may be innocent. The next step is the driver and rendering layer, not the panel, and the line's appearance in the screenshot is the evidence that points there.
The line is on top of the monitor's own menu. What does that mean?
It means the fault is in the panel driver chain. The monitor's menu is generated by the monitor itself, without going through the graphics card, so a line that lies on top of the menu cannot be coming from the input signal. Combined with a clean screenshot, this is strong evidence that the fault sits in the panel.
The line is visible on the BIOS screen. Should I still reinstall the driver?
No. If the line is already visible before Windows loads, the driver has not loaded yet, so reinstalling it cannot help. The BIOS test rules out Windows drivers, games, and programs in one step. Only a line that appears after Windows loads should lead to the driver layer.
I changed the cable and the line is still there. Does that rule the cable out?
Yes, for practical purposes. A cable fault very rarely produces one clean straight line in the first place, and a line that is completely unaffected by changing the cable and the port can be treated as unrelated to the cable. Change the cable and the port one at a time, and record the result — a line that does not move, flicker, or change is telling you the cable is not involved.
Can I press the screen gently where the line is, just to see if it changes?
No. Do not press, bend, or tap the panel to test it. Pressure can turn a minor driver fault into permanent damage, and a change when pressed proves nothing about the cause. Some articles online teach a bezel-pressure test; this site does not, and no version of it — gentle or otherwise — should be used.
The line is sometimes there and sometimes not. Is the diagnosis different?
The order of the tests does not change, but an intermittent line points toward a contact or cable direction rather than a fixed driver fault. Record when it appears and when it disappears, and whether moving the screen or the cable is involved. Do not treat an intermittent line and a continuous line as the same symptom, and do not keep moving the screen to provoke it.
My screen is OLED and it has one straight line. Does this guide still apply?
The isolation tests still apply: the screenshot, the monitor's own menu, the BIOS screen, and the source and cable comparisons all work the same way on OLED, because they test where the fault sits in the chain. What does not apply is the internal mechanism — an OLED panel does not have the LCD structure of a T-Con with row and column drivers, so the internal cause should not be described using LCD terms.