Monitor OSD Menu Pops Up by Itself? Stuck Button, Button-Board Short & Firmware Loop Diagnosis Guide
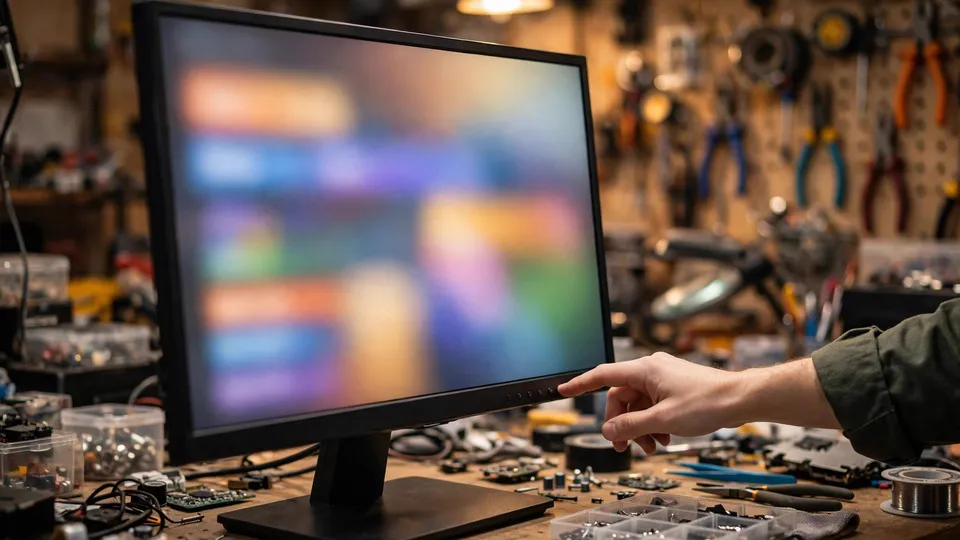
Key Takeaways
A monitor menu that appears without anyone pressing a button is a monitor-side problem, because the menu is drawn by the monitor itself and never passes through the graphics card or the cable. Check for something pressing a button first, then test each button's feel, unplug the signal cable, and try a full power reset.
What "Pops Up by Itself" Actually Means
Nobody has touched the monitor. The on-screen display menu appears on the picture, or appears and then appears again shortly afterwards, over and over. The picture itself is normal and the computer is running normally. Only the menu keeps appearing without being called up, and it covers part of the screen while it is there.
Two presentations have to be recorded separately, because they point in slightly different directions even when the cause is the same. The first is the menu appearing on its own, with nobody pressing anything. The second is the menu appearing and then not going away. A menu that stays on screen can be the same fault in a different form: a button that keeps sending signals resets the menu's automatic time-out countdown again and again, so the menu never gets the quiet period it needs to disappear. Both presentations can appear together, and both can come from the same cause, but the diagnosis is cleaner when each is written down on its own: how often the menu appears, whether it disappears by itself or stays on the screen, and which menu screen appears — the main menu, brightness, volume, or an input source message.
The timing also matters. Note when the problem started, and whether anything changed just before it — the monitor was moved, cleaned, or a new piece of equipment was added nearby. A menu that started appearing right after the monitor was moved points in a different direction from one that started gradually, with no change at all around it. Vague impressions are not enough here. Writing the pattern down — how often, how long it stays, which screen, which button if any still responds — turns a confusing symptom into something that can be tested step by step.
How the On-Screen Menu Is Drawn
The on-screen display menu is produced inside the monitor by its own scaler processor. It never passes through the graphics card, the cable, or the computer. The graphics card sends the computer picture, and the scaler combines that picture with the monitor's own menu and sends the result to the panel. The computer picture and the menu travel on two separate paths, and only the scaler controls the menu.
That separation is the single most useful fact in this whole subject. Because the menu is drawn by the monitor itself, a menu that appears on its own is a monitor-side problem. Changing the cable, changing the computer, or reinstalling a graphics driver cannot stop it, because none of those things is involved in drawing the menu at all. The diagnosis therefore stays inside the monitor from the start, and the checks below are designed to narrow down where inside the monitor the false signal is coming from.
The button signal path has several links. A physical button — a mechanical button, a touch button, or a joystick — sends a signal to the button board. The button board sends it along a ribbon cable to the main board's control circuit, and the control circuit tells the scaler to draw the menu. Pressing a button once sends one signal along that path. If any link in the path sends a signal when nobody has pressed anything, the menu appears by itself. The whole diagnostic task is to find which link is sending the false signal, and the checks are ordered so that the easiest links are ruled out first.
The OSD Time-Out Setting Does Not Cause This
The on-screen display time-out setting controls how long the menu stays on screen after the last input before it disappears by itself. That setting only decides how long the menu remains visible. It cannot make the menu appear, and changing it cannot stop the menu from appearing.
Turning the time-out longer makes the menu stay on screen for longer. Turning it shorter makes the menu disappear sooner. Neither change touches the reason the menu appeared in the first place. A shorter time-out can make the symptom less annoying, because the menu vanishes faster each time, but the cause is still there and the menu will still keep coming back. During diagnosis, the time-out setting has to be kept out of the list of causes. It is a display preference, not a trigger.
The Input Source Message Is Not the Main Menu
Automatic input source detection is a separate mechanism that can also put a message on the screen. When a monitor detects that the input signal has changed, disappeared, or that a new signal has been connected, it shows an input source message. That message is a signal status notice, not the on-screen display main menu. The two have to be looked at separately: the message reports a change in the signal, while the menu reports that a button was pressed.
The distinction matters because the two follow different things. An input source message follows the signal. The main menu follows the buttons. If the screen shows a message about the input every time the signal changes, that is the detection mechanism doing its job. If the main menu appears with nobody touching anything, that is a button or control-circuit problem. Confusing the two sends the diagnosis down the wrong path, so the first record to make is which one is actually appearing — the main menu, a brightness or volume screen, or an input source message.
Four Routes to a Menu That Appears by Itself
The causes fall into four routes. They are listed here from the easiest to check to the hardest, and the diagnosis in the next section follows the same order.
| Route | What is happening | Typical pattern | First check |
|---|---|---|---|
| Something pressing a button | An object touching a button holds it in a half-pressed state | Starts after the monitor was moved, cleaned, or new equipment was added nearby | Look around all four sides of the monitor, especially the bottom and sides |
| Worn button, partial short, or moisture | A mechanical button's contacts are worn, oxidised, dirty, or damp, and conduct on their own from time to time | Comes and goes; the menu appears at irregular intervals, sometimes often, sometimes rarely | Press each button in turn and compare the feel |
| Button board, ribbon cable, or control circuit | The button board wiring, the ribbon cable connector between the button board and the main board, or the control circuit itself is faulty | The whole button board misbehaves at once, or the menu jumps around and switches options without control | Unplug the signal cable and see whether the menu still appears |
| Firmware loop or settings layer | The control circuit is temporarily stuck, or a setting such as key repeat or automatic detection is in an abnormal state | Intermittent; a full power reset may stop it for a while, then it comes back | Full power reset, then watch whether the problem returns |
The first route is an object pressing or catching a button. A speaker, a cable, a desk lamp clamp, a monitor light bar clamp, a book, or any clutter touching a button on the casing can hold the button in a half-pressed state. This route is the easiest to check and also the easiest to miss, because the object pressing the button may be on the side or the bottom of the casing, not in a position visible from the front. A monitor that was moved, cleaned, or had new equipment added just before the problem started fits this route's typical timeline.
The second route is the button itself wearing out, partially shorting, or being affected by moisture. A mechanical button that has been used for a long time can develop worn, oxidised, or dirty contacts, or contacts affected by damp, and can conduct on its own from time to time, sending a false signal. In this half-shorted state the fault comes and goes, and the menu appears at irregular intervals — sometimes often, sometimes rarely. A touch button behaves differently: dirt or moisture on its surface can cause a false touch, so the check for a touch button starts with the surface, while the check for a mechanical button starts with the feel and travel of the button.
The third route is the button board, the ribbon cable, or the control circuit. Faults in the button board wiring, in the ribbon cable connector between the button board and the main board, or in the control circuit itself can all produce signals that nobody sent. The difference between this route and the second is scope. The second route usually involves one particular button. The third route can involve the whole button board misbehaving at once, or the menu jumping around the screen and switching options without any control.
The fourth route is a firmware loop or a settings layer. The monitor's control circuit can become temporarily stuck, triggering the menu again and again, or a setting can be in an abnormal state. The characteristic pattern here is intermittent: a full power reset may stop the problem for a while, and then it comes back. A recovery after a power cut points towards the firmware layer, but a recovery is not the same as a repair. If the problem returns, the underlying cause is still there.
Diagnosis, Step by Step
Step 0: Write Down the Pattern
Before anything is moved or changed, write down the pattern: how often the menu appears, how long it stays each time, which menu screen appears, whether pressing a button gets any response, when the problem started, and whether the monitor was recently moved, had equipment added, or was cleaned. Write it down rather than relying on a vague impression. The record is what makes the later steps meaningful, because each step is a comparison against this starting pattern.
Step 1: Look for Something Pressing a Button
Check all around the casing for anything touching a button, paying particular attention to buttons on the bottom and the sides of the monitor. Move any suspicious object away and watch whether the menu still appears. If the menu stops, the cause was the object. If it continues, the cause is inside the monitor and the next steps apply.
Step 2: Press Each Button and Compare the Feel
Press each button once, in turn, and record which ones have a clear travel, which feel soft and flat, which feel stuck, and which stay pressed down instead of springing back. A button with abnormal feel is the suspect for the second route. A touch button has no travel, so its check starts with the surface — look for dirt or moisture on the touch area and clean the surface gently, without opening anything.
Step 3: Unplug the Signal Cable
Unplug the signal cable from the monitor and leave only the power cable connected, then watch whether the menu still appears. If the menu still appears with the signal cable unplugged, the problem is in the monitor itself and has nothing to do with the computer, the cable, or the signal. If the menu stops appearing once the cable is unplugged, the problem follows the signal or the input detection, and the diagnosis moves back to the signal layer. This single comparison separates the monitor from everything outside it, and it is the most decisive step in the whole guide.
Step 4: Switch to a Different Input
Switch to another input and watch whether the menu's appearance changes. If the problem follows the input, it points towards the signal or handshake layer. If it does not follow the input, it points towards the button or control-circuit layer. This step is only meaningful after Step 3, because Step 3 has already established whether the signal is involved at all.
Step 5: Full Power Reset
Switch the monitor off, unplug the power cable from the wall, wait a while for any residual charge inside the monitor to dissipate, then plug it back in and switch it on. If the problem recovers, it points towards the firmware layer, and the recovery is temporary. If nothing changes, it points towards the button or button-board layer. A power reset is a diagnostic comparison, not a repair. It shows which layer is involved; it does not fix a worn button or a faulty board.
Step 6: Restore Factory Settings — Only If the Menu Can Be Reached
Restoring factory settings can only be done when the menu can actually be entered. If the menu is so out of control that the settings cannot be reached, this step cannot be used at all. If the menu still appears after factory settings have been restored, the button hardware layer is the strongest suspect, because a settings reset only resets the settings layer and cannot fix a worn button, a partial short, or a button-board fault.
Step 7: The Check-In Boundary
Several results together point to a check-in: external objects have been ruled out, a button feels abnormal, the menu still appears with the signal cable unplugged, a full power reset changes nothing, and the problem keeps coming back intermittently. Any one of these on its own is a clue; together they point firmly inside the monitor. Note the brand and model, which button is suspect, how often the menu appears, the result of the signal-cable test, and the result of the power reset. That record is what a check-in starts from.
Opening a monitor and replacing a board are check-in scope only. Parts of a monitor's power supply can retain a hazardous charge, so opening the casing is not a home task. Button-board replacement, ribbon cable reseating, and switch soldering all belong to the same check-in scope.
Boundary Cases
The input source changes by itself. A monitor switching inputs on its own belongs to the automatic input source detection layer, which is covered in a separate article on this site. When the input changes, the monitor shows an input source message, which is a signal status notice rather than the on-screen display main menu appearing by itself. The two are separated by what they follow: the message follows the signal, the menu follows the buttons.
The menu is locked and the buttons do not respond. That is the opposite direction of the symptom in this article, and it belongs to a different article on this site. There, the symptom is pressing buttons and getting no response; here, the symptom is getting a response with nobody pressing anything. The two share the button layer but follow completely different diagnostic paths, and the unlock combinations from that article do not apply here.
The power button needs several presses to switch on, or sometimes does not switch on at all. That belongs to the power-button range, covered in another article. The power button is part of the switch-on chain, while the menu buttons belong to the menu layer. The two are different buttons on different chains.
The monitor shows a "no signal" message. That is a separate subject. A "no signal" message means the monitor has power but is receiving no signal, and the message itself is evidence of that state rather than a fault. The menu appearing by itself and a "no signal" message are different symptoms with different meanings.
The backlight is on but there is no picture at all. In that situation the menu test is a diagnostic tool, covered in another article. If the menu can be drawn, the monitor's own picture-drawing path is working; if it cannot, the fault points at the monitor's internal picture path. There, the menu is the test. Here, the menu is the fault itself.
A laptop's built-in screen. A laptop's built-in screen does not have the same set of physical buttons as an external monitor, so the button layer in this article does not apply to it. The diagnosis here is written for an external monitor.
Warranty stickers and opening the monitor. Questions about warranty stickers, seal condition, and what happens when a monitor is opened are covered in a separate article on this site. The short version is that opening the monitor is check-in scope, and the seal question has to be settled before any cover is removed.
Common Misconceptions
- "The menu appearing by itself means the graphics card or the driver is broken." Wrong. The on-screen display menu is drawn by the monitor itself and never passes through the graphics card, so a graphics card or driver fault cannot make the menu appear.
- "Changing the cable or reinstalling the driver will fix it." Wrong. The button signal lives inside the monitor. Nothing done on the computer side can affect it.
- "Pressing harder, or pressing several times, will press it back to normal." Wrong. Pressing harder only speeds up button wear. A partially shorted button does not recover because it was pressed firmly.
- "It went away after a power cut, so it is fixed." Wrong. A power reset is only a diagnostic comparison. A firmware stall clearing after a power cut does not mean the underlying cause has gone, and a problem that keeps coming back needs a check-in.
- "Restoring factory settings fixes everything." Wrong. Restoring factory settings only resets the settings layer. Button wear, a partial short, and a button-board fault do not disappear because the settings were reset, and if the menu is so out of control that the settings cannot be reached, the reset cannot even be attempted.
- "Turning the on-screen display time-out shorter will fix it." Wrong. The time-out only decides how long the menu stays on screen. It does not stop the menu from appearing; it only makes the menu disappear sooner each time, while the cause stays where it is.
- "A menu appearing must mean a button is broken." Wrong. An object pressing a button, a firmware loop, and input detection can all make a menu appear. Until the signal-cable test has been done, the menu appearing on its own is not enough to conclude that a button is broken.
- "I can open the monitor myself and clean the button board." Wrong. Parts of a monitor's power supply can retain a hazardous charge, and opening the casing belongs to check-in scope. Button-board replacement, ribbon cable reseating, and switch soldering are all check-in scope as well.
What to Note Down Before a Check-In
Bringing a clear record makes a check-in faster and more accurate. Note the brand and the exact model of the monitor, taken from the label on the back. Record which button feels abnormal, if any, and how the buttons compare with each other. Record how often the menu appears, how long it stays, and which menu screen appears. Record the result of the signal-cable test — whether the menu still appeared with the signal cable unplugged — the result of switching to a different input, and the result of the full power reset. Record when the problem started. Record whether the monitor was recently moved, cleaned, or had equipment added nearby, and whether anything is touching the buttons.
Inspection is charged under the site's published three-tier fee of HK$400–2,800, with the actual figure confirmed after inspection. The shop is at Room 1209, Dali Plaza, Shek Mun. The phone number is 2186 8010 and WhatsApp is 6558 6806. There is no shop in Mong Kok and no on-site service.
Frequently Asked Questions
Does a menu appearing on its own mean my graphics card or driver is faulty?
No. The on-screen display menu never passes through the graphics card, the cable, or the computer. Changing the cable or reinstalling a driver cannot affect it. A menu that appears by itself is a monitor-side problem, and the diagnosis stays inside the monitor.
My menu appears and then never goes away. Is that the same problem?
It can be the same cause in a different form. A button that keeps sending signals resets the menu's automatic time-out countdown again and again, so the menu never gets the quiet period it needs to disappear. Record both presentations separately — how often the menu appears, and whether it disappears by itself or stays on screen — because the two together describe the fault more clearly than either one alone.
Can changing the cable or reinstalling the driver fix it?
No. The button signal lives inside the monitor. Nothing done on the computer side can affect it. The signal-cable test proves the point: if the menu still appears with the signal cable unplugged, the problem is in the monitor itself and has nothing to do with the computer, the cable, or the signal.
I changed the OSD time-out to the shortest setting, but the menu still pops up. Why?
Because the time-out setting only controls how long the menu stays on screen after the last input. It cannot stop the menu from appearing. A shorter time-out makes each appearance disappear sooner, but the cause — the false button signal — is still there, and the menu will keep coming back.
How can I tell which button is the problem by pressing each one in turn?
Press each button once, in turn, and record which ones have a clear travel, which feel soft and flat, which feel stuck, and which stay pressed down instead of springing back. A button with abnormal feel is the suspect. A touch button has no travel, so check its surface for dirt or moisture first. Normal feel does not rule a button out: a partial short can happen with normal feel. If the whole button board misbehaves at once, or the menu jumps around and switches options without control, that points towards the button board, the ribbon cable, or the control circuit rather than one single button.
The menu still appears after I unplugged the signal cable. What does that mean?
It means the problem is in the monitor itself — the button, the button board, the control circuit, or the firmware layer — and has nothing to do with the computer, the cable, or the signal. If the menu stops once the cable is unplugged, the problem follows the signal or the input detection instead.
The menu went away after I unplugged the power cable, but it came back the next day. Is it fixed?
No. A power reset is only a diagnostic comparison, not a repair; a recovery after a reset only points towards the firmware layer for a while, as stated above. A problem that keeps coming back after a reset needs a check-in.
Can restoring factory settings fix a menu that pops up by itself?
It depends on the cause. Restoring factory settings only resets the settings layer, so a problem caused by an abnormal setting may disappear; but button wear, a partial short, and a button-board fault do not disappear because the settings were reset. If the menu still appears after factory settings have been restored, the button hardware layer is the strongest suspect. Also, if the menu is so out of control that the settings cannot be reached, the reset cannot even be attempted.
Can I open the monitor myself to clean the button board?
No. Parts of a monitor's power supply can retain a hazardous charge, so opening the casing belongs to check-in scope. Button-board replacement, ribbon cable reseating, and switch soldering are all check-in scope as well. The checks in this guide — looking for objects pressing a button, comparing button feel, unplugging the signal cable, and a full power reset — are the checks that can be done without opening anything.
When should I stop and send it in for a check-in?
When external objects have been ruled out, a button feels abnormal, the menu still appears with the signal cable unplugged, a full power reset changes nothing, or the problem keeps coming back intermittently. Note the brand and model, which button is suspect, how often the menu appears, the result of the signal-cable test, and the result of the power reset, and bring that record to a check-in.
My monitor's menu is locked and the buttons do nothing. Is that the same fault?
No, it is the opposite direction. A locked menu with buttons that do not respond is a different symptom, covered in a separate article on this site. This article is about getting a response with nobody pressing anything. The two share the button layer but follow completely different diagnostic paths, and the unlock combinations for a locked menu do not apply here.