Monitor Backlight Is On but There's No Picture at All? Backlight, Logic Board & Signal Diagnosis Guide
Key Takeaways
A glowing screen with no picture means the backlight works while the image path does not. The on-screen menu is the decisive test: if the menu appears, the fault sits upstream in the signal chain; if it never appears, the fault sits inside the monitor. Work through the comparisons in order, changing one thing at a time.
What Counts as "Backlight On, No Picture"
Start by pinning down exactly what is happening, because several different monitor faults get described with the same words, and each one points in a different direction.
The symptom covered here is narrow: the monitor's power light is on, and the whole screen is glowing with an even, grey-white light that is easy to see in a dim room. From the first second after switching on, there is no picture at all — no brand logo, no start-up screen, no desktop, no image of any kind. Pressing the monitor's own menu button brings up no menu either. Changing the input, changing the cable, or connecting a different computer makes no difference. The state stays the same; it is not a flicker that comes back, and it is not a picture that arrives after a wait.
Five boundaries need to be clear before going any further:
- The picture arrives, but only after a wait. If the screen lights up and the picture gradually appears over minutes, the backlight supply is warming up slowly. That is a different fault, and the steps below do not apply to it.
- The first press of the power button does nothing. If the monitor will not switch on at all and the backlight never lights, the start-up step itself is failing. Here the monitor has already switched on and the backlight is lit, so the problem is not in the start-up chain.
- The monitor switches itself off or restarts while in use. A monitor that comes on and then cannot stay on is failing in the opposite direction — staying on rather than producing a picture in the first place.
- The monitor displays "no signal" and then goes into power saving. A "no signal" message is itself a picture produced by the monitor, which proves the monitor can draw. Here even that message never appears.
- The picture goes black for a second or two and then comes back. An intermittent black screen is a signal interruption. Here the picture has never appeared at all.
If the symptom matches the narrow definition — even glow, no picture from the first second, no menu, no change with a different input or computer — the steps below apply.
The Backlight and the Picture Are Two Separate Systems
An LCD panel does not produce its own light. It relies on a backlight shining through the liquid crystal to make a picture visible. That single fact is the key to the whole symptom: the backlight and the picture are two independent systems inside the monitor, and they share only the power board.
The image path inside a monitor runs through four stages. First, the input port receives the signal sent by the graphics card. Second, the scaler processor handles the incoming signal, generates the monitor's own on-screen menu, and passes the picture on to the next stage. Third, the timing controller, often called the T-Con, distributes the picture signal to the row drivers and the column drivers, which carry it through flexible ribbon cables to every row and column of pixels. Fourth, the panel itself twists the liquid crystal according to the signal it receives, controlling how much backlight passes through, and that is what forms the picture.
The backlight supply runs on a separate path: a backlight driver circuit on the power board supplies a steady voltage that drives the backlight strips to glow. A glowing backlight proves only four things: mains power is reaching the monitor, the standby circuit has power, the main power supplies have been established, and the backlight driver circuit is working. It proves nothing about the scaler processor, the timing controller, the row and column drivers, or the panel itself. That is why "the screen is lit" and "the monitor is fine" are two different statements.
The possible causes fall into four families. These are families, not a ranking; which one applies has to be worked out by isolation testing.
- Scaler processor fault. The input signal cannot be processed, and the menu cannot be generated either. A menu that never appears is an important clue pointing at this family or at a later stage, because the menu is generated inside the monitor by the scaler processor itself, with no involvement from any cable or graphics card.
- Timing controller fault. The picture signal reaches the timing controller and stops there, never being distributed to the row and column drivers, so the whole panel receives no instruction about what to draw and the result is a screen with no picture at all. This is different from a single fixed line on the screen, which is what happens when one output channel of the timing controller fails; here the whole timing controller, or its power supply, is affected, and the whole picture is gone.
- Panel driver or panel power fault. The power rails feeding the row drivers and column drivers, or the bonding between the drivers and the panel, can fail at the level of the whole panel. This is different from a fault affecting half the screen, where one group of drivers fails and only that half is affected; here the whole panel receives no picture.
- Internal signal connection fault. The internal ribbon cable or connector between the scaler processor and the panel can work loose or make poor contact. This family needs care: a loose external cable causes a "no signal" state, but the monitor's own menu still appears; a loose internal cable takes the menu down with it.
OLED monitors need to be handled separately. Each OLED pixel produces its own light, so there is no backlight and no liquid-crystal timing controller and row-and-column driver structure. The isolation tests in this guide still apply to OLED — the menu test, the input comparison, and the monitor swap all test which stage of the chain the fault sits in, not which panel technology is used — but the internal cause names from the LCD families cannot be transferred directly to OLED.
Older CCFL backlights and modern LED backlights also need to be kept apart. Older CCFL designs drive their tubes with an inverter board, while modern LED backlights use a direct-current driver circuit. The observation "the backlight is on" applies to both, but the internal details differ: an inverter board fault only applies to an older CCFL monitor, because a modern LED backlight monitor has no inverter board.
The Menu Test: The Single Most Decisive Step
Press the monitor's own menu button and watch whether the monitor's built-in menu appears. This is the most decisive test in the whole diagnosis.
| Menu test result | What it points to | Next step |
|---|---|---|
| The menu appears clearly, but the computer picture stays absent | The scaler processor, timing controller, and panel image path are working; the fault sits upstream in the signal chain — cable, port, graphics card output, or handshake | Move to the input comparison and work the signal path |
| The menu never appears at all, while the screen keeps glowing | A fault in the monitor's internal image path — scaler processor, timing controller, panel drivers, or internal connection; the cable and the driver software are not suspects | Move to the input comparison to confirm the internal conclusion |
| The menu flashes briefly and disappears, or only half of it appears | The image path is in a borderline state; combine this with the secondary symptoms recorded later | Record the secondary symptoms and judge the pattern |
The value of the menu test is that it does not depend on the computer signal at all. The menu is generated inside the monitor, so it needs no graphics card, no cable, and no handshake. If the menu appears, the monitor's own picture-drawing path is working; if it never appears, changing cables and driver software will not help.
Two practical points matter when running this test. Some monitors show an internally generated message when the input source button is pressed, and that message counts as an internally generated picture too — if even the input-source message never appears, the conclusion is the same as a menu that never appears. Also, run the test in a dim room: the glowing screen can make a faint menu hard to see, so do not conclude after one attempt in bright light that the menu is absent.
A Step-by-Step Diagnosis
Work through the steps in order, and change one thing at a time. Changing two things at once destroys the evidence: if the symptom improves, there is no way to know which change mattered.
Step 0: Observe first, change nothing
Before touching a cable or a setting, note four things: whether the glow is even across the whole screen or brighter or darker in one area; whether the brand logo flashes briefly when the power button is pressed; whether pressing the menu button changes the brightness of the screen at all; and whether this state appeared suddenly or was preceded by other symptoms, such as occasional black screens or flickering. A brand logo that flashes once before the screen goes blank points at a different stage from a screen that has shown nothing from the very first second.
Step 1: The menu test
Run the menu test described above. The result splits the whole diagnosis into two branches — signal upstream, or internal image path — and every later step follows from which branch applies. Do not skip ahead to changing cables before this test is done, because the menu result decides whether cables are even suspects.
Step 2: Input comparison
Try a different input port, for example switching from DisplayPort to HDMI; then try a different cable; then connect a different computer. Change only one thing at a time.
- If the menu appeared, the fault is upstream in the signal chain. If a different input brings the picture back, the original input, cable, or handshake is the direction to pursue. If every input shows no picture while the menu still appears, the fault sits with the graphics card output or the system, and the diagnosis moves to the signal chain.
- If the menu never appeared, the fault is internal to the monitor. If changing the input, the cable, and the computer still leaves the same glowing screen with no picture and no menu, the internal conclusion is confirmed. The value of this comparison is that it rules out the unlikely explanation that every input failed at once.
Step 3: Full power-off reset comparison
Unplug the power cable from the wall, leave it unplugged long enough for the residual charge inside the monitor to drain away, then plug it back in and press the power button once. If the picture comes back on the first attempt after the disconnection, a protection latch or a failed start-up of the image path is a plausible explanation: the earlier start triggered a latch or failed to initialise, and repeated pressing without a full disconnection would never have cleared it. The value of this comparison is that it tests the latch directly — if behaviour differs before and after the disconnection, the latch is a genuine clue; if the screen is still glowing with no picture after the disconnection, the latch is not the main cause.
One thing must be stated plainly: a full power-off is a diagnostic comparison, not a repair. A picture that comes back after unplugging does not mean the monitor is fixed. The next time the same trigger occurs, the same failure can happen again.
Step 4: Swap the monitor
Using the same computer and the same cable, connect a different monitor and switch it on once. If the other monitor shows a picture immediately, the fault is pinned to the original monitor. If the other monitor behaves the same way, the fault is not in the monitor, and the diagnosis goes back to the graphics card, the cable, or the port. Change only one thing: do not swap the cable and the monitor at the same time, or the result will be unreadable.
Step 5: Record the secondary symptoms
Note any of the following and pass them on together when the monitor is sent for a check: whether the glow is even or brighter on one side; whether the glow flickers; whether the brand logo flashed briefly; whether a faint straight line, horizontal or vertical, is visible on the glowing screen — if there is one, the direction points toward a driver fault rather than a whole-screen loss of picture; whether the monitor restarts on its own; and whether there is any smell, unusual heat, or swelling or warping of the body. These symptoms are not for naming a faulty part at home; they are for letting the person carrying out the check start from a clear record instead of guessing from the beginning.
Step 6: When to stop testing
Stop testing immediately and do not keep switching the monitor on and off if any of the following appears:
- A burning smell or a chemical smell
- Unusual heat from the monitor body, especially one particular spot on the back that is noticeably hotter than the rest
- Swelling or warping of the power brick or the monitor body
- The monitor restarting over and over, coming on for a few seconds and then switching off again in a loop
- Any unusual sound coming from the monitor while the screen is glowing
These signs point toward a fault in the internal power board or panel circuitry, and continued testing with power applied can make the damage worse. The right move is to leave the monitor unplugged and send it for a check.
The Torch Test, Understood in Reverse
The torch test needs to be understood in reverse here, because it is easy to carry its conclusion across from a different fault and get it exactly wrong. In a monitor whose backlight is off, shining a torch at an angle across the screen can reveal a faint picture, which shows that the panel and the signal are working and the fault is in the backlight supply. This symptom is the opposite: the backlight is already on, and the screen is already glowing. If the image path were working, the picture would already be visible on the glowing screen, with no torch needed. Shining a torch at a glowing screen reveals no extra information, and seeing nothing extra under the torch is not evidence that the backlight is faulty — the backlight is plainly lit. Used as an exclusion only, the torch test can confirm once more that the image path is producing no output, but it says nothing about the backlight layer.
Cases That Look Similar but Are Not This Problem
Several nearby symptoms are easy to confuse with a glowing screen that shows no picture. Sorting them out early saves a lot of wasted effort:
- The monitor switches on but the picture brightens slowly. The button press succeeded and the main supplies were established; the slow part is the backlight supply. Different fault, different diagnosis.
- The monitor's power button needs several presses before it switches on. The start-up step itself is unreliable and the backlight never lights. Here the main supplies are already established and the backlight is lit.
- The monitor switches itself off or restarts while in use. The monitor started and then could not stay on. The direction is reversed.
- The monitor shows "no signal". That message proves the scaler processor, timing controller, and panel can all draw. Here even that message never appears.
- Half the screen is normal and half is wrong. A half-screen fault has a clear dividing line and points at one group of drivers. Here the whole screen has no picture and there is no dividing line.
- A single fixed line runs across the screen. One row or column driver channel has failed while the rest of the picture is normal. Here the whole picture is gone.
- The picture goes black for a second or two and comes back on its own. That is an intermittent signal interruption. Here the picture has never appeared.
- The start-up screen is visible but the screen goes black when the system loads. The start-up picture proves the monitor can draw, and the fault sits at the point where the driver loads. Here even the start-up picture is invisible.
- The start-up screen is invisible but the picture appears once the system has loaded. That is a firmware output and wake-up layer issue, and the picture is normal once the system is running. Here the picture never appears, even after the system has loaded.
- A laptop's built-in screen. The power path for a built-in laptop screen runs through the motherboard and a ribbon cable, not through an external monitor power board, and a built-in panel has no monitor menu to test with. An external monitor comparison has to be used instead.
- An automatic switch-off setting. Some monitors switch themselves off after a period of idleness. That is a setting, not a fault, and after switching off the screen is dark with the backlight off. Here the backlight is lit, which does not match an automatic switch-off.
Common Misconceptions
- "If the screen is glowing, the monitor cannot be broken." Wrong. The backlight and the picture are two independent systems, and the backlight glowing only proves the power reaches the backlight. The image path can fail on its own, and a glowing screen with no picture is exactly what that looks like.
- "Changing the cable will fix it." Wrong. The cable is only part of the signal path, and when the monitor's own menu cannot appear, changing the cable has no effect at all. Changing the cable is an isolation test; if nothing changes after the swap, the cable layer is ruled out, and that is useful information in itself.
- "Turning the brightness up will make the picture appear." Wrong. The brightness control only adjusts the backlight intensity. If the image path is dead, turning the brightness up only makes the picture-less glow brighter; it cannot create a picture.
- "Reinstalling the driver will fix it." Wrong. The driver lives inside the operating system, and it is not even loaded when the brand logo and the monitor menu are supposed to appear. If the logo and the menu cannot appear, the driver is not a suspect, and the menu test has to come before any driver work.
- "Shining a torch at the screen and seeing nothing means the backlight is broken." Wrong. That conclusion belongs to a monitor whose backlight is off. Here the backlight is plainly on, and the torch reveals no extra information.
- "The monitor responds — the light is on and the screen glows — so it must be the graphics card." Wrong. The power light and the backlight only prove the power layer. The image path has to be separated out with the menu test before the graphics card is blamed, and blaming the graphics card before that test is the most common misdiagnosis in this fault.
- "Pressing the power button a few more times will fix it." Wrong. Pressing the button only repeats the switch-on command, and an image path fault is not repaired by pressing the button again. A picture that returns once after a full power-off is a latch or initialisation observation, not a repair.
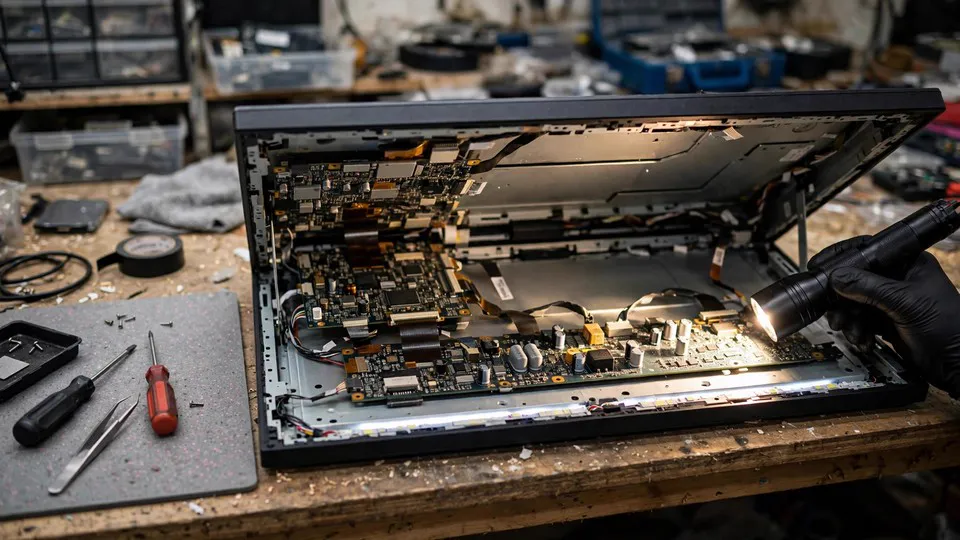
- "Opening the monitor to check the ribbon cable is a reasonable job." It is not. Monitors contain high-voltage parts, opening one carries a real risk, and internal connections and panel drivers belong in a workshop. Opening the monitor can also affect any later check.
- "Blowing hot air at the monitor will test it." Do not try this. Heating is a dangerous operation: high temperatures can damage components, and even if the picture returns after warming, that proves nothing about the cause and does not count as a repair.
What to Note Down Before a Check
Bringing a clear record makes a check faster and more accurate. Note the brand and model, and whether the backlight is LED or CCFL if the manual states it. Record whether the glow is even, the result of the menu test — whether the menu appeared, flickered, or never showed — and the results of the input comparison, the full power-off reset comparison, and the monitor swap. Add whether the brand logo flashed briefly, and any secondary symptoms such as a line, flickering, restarting, smell, heat, or swelling. Note whether the problem appeared suddenly or was preceded by other symptoms.
Inspection is charged under the site's published three-tier fee of HK$400–2,800, with the actual figure confirmed after inspection. The shop is at Room 1209, Dali Plaza, Shek Mun. The phone number is 2186 8010 and WhatsApp is 6558 6806. There is no shop in Mong Kok and no on-site service.
Frequently Asked Questions (FAQ)
The screen is glowing, so why is there no picture?
Because the backlight and the picture are two separate systems. The backlight glowing proves the power board is supplying the backlight; it says nothing about the scaler processor, the timing controller, or the panel drivers. A fault in any of those stops the picture while leaving the glow untouched.
The menu button does nothing. Does that mean the button is broken?
Not necessarily. The menu button is only the way of asking the monitor to draw its own menu. If the image path inside the monitor has failed, the menu cannot be drawn no matter how well the button works. A menu that never appears points at the internal image path, not at the button.
I changed the cable and nothing changed. Does that rule the cable out?
Yes, as far as this fault goes — provided only the cable was changed. If the menu never appears, the cable was never a suspect in the first place, because the menu is generated inside the monitor and does not travel through the cable at all. If the menu does appear and the picture is still missing, the cable is one of the upstream suspects, and a cable swap that changes nothing moves the suspicion toward the port, the graphics card output, or the handshake.
I shone a torch at the screen and saw nothing. Does that mean the backlight is broken?
No. Here the backlight is plainly on, so the torch reveals no extra information. The torch test belongs to a monitor whose backlight is off; here it only confirms once more that the image path is producing no output.
The picture came back once after I unplugged the monitor. Is it fixed?
Not necessarily. A full disconnection resets a protection latch and lets the image path initialise again from the beginning. The picture returning suggests that the latch or the initialisation may have been holding the picture off; it does not show that the underlying cause has gone away. If the same trigger occurs again, the same failure can happen again. Keep a note of how often it recurs.
Should I turn the brightness up to see whether a picture is hiding in the glow?
No. The brightness control adjusts the backlight only, and the picture is missing because the image path is producing no output. Turning the brightness up makes the glow brighter and nothing else. The menu test is the check that matters, and it should be run in a dim room so a faint menu is easier to see.
When should I stop switching the monitor on and off to test it?
Stop at once if you smell burning or a chemical smell, if the body is unusually hot, if the power brick or the body is swollen or warped, if the monitor keeps restarting, or if there is any unusual sound while the screen is glowing. Continued testing with power applied can make the damage worse, and these cases belong to a check.
My laptop screen has the same symptom — glowing but no picture. Do these steps apply?
Only in part. A laptop's built-in screen has no monitor menu to test with, and its power path runs through the motherboard rather than an external monitor power board. The external monitor comparison still works: connect the laptop to an external monitor, and if the external monitor shows a picture, the fault sits with the laptop's own screen path rather than with the graphics output.
The screen glows and there is a faint line across it. Is that still this problem?
A faint straight line on the glowing screen is a separate clue. It points toward a row or column driver fault rather than a whole-screen loss of picture, and it should be recorded and passed on with the rest of the symptoms when the monitor is sent for a check. The steps in this guide still help to separate the internal path from the signal chain, but the line itself belongs to a different driver family.