Left and Right Halves of One Monitor Show Different Colours? Split-Screen Mode, Signal and Panel Diagnosis Guide
Key Takeaway
One monitor can show two different colours on its left and right halves while both halves still show a picture, because a split-screen mode runs two signal pipelines with their own settings. Open the monitor's own menu first and check whether Picture-by-Picture, Picture-in-Picture, or Dual Colour is on: that one check separates a setting from a signal or panel fault.
The Shape of the Problem: Two Colours on One Screen
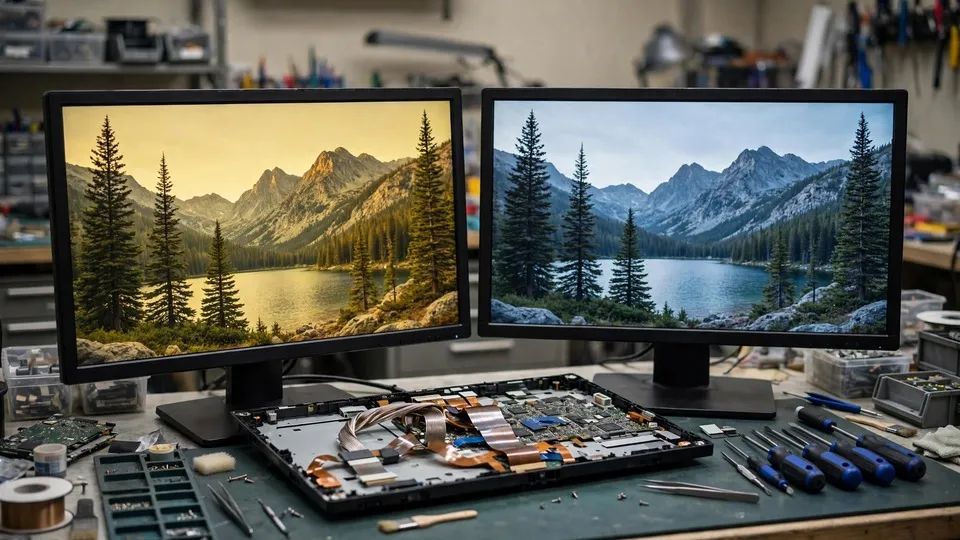
This piece covers one narrow pattern and nothing beyond it. Take one monitor: its left half and its right half show different colours. One side may look colder or warmer, darker or brighter, or more saturated than the other, while the other side looks normal. The dividing line usually sits in the middle of the picture, stands still, and does not move when the content changes. Both halves still show a picture. Nothing has gone black, nothing has gone blank, and the machine does not keep rebooting. Only the colour differs, from one side to the other.
Three conditions pin this pattern down, and all three must hold. First, the difference sits inside one physical monitor, between its left half and its right half. Second, the dividing line is fixed — usually at the middle of the picture — and it stays in the same place whatever is shown. Third, both halves still show a picture; the difference is colour alone, not a picture against a fault.
That boundary is worth drawing, because the usual trap with this pattern is to call it a broken graphics card and stop there. It is not done. A monitor that shows two colours on one screen can be doing so because a split-screen mode is running two separate signal pipelines, because the two sides are fed different signal formats, because the driver colours each side differently, because a cable or port is at fault, because the panel's backlight behaves differently on each side, or because two different source devices are feeding it. Each of those has to be tested on its own. What needs answering is not whether the monitor is at fault in some vague sense. It is which part of the chain is making the two halves differ — the split-screen mode, the signal format, the driver colour settings, the cable, the panel, or the source devices. The monitor's own menu check is the move that splits the first answer off from the rest.
A monitor with one half normal and the other half faulty sits outside this piece altogether. A half that shows corruption, a black screen, or no picture at all is a different kind of trouble, with a different set of causes. So does a whole screen that has shifted colour all over, and so does a colour difference between two separate monitors. This guide follows the opposite picture: one monitor, two halves, both showing a picture, only the colour different between them. The checks below set two settled states side by side — the split-screen mode on against it off, a screenshot against what the eye sees, the monitor's own menu against the input picture — because a fault tied to one side of a line is found by moving one factor alone and watching whether the line moves.
One more boundary belongs at the front, ahead of any check running. Choosing a colour profile for a whole screen is not covered here. A single move is taken from that topic — setting both halves to the same preset as a test — and nothing more. Backlight glow that follows bright content around a dark picture is not covered here either. A single move is taken — noting whether the difference follows the content or stays fixed at the middle — and nothing more. A whole screen that changes colour after leaving a game is not covered here either. A single move is taken — noting whether the change follows a game — and nothing more. The piece keeps to its own pattern by taking a single move from each nearby topic and going no further into those topics.
Why One Monitor Can Show Two Colours at Once
A monitor in split-screen mode is two picture pipelines in one box. Picture-by-Picture, usually shortened to PBP, splits the picture down the middle and shows two signal sources side by side. Picture-in-Picture, usually shortened to PIP, shows a second signal source as a small window inside the main picture. Each source can have its own resolution, refresh rate, dynamic range, colour range, gamma behaviour, and high dynamic range state. Two pipelines with different settings will paint two different colours, and the dividing line between them will sit exactly where the pipelines meet — usually the middle of the screen. That is why the line is fixed and the content does not move it: the line is the boundary between two signal paths, not something in the picture itself.
Some monitors add a further option, usually called Dual Colour, which lets the two sides of a split-screen picture use different colour settings on purpose. The manufacturer's manual describes it as a feature: in PBP or PIP mode, the two sides can show two different colour settings. A reader who finds Dual Colour switched on has found a setting, not a fault, and the two halves will differ in colour because the monitor was told to paint them differently. That distinction — feature against fault — is the first thing the diagnosis must settle, and it is settled in the monitor's own menu, not in the computer.
One technical article, us.ktcplay.com, calls high dynamic range the largest trigger in this pattern; manufacturer manuals emphasise input source settings instead, and the sources do not agree on which cause comes up most often, so this guide ranks none of them first. When one side runs high dynamic range and the other runs standard dynamic range, the monitor applies different tone mapping to each side: the high dynamic range side can look more vivid, while desktop whites can turn grey or overbright; the standard dynamic range side looks more restrained. If the monitor cannot apply image settings independently to each input window, one side becomes a compromise, and the two halves will not match. The two sides can also differ in signal format: one side full-range RGB and the other limited-range RGB, one side YCbCr and the other RGB, one side through DisplayPort and the other through HDMI or USB-C. A laptop through USB-C can send limited-range RGB or a different high dynamic range state, while a desktop through DisplayPort sends full-range standard dynamic range. Different formats mean the colour is read differently on each side, and the two halves will not match even though both pictures arrive intact.
The driver can change the colour before the signal ever reaches the monitor. A graphics driver can apply its own colour settings — a colour profile, a digital vibrance setting, a colour range setting — to the signal on its way out, and two signal sources travelling through different driver paths can carry different settings. That is why the two halves can differ even when the monitor's own settings look identical: the difference was made before the signal arrived.
Two further mechanisms sit underneath, and they must be kept separate from the split-screen and signal layers. A monitor with zoned backlighting adjusts its brightness by zone, and if the two halves sit in different backlight zones, their brightness can differ. A panel's own uniformity can also leave a slight difference between its halves. Neither of those moves with the content the way glow does, and neither sits exactly at the middle of the screen the way a split-screen boundary does — which is why the position of the line is evidence, not decoration.
Five Comparisons That Narrow the Field Down
Five comparisons do the diagnosing here, and each one has two possible outcomes. They run in order: each outcome cuts down what comes next, and the opening comparison — the monitor's own menu check — counts for more than any other check here. It does not depend on how large any single reading is. It depends only on what shifts when a single variable shifts, on one monitor, with one picture.
The opening comparison is the split-screen mode check, and it is the central check of this piece. Open the monitor's own on-screen menu and look for the split-screen options — Multi-Picture, Picture-by-Picture, Picture-in-Picture, or Dual Colour. If any of them is switched on, the fault sits in the split-screen mode layer: two pipelines with their own settings are painting the two halves, and the diagnosis stays there. If none of them is switched on, the fault sits in the single-signal layer, and the work moves to the screenshot and menu comparisons. What makes this test strong is that it is checked before any cable is touched and before any driver setting is changed. A mode that is on explains the whole shape at once, and no other test can say that.
The second comparison is the screenshot test. Take a screenshot immediately, and look at it on the same monitor — or better, on another screen. If the screenshot itself shows the left-right colour split, the fault sits in the rendering and driver layer: the split was drawn before the picture ever left the computer. If the screenshot is clean and only the eye sees the split on the monitor, the fault sits in the display chain: the signal, the cable, or the monitor. A clean screenshot does not mean nothing is wrong. It means the rendering layer is clear, and the display chain still has to be tested.
The third comparison is the monitor's own menu test. Open the monitor's own on-screen menu — its brightness, input, or settings menu — and look at the menu itself. If the menu also shows the left-right colour split, the fault sits in the panel layer: the monitor's own picture is split, so the panel or its backlight is involved. If the menu looks normal in colour and only the input picture is split, the fault sits in the signal layer: the monitor can paint evenly, and the difference arrives with the signal. The menu is the monitor's own picture, drawn without any input at all, and that is what makes it a clean test.
The fourth comparison is the single-signal test. Switch the split-screen mode off and connect only one input source, so the monitor shows one picture across the whole screen. If the colour split disappears, the split-screen mode layer is confirmed: the two pipelines were the cause. If the split is still there with a single signal, the split-screen mode is not the cause, and the work moves to the cable and panel route. This test must run with one source only, because two sources connected at once can keep the two pipelines alive even with the mode apparently off.
The fifth comparison restores the two sides to the same settings, one setting at a time. Both sides are set to the same standard dynamic range preset, the same brightness, and the same high dynamic range switch, and the picture is checked after each change. Whichever setting, when changed, makes the two halves match is the clue. If no setting makes them match, the difference sits deeper — in the cable, the panel, or the source devices — and the work moves to the stop line. Each setting is restored one at a time, because changing several at once leaves no way to tell which one mattered.
| Comparison | What is compared | Result pointing at the split-screen and signal layers | Result pointing elsewhere |
|---|---|---|---|
| Split-screen mode check | Monitor's own menu: Multi-Picture, PBP, PIP, Dual Colour on or off | A mode switched on; split-screen mode layer | No mode on; single-signal layer |
| Screenshot against the eye | Screenshot of the split picture | Split visible in the screenshot; rendering and driver layer | Screenshot clean, eye sees the split; display chain layer |
| Monitor's own menu against the input picture | On-screen menu colours against the input picture | Menu also split; panel layer | Menu normal, input picture split; signal layer |
| Single signal against split screen | Split-screen mode off, one input source only | Split disappears; split-screen mode layer | Split still there; not the split-screen mode |
| Restoring both sides to the same settings | Same preset, brightness, and high dynamic range switch on both sides, one at a time | One setting makes the halves match; that setting is the clue | No setting makes them match; cable, panel, or source layer |
The Six Suspicion Layers
Every case of one monitor showing two different colours on its left and right halves belongs under one of the six layers set out in this section. Those layers show up in the order the evidence tends to suggest first, but that order settles nothing on its own: naming a layer takes a test behind it, backing it or clearing it. No source agrees with another about which layer appears most often, so this guide ranks none of them first. Each layer carries its own pointing evidence, and the evidence decides.
| Layer | What it means | Evidence that points at it |
|---|---|---|
| First layer: split-screen mode layer | Picture-by-Picture, Picture-in-Picture, or Dual Colour is switched on; two pipelines with their own settings | A mode is on in the monitor's menu; the split disappears with a single signal |
| Second layer: signal format layer | High dynamic range against standard dynamic range, full-range against limited-range RGB, or YCbCr against RGB differ between the two sides | One setting restored to match makes the halves agree; one side runs high dynamic range, the other does not |
| Third layer: driver colour settings layer | A colour profile, digital vibrance, or driver colour setting differs between the two signal paths | The screenshot shows the split; changing a driver colour setting moves the split |
| Fourth layer: cable and port layer | A cable, port, or adapter leaves one side's signal incomplete | The split follows the cable or port when it is swapped |
| Fifth layer: panel and backlight layer | Zoned backlighting, panel uniformity, or glow leaves the two halves different | The monitor's own menu is also split; the split stays with a single signal and matched settings |
| Sixth layer: signal source layer | Two source devices — a desktop, a laptop, a games console — each send a different format | Each source on its own looks normal; together on one screen they differ |
The first layer is the split-screen mode layer, and the opening check exists to find it. Picture-by-Picture, Picture-in-Picture, or Dual Colour is switched on, and two pipelines with their own settings paint the two halves. The evidence is the monitor's own menu: a mode switched on, and a split that disappears when the mode is off and only one source is connected. The follow-up is to switch the mode off, or to set both sides to the same settings, and to note the result. A mode that is on is a setting, not a fault, and calling it a fault sends the reader off to replace hardware that was never at fault.
The second layer is the signal format layer: high dynamic range against standard dynamic range, full-range against limited-range RGB, or YCbCr against RGB differ between the two sides. The evidence is narrow and specific: one setting restored to match makes the two halves agree, or one side runs high dynamic range while the other does not. High dynamic range against standard dynamic range is one mismatch the sources highlight — the two sides then receive different tone mapping — and this guide ranks no cause first, because the sources do not agree on which comes up most often. This layer sits beside the guide on high dynamic range for a whole screen, which treats high dynamic range in full; this piece uses only the half-screen mismatch, and does not redo that guide. The follow-up is to restore both sides to the same setting, one at a time, and to write down which setting made the halves match.
The third layer is the driver colour settings layer: a colour profile, digital vibrance, or driver colour setting differs between the two signal paths, and the driver changes the colour before the signal reaches the monitor. The evidence is the screenshot test: the split is visible in the screenshot, which means it was drawn before the picture left the computer. The follow-up is to check the driver colour settings for each path and to restore them one at a time. A screenshot that shows the split points at the computer, not at the monitor, and that direction matters more than any single setting.
The fourth layer is the cable and port layer: a cable, port, or adapter leaves one side's signal incomplete. The evidence is that the split follows the cable or port when it is swapped: move the cable to the other side, or swap in a different cable, and watch whether the split moves with it. This layer sits beside the guide on signal chains, which treats cable and port diagnosis in full; this piece uses only the swap-and-watch test, and does not redo that guide. The follow-up is to swap one thing at a time — cable first, then port, then adapter — because swapping several at once leaves no way to tell which one mattered.
The fifth layer is the panel and backlight layer: zoned backlighting, panel uniformity, or glow leaves the two halves different. The evidence is the monitor's own menu test: the menu itself is also split, which means the monitor's own picture is uneven, or the split stays with a single signal and matched settings. This layer sits beside the guide on zoned backlight glow, which treats glow in full; this piece uses only the concept that backlight zones can differ, and does not redo that guide. The follow-up is to note whether the split follows the content or stays fixed at the middle: glow follows bright content around a dark picture, while a split-screen boundary stays fixed whatever is shown.
The sixth layer is the signal source layer: two source devices — a desktop, a laptop, a games console — each send a different format. The evidence is that each source on its own looks normal, and together on one screen they differ. A laptop through USB-C can send limited-range RGB or a different high dynamic range state, while a desktop through DisplayPort sends full-range standard dynamic range, and the two will not match on one screen. The follow-up is to test each source alone on the same monitor, and to set both sources to the same format before comparing them. Two sources that differ are not two faults. They are two settings that were never matched.
The Seven Diagnostic Steps
Work through the seven checks one by one, in the order printed. Each check returns a result that decides which check follows. Jumping straight to swapping the graphics card, or to replacing the monitor, ahead of the opening three checks usually wastes the whole attempt: no defined shape, no split-screen mode check, and no screenshot comparison in hand means a later change proves nothing at all, even if the colours move.
| Check | What to do | How to read the result |
|---|---|---|
| Check 1 | Define the shape: note where the dividing line sits, and how the two halves differ — colder, warmer, darker, brighter, or different saturation | A line fixed at the middle with both halves showing a picture means this guide; a line that moves with content means another guide |
| Check 2 | Run the split-screen mode check, the deciding one: open the monitor's own menu and look for Multi-Picture, PBP, PIP, or Dual Colour | A mode switched on means the split-screen mode layer — stop at this check; no mode means move on |
| Check 3 | Run the screenshot comparison: take a screenshot and look at whether the split is in it | Split in the screenshot means the rendering and driver layer; a clean screenshot means the display chain |
| Check 4 | Run the monitor's own menu comparison: open the monitor's own menu and look at whether it is also split | Menu also split means the panel layer; menu normal means the signal layer |
| Check 5 | Run the single-signal comparison: switch the split-screen mode off, connect only one input source, and look again | Split disappears means the split-screen mode layer; split still there means it is not the mode |
| Check 6 | Run the cable and port comparison: swap the cable, then the port, then the adapter, one at a time, and watch whether the split follows | Split follows the swap means the cable and port layer; split stays put rules it out |
| Check 7 | Stop line: restore both sides to the same settings one at a time — same preset, same brightness, same high dynamic range switch; still split, with picture corruption, flicker, or a black screen alongside | Carry the records — the line position, the screenshot result, the menu result, the single-signal result, and the checks run so far — to bring along to the inspection; do not swap the card or the monitor at random |
The first check prepares the ground for every check that follows, and it runs ahead of any test. Fix the picture: one monitor, one picture, one plain test image if one is available — a plain white picture shows a colour difference most clearly. Put the shape down in full: where the dividing line sits, whether it stands at the middle, and how the two halves differ — colder, warmer, darker, brighter, or different in saturation. Do not compare a bright scene with a dark scene: the loads differ, so any test between them proves nothing. If the line moves when the content changes, say so plainly: a line that follows content is a different shape, and this guide is the wrong one. Every check after this one is read against the shape defined here. Without it, a later observation cannot be read as a shift or as no shift — there is nothing to set it beside.
The second check is the split-screen mode check — the one this guide turns on. Open the monitor's own on-screen menu and look for the split-screen options: Multi-Picture, Picture-by-Picture, Picture-in-Picture, or Dual Colour. The exact menu names differ by manufacturer and model, so the monitor's manual and the actual menu names are the authority, and no single manufacturer's menu path is written here as the only one. If a mode is switched on, the split-screen mode layer is confirmed, and the work stops at this check apart from the single-signal comparison that proves it. If no mode is switched on, the work moves to the screenshot and menu comparisons. Switching the mode off in this way is a test. It is not advice to never use split-screen mode again. The mode exists because people use it, and a test that switches it off proves only that the difference follows the mode.
The third check is the screenshot comparison. Take a screenshot immediately, and look at whether the split is in it. Split visible in the screenshot means the rendering and driver layer: the split was drawn before the picture left the computer. Screenshot clean, with only the eye seeing the split on the monitor, means the display chain layer: the signal, the cable, or the monitor. This check is the one readers most often misread, because a clean screenshot feels like good news. It is not good news. It only clears the rendering layer, and the display chain still has to be tested.
The fourth check is the monitor's own menu comparison. Open the monitor's own on-screen menu — its brightness, input, or settings menu — and look at the menu itself. Menu also split in colour means the panel layer: the monitor's own picture is uneven, so the panel or its backlight is involved. Menu normal in colour, with only the input picture split, means the signal layer: the monitor can paint evenly, and the difference arrives with the signal. The menu is drawn without any input at all, and that is what makes it a clean test. Hold to changing nothing else while this check runs: a cable swapped at the same time leaves no way to tell which change mattered.
The fifth check is the single-signal comparison. Switch the split-screen mode off and connect only one input source, so the monitor shows one picture across the whole screen. Split disappears means the split-screen mode layer is confirmed. Split still there with a single signal means the split-screen mode is not the cause, and the work moves to the cable and panel route. This check sits deliberately after the screenshot and menu checks, because a single-signal result by itself cannot say whether the fault is in the signal or in the panel — it can only show whether the mode was the cause, once the screenshot and menu results are already in hand.
The sixth check is the cable and port comparison. Swap the cable first, then the port, then the adapter, one at a time, and watch whether the split follows the swap. Split follows the cable means the cable layer. Split follows the port means the port layer. Split stays put through every swap rules the cable and port layer out, and the hunt moves on. One caution belongs here: swapping a cable while the split-screen mode is still on proves nothing, because the two pipelines can keep the split alive whatever cable is used. The mode must be off before this check runs.
The seventh check is the stop line. Both sides are restored to the same settings, one at a time — the same standard dynamic range preset, the same brightness, the same high dynamic range switch — and the picture is checked after each change. Whichever setting, when changed, makes the two halves match is the clue, and it is written down. If no setting makes them match, and the split is still there with picture corruption, flicker, or a black screen alongside it, home testing has run out. At that point, stop testing, and bring the records in for inspection: the line position, the screenshot result, the menu result, the single-signal result, and the checks already completed. Do not keep swapping cables, ports, and adapters at random, and do not swap the graphics card or the monitor one after another. Trying hardware one after another at random piles up changes and no insight, and the cause stays unidentified.
Six Misleading Ideas to Set Aside
Misleading idea one: different colours on the two halves always means the graphics card is broken. This is wrong. A split-screen mode switched on is checked first, because the monitor's own menu check decides the layer in one move: open the monitor's own menu before touching the card. Two pipelines with different settings will paint two different colours, and no card fault is needed. The menu check comes first, and a card swap before it wastes the whole attempt.
Misleading idea two: a clean screenshot means nothing is wrong. This is wrong. A clean screenshot only proves the rendering layer is clear. The signal, the cable, and the monitor still have to be tested, because the split can be made after the picture leaves the computer. A clean screenshot is a result, not a verdict, and treating it as a verdict ends the work before the display chain has been tested at all.
Misleading idea three: one colour calibration fixes it. This is wrong. Two pipelines with different settings cannot be fixed by calibrating one side. Each side must be restored to the same settings — the same preset, the same brightness, the same high dynamic range switch — one at a time, and the picture checked after each change. Calibrating one side while the other keeps its own settings leaves the difference in place, and the reader concludes wrongly that calibration does not work.
Misleading idea four: swapping the cable always fixes it. This is wrong. In split-screen mode, swapping the cable does not change the two pipelines' settings, and the split follows the mode, not the cable. A cable swap is a test for the cable layer, and it only means something once the split-screen mode is off and only one source is connected. Swapping cables with the mode still on proves nothing, and a reader who keeps swapping cables will never reach the setting that actually matters.
Misleading idea five: one half looking yellow means night mode is on. This is wrong. Night mode changes the colour of the whole screen, not half of it. A half that looks yellow while the other half looks normal has a split-screen or signal shape, and its checks are about the mode, the signal format, and the driver settings. Lumping a half-screen difference under a whole-screen setting pushes the reader towards the wrong set of checks, because the test for night mode cannot say anything about one half of a screen.
Misleading idea six: zoned backlighting means the panel is broken. This is wrong. Zoned backlighting is a physical characteristic of the panel, not a fault, and it adjusts brightness by zone. A dividing line that stands fixed at the middle of the screen points at the split-screen mode first, not at the panel. The panel layer is named only when the monitor's own menu is also split, or when the split stays with a single signal and matched settings. Calling a characteristic a fault ends the work before the mode has been checked.
Results Table: What Each Outcome Means
The table below pulls the checks together in one place. Each row opens with something visible — a mode switched on, a screenshot, a menu, a cable swapped — and closes by naming the layer that outcome points to. It follows the seven checks, so the reader can cross-check the diagnosis without it standing in for the checks themselves.
| Outcome observed | Layer indicated | Next move |
|---|---|---|
| A split-screen mode is switched on in the monitor's menu | First layer: split-screen mode layer | Switch the mode off, or set both sides to the same settings |
| No split-screen mode is on | Single-signal layer | Run the screenshot and menu comparisons |
| Split visible in the screenshot | Third layer: driver colour settings layer | Check the driver colour settings for each path |
| Screenshot clean, eye sees the split | Display chain layer | Run the menu and single-signal comparisons |
| Monitor's own menu also split | Fifth layer: panel and backlight layer | Note the menu result; the panel is involved |
| Monitor's own menu normal, input picture split | Signal layer | Run the single-signal and cable comparisons |
| Split disappears with a single signal | First layer: split-screen mode layer | The two pipelines were the cause |
| Split still there with a single signal | Not the split-screen mode | Move to the cable and panel route |
| Split follows the cable or port when swapped | Fourth layer: cable and port layer | Note which swap moved the split |
| Split stays put through every cable and port swap | Cable and port ruled out | Move to the settings restoration |
| One setting restored to match makes the halves agree | Second layer: signal format layer | Note which setting made the halves match |
| No setting makes the halves match | Cable, panel, or source layer | Move to the stop line |
| Each source alone looks normal, together they differ | Sixth layer: signal source layer | Set both sources to the same format |
| Still split with matched settings, and corruption, flicker, or a black screen alongside | Outside this guide | Stop testing; bring the records in for inspection |
Those last two rows deserve a careful read, because they lay out what each test can and cannot prove. A split-screen mode switched on shows the difference follows the mode — but it does not show that the mode is the only cause, because the signal format layer and the driver layer can exist at the same time as the mode layer. The screenshot, menu, single-signal, and settings-restoration comparisons still need to run before the layers can be pulled apart, and this guide says that limit outright. A result of "no setting makes the halves match" proves nothing about any one setting: it proves that the difference sits deeper, and the follow-up is to carry the records in for inspection, not to blame one part.
Where the Sources Part Ways
The sources behind this guide split apart, and the places where they part need to be set out plainly rather than smoothed away. The first split is over which cause comes up most often. A technical article on split-screen colour accuracy puts high dynamic range state first: one side in high dynamic range and the other in standard dynamic range is the largest trigger. Manufacturer manuals put the input source settings first: each source carries its own resolution, refresh rate, and colour behaviour, and the two sides differ because the sources differ. The two are slicing through the same trouble in unlike ways, not rival orderings of a single list, and the sources never settle on one view. This guide ranks none of them first. Six layers follow, each with its own backing evidence, and none of them is ever picked out as the most frequent cause.
The second split is over whether Dual Colour is a feature or a fault. The manufacturer's manual describes Dual Colour as a feature: in Picture-by-Picture or Picture-in-Picture mode, the two sides can show two different colour settings by design. A reader who sees two different colours on one screen calls it a fault. Both descriptions are true of the same monitor, and the difference is only whether the setting was switched on on purpose. This piece treats a Dual Colour setting that is on as a setting, not a fault, and the menu check is what settles which one it is.
The third split is over whether a split-screen colour difference can be removed completely. A technical article on split-screen colour accuracy says that restoring the two sides to the same settings, one at a time, can narrow the difference, but the two pipelines are different by nature, and a complete match is not guaranteed. This piece follows that position: the guide can only promise that comparison narrows the difference, and it cannot promise that the two halves will always match exactly. A reader who expects a perfect match after one setting change will be disappointed, and the guide says that limit outright.
The fourth split concerns the size of the difference. No source consulted here gives a general measure for how large a split-screen colour difference is, and this piece gives none either. A plain white picture shown side by side is a qualitative test: it shows the two halves differ, and it does not measure by how much. A reader who wants a number for the difference will not find one here, because the sources do not agree on one, and inventing one would be worse than admitting the gap.
Outside This Guide: Patterns Other Guides Cover
The table below collects lookalike shapes that sit with other guides. Each row gives the shape and its guide, and why that guide is the right home for it. The table belongs with the diagnosis: if what the reader sees lines up with a row here better than with the shape in the opening section, another guide is the right one to move to.
| Pattern | The guide that covers it | Why it sits outside this piece |
|---|---|---|
| Colours differ between two separate monitors | #201, two-monitor colour matching | The premise here is one monitor with two halves, not two physical monitors |
| One half normal, the other half faulty — corruption, black screen, or no picture | #287, half-screen fault | The premise here is two halves both showing a picture, only the colour different |
| Whole screen shifted yellow or warm | #233, night mode and colour temperature | The premise here is a half-screen difference; night mode changes the whole screen |
| Whole screen missing one primary colour — red, green, or blue | #288, missing primary colour | The premise here is a half-screen colour difference, not a whole-screen loss |
| Whole screen washed out, colours pale | #250, full-range and limited-range mismatch | The premise here is a half-screen, per-side mismatch, not a whole-screen one |
| Glow around bright objects on a dark picture, following the content | #239, zoned backlight glow | The premise here is a line fixed at the middle, not glow that follows content |
| Whole screen washed out or shifted after switching high dynamic range on | #139, high dynamic range | The premise here is a half-screen high dynamic range against standard dynamic range mismatch |
| Colours change after leaving a game | #514, colour change after leaving a game | The premise here has no game trigger |
| Two monitors showing the same picture, mirrored | #269, mirrored display mode | The premise here is two pictures on one monitor, the opposite direction |
Two rows in that table repay a closer look, since readers confuse them with this shape more than any others. The first is the two-monitor colour-matching guide. Two separate monitors showing different colours is a calibration shape between two physical screens, and its checks are about matching two monitors. The shape here is one monitor with two halves, and its checks are about two pipelines inside one box. The two shapes share the words "different colours" and little else, and their checks go in different directions. After that comes the half-screen fault guide. A monitor with one half normal and the other half faulty — corruption, a black screen, or no picture — has a fault shape, and its checks are about the panel drive, the signal, and the backlight as faults. The shape here is two halves both showing a picture, only the colour different between them. Mixing the two up sends the reader off to replace a panel that was never faulty, because a setting was never checked.
When to Stop Testing
Stop when all seven checks are done and no layer is named. A monitor that has been fixed to one picture, checked in its own menu, weighed with a screenshot and a menu comparison, run through a single-signal comparison, a cable and port comparison, and a settings restoration — and still leaves no clear answer — has used up what home testing can offer. Going further from there is guesswork, and blaming parts that were never at fault muddies the picture further. Put the changed options back before stopping, so the machine and the monitor end up as they were.
Stop when the split is still there with matched settings, with picture corruption, flicker, or a black screen alongside it. Those signs belong to another family of guides, and more cable swapping from here risks turning the question into a hardware fault. Note the new sign, when it showed up, and which test was running then, and keep that note with the records. That note counts as evidence, and it says more than a list of changed cables ever could.
Stop too when one setting has been restored and nothing moved, and then a second setting is changed and nothing moves either. Two factors tried and an outcome that has not shifted already answers the question: neither factor governs the layer. A third, fourth, and fifth setting tried one after another gains nothing. A pile of changes is left behind to undo before an inspection can even start.
Hold on to the baseline notes once testing ends. The line position, the screenshot result, the menu result, the single-signal result, and the settings restoration, written out for the same picture on both sides of each test, count for more together than any one of them does alone. An inspection starts with those notes — that is why the shape is defined first, written down before any test runs.
What to Bring for Inspection
Bring the notes from the seven checks: the fixed picture and the shape defined in the first check; whether a split-screen mode was switched on; the screenshot result; the monitor's own menu result; the single-signal comparison result; the cable and port comparison result; and which setting, if any, made the two halves match.
Bring the monitor model and the source devices in use, and the cables and ports in use at the time, because the split-screen mode, the signal format, and the cable are evidence too, and so is the outcome of swapping them. Bring the card model, driver release, and processor model, since that set of three belongs in the evidence. Keep the options as they stand now, with every test option put back, and do not bring a list of the options changed during testing. What counts as evidence is the options as they stand plus the seven test outcomes. A past change counts only where it moved the colours, since that change points at the layer.
For inspection, HK GPU Fix is at Dali Plaza 1209, Shek Mun. The phone number is 2186 8010 and WhatsApp is 6558 6806. The published inspection fee range is HK$400 to HK$2,800, and no price is estimated before inspection. There is no Mong Kok shop and no on-site service.
Frequently Asked Questions
My monitor's left half and right half show different colours. Is the graphics card broken?
Not necessarily — and a split-screen mode switched on is checked first. Open the monitor's own menu and look for Multi-Picture, Picture-by-Picture, Picture-in-Picture, or Dual Colour. If any of them is on, two separate signal pipelines with their own settings are painting the two halves, and that is a setting, not a fault. Only when no mode is on, and the screenshot, menu, and single-signal comparisons point away from the mode, does the hunt move to the signal, the cable, and the panel. A card swap before the menu check wastes the whole attempt.
The screenshot looks normal. Does that mean nothing is wrong?
No. A clean screenshot only proves the rendering layer is clear — the split was not drawn before the picture left the computer. The signal, the cable, and the monitor still have to be tested, because the split can be made after the picture leaves the computer. Run the monitor's own menu comparison next: if the menu is also split, the panel layer is involved; if the menu looks normal and only the input picture is split, the signal layer is involved. A clean screenshot is a result, not a verdict.
How do I tell a split-screen setting apart from a panel fault?
Open the monitor's own menu. The menu is the monitor's own picture, drawn without any input at all. If the menu itself also shows the left-right colour split, the panel layer is involved, because the monitor's own picture is uneven. If the menu looks normal in colour and only the input picture is split, the monitor can paint evenly, and the difference arrives with the signal. Then run the single-signal comparison: switch the split-screen mode off, connect only one input source, and look again. A split that disappears was the mode. A split that stays was never the mode.
Can I fix it by calibrating the colours once?
No — not with one calibration. Two pipelines with different settings cannot be fixed by calibrating one side. Both sides must be restored to the same settings — the same standard dynamic range preset, the same brightness, the same high dynamic range switch — one at a time, with the picture checked after each change. Whichever setting, when changed, makes the two halves match is the clue. Note that restoring the settings can narrow the difference, and a complete match is not guaranteed, because the two pipelines are different by nature.
One half looks yellow. Is night mode on?
No — not as the cause of a half-screen difference. Night mode changes the colour of the whole screen, not half of it. A half that looks yellow while the other half looks normal has a split-screen or signal shape, and its checks are about the split-screen mode, the signal format, and the driver settings. If the whole screen looks yellow, that is a different shape, and it belongs to the guide on night mode and colour temperature.
Will swapping the cable fix it?
It can, but only as a test for the cable layer — and only once the split-screen mode is off and only one source is connected. Swap the cable first, then the port, then the adapter, one at a time, and watch whether the split follows the swap. In split-screen mode, swapping the cable does not change the two pipelines' settings, and the split follows the mode, not the cable. A cable swap with the mode still on proves nothing.
When should I stop home testing and arrange an inspection?
Stop when the split is still there with both sides restored to the same settings, with picture corruption, flicker, or a black screen alongside it. Bring the notes from the seven checks: the fixed picture and the shape defined in the first check, whether a split-screen mode was switched on, the screenshot and menu results, the single-signal and cable comparison results, and which setting, if any, made the two halves match — together with the monitor model, the source devices, the cables and ports in use, the card model, driver release, and processor model. Those notes, along with the options as they stand now, are the starting point for an inspection.
Sources
The sources below fed into this guide. Repair guides are used here to explain what the fault does and how to test for it, not as things to follow. Numbers from them are given as source claims wherever the text says so. No figure from any source is treated here as a finding of this site.
- us.ktcplay.com, "Split Screen / PIP Color Accuracy: Causes and Fixes" — https://us.ktcplay.com/blogs/technology-hub/split-screen-pip-color-accuracy-causes-fixes — in Picture-in-Picture and Picture-by-Picture split-screen modes, colour mismatch comes from mixed signal handling, high dynamic range state, colour profiles, presets, brightness behaviour, and panel zones; the test method is a side-by-side white picture, brightness matching, and a stable standard dynamic range preset; high dynamic range is the largest trigger, with one side in high dynamic range and the other in standard dynamic range receiving different tone mapping; the driver can change the colour output before the signal reaches the monitor.
- ViewSonic VP2776T-4K / VP2786-4K manual, "On-Screen Display Menu Options" — https://manuals.viewsonic.com/index.php?title=VP2776T-4K_On-Screen_Display_Menu_Options&diff=41794&oldid=41793 — the Multi-Picture options include Picture-by-Picture Left-Right, showing two windows side by side, and Picture-in-Picture, showing a main window with a small window; Dual Colour shows two different colour settings in Picture-in-Picture and Picture-by-Picture modes.
- EIZO, "Picture-by-Picture Monitor" guide — https://www.eizo.eu/monitor-knowledge/picture-by-picture-monitor — Picture-by-Picture can show two signal sources side by side on one monitor; the signal sources are set through the monitor's operating menu; different models offer different layout options.
- Samsung CJ791 34-inch 21:9 curved monitor manual, Picture-in-Picture and Picture-by-Picture — https://www.manualsdir.com/manuals/850063/samsung-cj791-34-219-curved-freesync-va-monitor.html?page=30 — the Picture-by-Picture function splits the picture in half and shows two different signal sources at the same time; switching Picture-by-Picture on or off, or changing the picture size, can make the picture flash briefly or appear with a delay; automatic best resolution and frequency do not apply in Picture-by-Picture mode.
- learn.microsoft.com, Questions and Answers, "How do I split one monitor into 2 displays" — https://learn.microsoft.com/en-my/answers/questions/5617746/how-do-i-split-one-monitor-into-2-displays — Windows itself does not split one physical monitor into two; Picture-by-Picture and Picture-in-Picture are monitor functions, and once switched on, Windows treats the monitor as two displays.
A monitor showing two different colours on its left and right halves is not a verdict against the monitor. Open the monitor's own menu first and check whether a split-screen mode is on, take a screenshot, look at the monitor's own menu, try a single signal, swap the cable, and restore both sides to the same settings one at a time. Those checks show whether the split-screen mode, the signal format, the driver colour settings, the cable, the panel, or the source devices are making the two halves differ — and they show it before any hardware is touched.