Laptop Screen Flickers When You Move the Lid? Hinge Flex Cable, Connector & Panel Diagnosis Guide
Key Takeaways
When a laptop's built-in screen flickers only at certain lid angles while an external monitor stays steady, the fault sits in the built-in display chain — the hinge flex cable, a connector, or the panel — not the graphics card or driver. This guide explains the copper fatigue behind angle-dependent flicker and the tests that separate the three suspects.
The Symptom This Guide Is About
This guide covers one specific failure: the built-in screen of a laptop flickers, flashes, or blacks out briefly, and whether it happens depends on the angle of the lid. At one angle the picture is steady; move the lid to another angle and it starts to flicker; move it back and it steadies again. Or the flicker appears only while the lid is being opened or closed, and stops once the lid is left still. The picture itself is otherwise normal — colours, brightness and resolution are as they should be whenever the screen is not flickering.
Three features define this symptom, and they should be established before anything is changed:
- It follows the angle. Whether the flicker appears has a stable relationship with the lid angle. The same angle produces it again and again; another angle makes it disappear again and again. That repeatability is the core evidence for this guide.
- It affects only the built-in screen. An external monitor connected to the same laptop shows a completely steady picture at the same time. The external monitor test in the section below is the decisive split for the whole guide.
- It is flicker, not a fixed line. The whole picture flashes, flickers across a region, or blacks out intermittently. It is not a single line in a fixed position that never moves.
Several neighbouring symptoms look similar but belong elsewhere, and each one changes the diagnosis completely:
- A single line in a fixed position, with the rest of the picture normal, is a panel row or column drive problem, not a flex cable problem.
- Flicker on a still image that stops as soon as the mouse is moved, with no connection to the lid angle, is a panel self-refresh problem.
- The whole screen going black for a second or two and then recovering on its own, with no connection to the lid angle, is a signal interruption problem.
- The whole desktop — taskbar, icons and File Explorer — flashing together repeatedly, with no connection to the lid angle, is a desktop composition or driver problem.
- Flicker that appears only at low brightness, and goes away when the brightness is turned up, is a pulse-width modulation dimming problem.
- Only one half of the screen behaving abnormally, with the division in the middle, is a panel drive, signal or backlight problem.
- A laptop that becomes unreliable after a drop or a knock, or that works when cold and fails when warm (or the other way round), is a graphics board solder or printed circuit board problem driven by temperature and impact, not by the lid angle.
The first job is therefore to confirm which symptom is actually present. Until the angle relationship and the external monitor result are both established, any conclusion about the cause is guesswork.
How the Built-in Screen Reaches the Motherboard
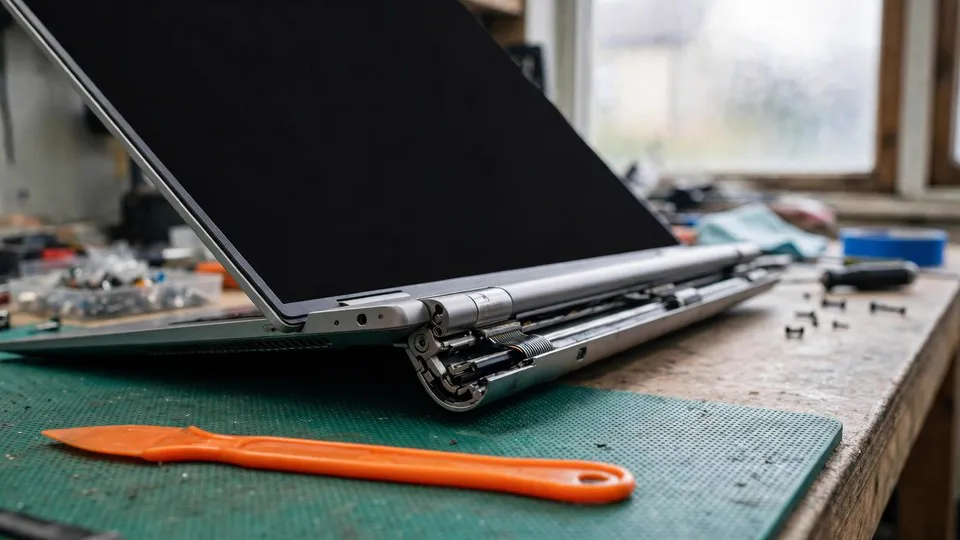
A laptop's built-in screen is connected to the motherboard by a single thin flat flexible cable. Older machines use a standard called LVDS; newer machines use eDP, short for Embedded DisplayPort. The cable leaves the motherboard, runs along the side of the base, passes through the hinge, and reaches a connector on the back of the screen assembly. It carries the image signal and the backlight power together, and in some machines it also carries the webcam signal.
The route matters because of what happens at the hinge. Every time the lid is opened or closed, the section of cable inside the hinge has to bend. It bends through the smallest radius in the whole run, and it is the place where the mechanical stress is most concentrated. Over thousands of open and close cycles, that section of cable is worked harder than any other part of the display chain.
Inside the flat cable are thin copper conductors, each one carrying part of the image signal or part of the power. The cable is designed to flex, but copper fatigues when it is bent back and forth repeatedly. The fatigue does not happen evenly along the cable; it concentrates exactly where the bending is tightest and most repeated, which is the hinge section.
Why a Fatigued Conductor Flickers at Some Angles and Not Others
When a copper conductor inside the flex cable fatigues, it develops a micro-fracture — a tiny crack across the conductor, not a clean break. The crack is the whole explanation for the angle-dependent symptom, and it is worth understanding in detail, because it explains both the pattern and what must not be done next.
A micro-fracture does not separate the conductor completely. At one lid angle, the geometry of the cable holds the two sides of the crack pressed together, so the electrical contact is maintained, the signal gets through, and the picture is normal. Move the lid to a different angle and the geometry changes: the cable bends a little differently, the two sides of the crack pull apart, the signal is interrupted for a moment, and the picture flickers or blacks out. Move the lid back and the two sides touch again, and the picture steadies.
That is why the symptom follows the angle rather than appearing at random. The angle determines whether the two sides of the crack are touching. The same angle reproduces the same geometry, so the same angle reproduces the same result — flicker at one angle, a steady picture at another. A fault that appeared at random, at every angle, would point somewhere else entirely.
The crack also explains why the problem gets worse over time. A micro-fracture is a degenerative fault. Each bend works the crack a little further open, and the conductor carries less and less of the signal until, eventually, the connection fails altogether and the screen goes black and stays black. Intermittent flicker at certain angles is the early warning of that progression, not a stable state that can be left alone.
Three Patterns, and Why They Must Not Be Mixed Together
Angle-dependent flicker is not one single pattern. Three distinct patterns have been confirmed across independent repair guidance, and each one points in a different direction. They must be kept separate, because treating them as the same fault leads to the wrong conclusion.
The angle pattern. This is the most typical. The flicker appears at a particular lid angle and disappears at another, and the same angle reproduces the same result every time. This pattern points at a fatigued conductor inside the hinge section of the flex cable, as described above. The angle is the evidence; the repeatability is what makes it evidence rather than coincidence.
The vibration pattern. In this pattern the screen is steady at every angle while the laptop sits still, but flickers when the machine is picked up, carried, or shaken. This points at a loose connector rather than a cracked conductor. The connector itself is not damaged, but the contact is not secure, so vibration breaks the connection briefly. The key difference is that the vibration pattern does not follow a fixed angle — it follows movement of the whole machine, not the position of the lid.
The warm-up pattern. This is the least common of the three. The screen is normal when the machine is cold, and the flicker only starts after the machine has been running for a while and warmed up, then goes away again when the machine cools down. This points at an oxidised panel connector, where thermal expansion changes the contact, or at a problem in the panel timing controller — not at the hinge flex cable. It is mentioned here only so that it is not mistaken for the angle pattern; it is not the subject of this guide.
Two further mechanical causes belong in the picture. First, the hinge itself. A hinge that has worn loose or become misaligned makes the flex cable bear uneven force every time the lid moves, which accelerates wear; in a severe case the hinge can pinch the cable directly. Whether a hinge is loose can be judged by feel, without opening the machine — whether it wobbles from side to side, and whether opening and closing feels smooth or gritty. Second, the connectors at the two ends of the cable, at the motherboard and at the panel. A connector can be undamaged yet not fully seated. The difference from a cracked conductor is the pattern: a loose connector usually does not follow a fixed angle, and responds to vibration or pressure instead; a cracked conductor follows a fixed angle. That distinction is the central split of this guide, and don't treat the two causes as one.
The Decisive Test: The External Monitor
This is the most important test in this guide, and it must come first in the diagnostic order. Before any conclusion is drawn about the cable, the connector or the panel, the external monitor test divides the whole investigation in two.
Connect an external monitor to the laptop and look at both screens at the same time, with the same machine running the same picture.
- The external monitor is completely steady while the built-in screen keeps flickering → the graphics card and the driver are cleared. The fault is in the built-in display chain: the flex cable, a connector, or the panel. This guide continues from here.
- The external monitor flickers along with the built-in screen → the fault is in the graphics card, the driver, or the output layer, not in the flex cable. Stop here. Follow the driver or graphics card path instead — a driver timeout and reset investigation, or a driver-versus-hardware diagnosis — and do not spend further time on the cable.
The reason the test works is the difference in the signal path. The external monitor uses a separate output route that does not pass through the built-in flex cable at all. If both screens flicker together, the source of the fault must be before the cable, where the picture is produced — the graphics card computing the wrong frame, or the driver delivering it wrongly. If only the built-in screen flickers, the source must be after the cable begins — in the cable, a connector, or the panel. That is the whole logic of the test, and it is why no other test can replace it.
One practical point: the external monitor must be checked while the built-in screen is flickering. If the built-in screen happens to be steady at the angle it is sitting at, the comparison proves nothing. Note the angle at which the built-in screen flickers during ordinary use, and make the comparison while it is in that state.
Two Further Splits: The Screenshot Test and the BIOS Screen Test
Two more tests narrow the fault further, and both are quick. Neither of them requires opening the machine.
The screenshot test. Take a screenshot while the built-in screen is flickering, then look at the captured image on a steady screen. If the captured image is clean — no flicker, no abnormality — the fault is after the frame buffer, which supports the flex cable layer: the graphics card computed a correct picture, and the picture was interrupted only while being carried to the panel. If the screenshot itself contains the flicker or abnormality, the fault is in the frame buffer or before it, and it is not a cable problem. A flex cable fault always produces a clean screenshot, because the picture the graphics card produced was never wrong.
The BIOS or UEFI screen test. Restart the machine and watch the BIOS or UEFI setup screen. If the flicker follows the lid angle on the BIOS screen as well, Windows, the driver, the game and every application can all be excluded — the flex cable is in the chain before any driver has loaded, so a cable fault shows up there too. If the flicker appears only after Windows has loaded, the driver layer has to be investigated instead. A cable fault does not wait for Windows; a driver fault does.
Both tests agree with the external monitor result in the same direction. If all three point at the built-in display chain — external monitor steady, screenshot clean, BIOS screen flickering — the diagnosis has been narrowed as far as software tests can narrow it. What remains is a physical inspection of the cable, the connectors and the panel.
The Diagnostic Flow, in Order
Work through these steps in order, and change only one thing at a time. Each step narrows the range of possible causes, and the later steps only mean something because the earlier steps established the pattern first.
| Step | What to do | How to read the result |
|---|---|---|
| 0 | Confirm the symptom: flicker on the built-in screen only, following the lid angle, not a fixed line | A fixed line points to a panel drive problem; flicker on a still image that stops when the mouse moves points to panel self-refresh; a whole-screen blackout of a second or two with no angle link points to the signal layer; desktop elements flashing together points to composition or driver |
| 1 | The external monitor test — the decisive fork | External monitor steady → flex cable, connector or panel layer, continue; external monitor flickers too → graphics card or driver layer, stop and change direction |
| 2 | The screenshot test | Screenshot clean → after the frame buffer, supporting the cable layer; screenshot shows the abnormality → frame buffer or before, not the cable |
| 3 | The BIOS or UEFI screen test | Flicker on the BIOS screen too → driver and applications excluded; only in Windows → investigate the driver layer |
| 4 | Ordinary-use angle observation — observation only, no repeated movement | Note which angle range flickers and which range is steady; the same angle reproducing the flicker supports the angle pattern and a fatigued conductor; flicker that does not follow an angle but appears with vibration points toward a loose connector |
| 5 | Hinge feel check, without opening the machine | Hinge loose, misaligned, or rough in operation is supporting evidence that the hinge is accelerating cable wear; a completely normal hinge does not exclude the cable, which can fatigue on its own |
| 6 | Stop line: the fault points at the flex cable, connector or panel layer, and the next step is a professional inspection | Do not open the screen assembly, remove the flex cable, or remove the hinge yourself; replacing the cable means dismantling the screen assembly, which is not a job for the user |
Observation Only: Why the Lid Must Not Be Moved Back and Forth to Test
This guide takes a firm position that has to be stated plainly, with its reason, not as a bare instruction. The lid must not be opened and closed repeatedly, or moved back and forth through its range, in order to test which angle flickers. Each opening and closing bends the already fatigued cable once more, and each bend works the crack further open. The test itself is a wearing action, and it makes the fault worse.
Some repair guidance found online teaches the opposite — to move the lid slowly through its full range while watching for the angle that flickers. This guide does not follow that approach. The angle relationship can already be observed during ordinary use: the reader will have noticed which angle range flickers and which range is steady, simply by using the machine. Noting that down is enough. Repeating the movement to confirm it one more time adds no diagnostic accuracy, and it risks turning an intermittent fault into a complete break.
The same position applies to pressing on the panel or on the hinge area to test for a change. Pressure can turn a slight fault into permanent damage, and a change under pressure proves nothing about the cause — a loose connector, a cracked conductor and a panel fault can all respond to pressure. The external monitor test, the screenshot test and the BIOS screen test are sufficient to narrow the fault, and none of them requires pressing anything.
What the reader should do instead is simple: during ordinary use, notice and write down the angle range where the flicker appears and the range where the picture is steady, and take that note to the inspection. The observation is the evidence. The repeated movement is not needed, and it is harmful.
Common Misconceptions
| Misconception | Correction |
|---|---|
| "Flicker means the graphics card is broken, or the driver is broken." | Wrong. The external monitor test comes first: if the external monitor is steady, the graphics card and the driver are cleared. Do not reinstall the driver before that test has been done. |
| "Flicker means the whole panel is broken and the screen has to be replaced." | Wrong. The most common cause in this pattern is the flex cable, not the panel. A panel that is itself fine, fed by a cable that cannot deliver the signal, does not need replacing. Only the external monitor test plus the angle relationship can separate the two. |
| "Open and close the lid a few more times to find exactly which angle flickers." | Wrong. Every opening and closing is wear on a fatigued cable, and the test action itself widens the crack. The angle relationship observed during ordinary use is already enough. |
| "Press the hinge area or press the panel and see whether anything changes." | Wrong. Pressure can turn a slight fault into permanent damage, and a change under pressure proves nothing about the cause. This guide does not teach that test. |
| "Updating the driver will fix it." | Wrong. Angle-dependent flicker is a physical-layer fault, and a driver update cannot repair a cracked copper conductor. A driver update is only worth trying when the external monitor flickers too. |
| "It only flickers occasionally, so it can be left alone for now." | Wrong. A flex cable micro-fracture is a degenerative fault; the crack only gets wider. Intermittent flicker is the early signal, and waiting can turn it into a completely black screen. Once the angle relationship has been observed, an inspection should be planned. |
| "Using an external monitor instead is the same as fixing it." | Wrong. An external monitor only bypasses the damaged chain; the cable itself keeps deteriorating, and the laptop has lost its portability. It is a workaround, not a repair. |
What to Do With the Result
If the tests point at the built-in display chain — the external monitor is steady, the screenshot is clean, and the BIOS screen flickers with the lid angle — the result should be recorded with the same care as the original symptom: which angle range flickers and which range is steady, the external monitor result, the screenshot result, and the BIOS screen result. That record lets an inspection start from the layer the tests have already narrowed down, instead of from the beginning. Do not attempt to open the screen assembly, remove the flex cable, or remove the hinge. Replacing the cable means dismantling the screen assembly, and the cable routing differs between models — its position is not fixed to one side or one hinge on every machine, so no general dismantling instruction can be given here.
If the external monitor flickers too, the fault is in the graphics card or driver layer, and the flex cable path should be abandoned. Follow the driver or graphics card diagnosis instead, starting with the timeline of what changed just before the flickering began — a driver update, a Windows update, or a graphics card change — and record the driver version involved.
If the flicker does not follow the lid angle at all, this guide does not apply, and the neighbouring symptom should be followed instead: a fixed line, a still-image flicker, a whole-screen blackout, or desktop elements flashing together each have their own diagnostic path, and the wrong path wastes time and risks the wrong conclusion.
HK GPU Fix offers a diagnostic inspection at its Shek Mun shop: Room 1209, Dali Plaza, Shek Mun. The published inspection fee range is HK$400–2,800 in total, and the actual price is subject to a post-inspection quotation. Phone 2186 8010, WhatsApp 6558 6806. There is no on-site service, and there is no Mong Kok shop; inspection is carried out at the shop.
Frequently Asked Questions
My laptop screen flickers when I move the lid, but it is steady when I leave it alone. Is the cable the cause?
It is the leading suspect, but it has to be confirmed. Connect an external monitor: if the external picture is completely steady while the built-in screen keeps flickering, the fault is in the built-in display chain — the flex cable, a connector, or the panel. If the external monitor flickers too, the fault is in the graphics card or driver layer instead.
Should I open and close the lid several times to find the exact angle that flickers?
No. Each opening and closing bends the already fatigued cable once more and works the crack further open. The angle relationship observed during ordinary use — which angle range flickers and which range is steady — is already enough evidence. Write it down and take it to the inspection.
The screen only flickers when I pick the laptop up or carry it. Is that the same problem?
Not exactly. Flicker that appears with vibration but does not follow a fixed lid angle points more toward a loose connector than toward a cracked conductor. The connector itself may be undamaged but not securely seated, so vibration breaks the contact briefly. The two patterns need different inspections, so the distinction should be recorded.
My screen is fine when the machine is cold and only starts flickering after it has warmed up. Is that the hinge cable?
Probably not. Flicker that appears only after warm-up points toward an oxidised panel connector, where thermal expansion changes the contact, or toward the panel timing controller — not toward the hinge flex cable. That warm-up pattern is a different fault from the angle pattern in this guide.
A screenshot taken while the screen flickers looks completely normal. Does that mean there is no problem?
No. A clean screenshot is exactly what a flex cable fault produces: the graphics card computed a correct picture, and the picture was interrupted only while being carried to the panel. A clean screenshot supports the cable layer; it does not mean the fault is imaginary.
The flicker also appears on the BIOS screen. What does that tell me?
It tells you the fault is below the Windows layer. The flex cable is in the chain before any driver has loaded, so a cable fault shows up on the BIOS screen too. Windows, the driver, the game and every application can all be excluded by that result.
The hinge feels loose. Does that prove the cable is broken?
No, but it is supporting evidence. A worn or misaligned hinge makes the flex cable bear uneven force every time the lid moves, which accelerates wear. A completely normal-feeling hinge does not exclude the cable either — the cable can fatigue on its own even when the hinge is fine.
It only flickers occasionally. Can I wait until it gets worse?
Waiting is the wrong choice. A flex cable micro-fracture is a degenerative fault and the crack only gets wider; intermittent flicker is the early signal. Once the angle relationship has been observed, an inspection should be planned before the connection fails altogether and the screen goes black.
Can I replace the flex cable myself?
No. Replacing the cable means dismantling the screen assembly, and the cable routing differs between models. This guide does not teach dismantling, and the reader should not open the screen assembly, remove the flex cable, or remove the hinge.
The external monitor flickers too. What should I do?
Stop following the cable path. The fault is in the graphics card or driver layer. Follow the driver or graphics card diagnosis instead, starting with the timeline of what changed just before the flickering began, and record the driver version involved.