GPU Worse After Cleaning? Compressed Air, Reseating, Static & Dislodged Connector Diagnosis Guide
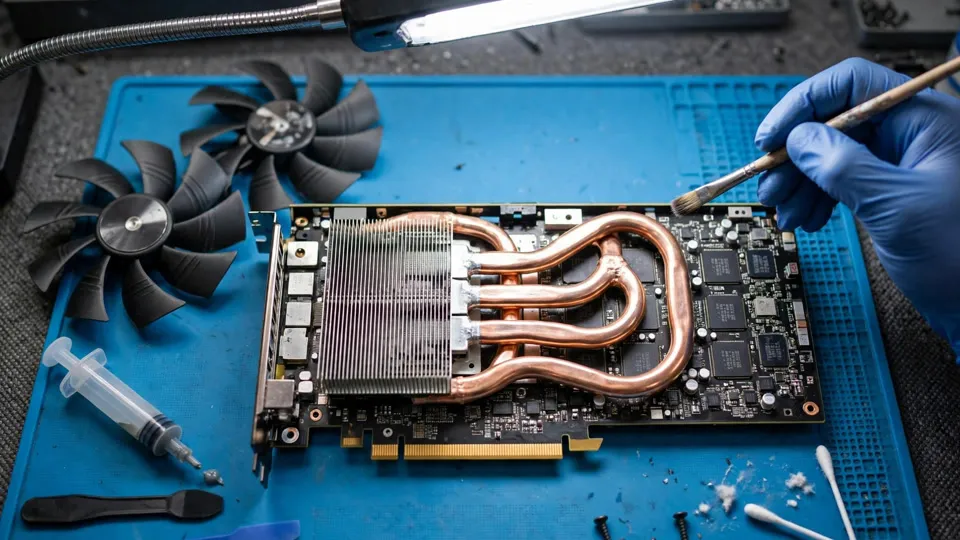
Key Takeaways
When a graphics card worked normally before cleaning and only developed a fault afterwards, the cleaning itself is the prime suspect, and the most useful evidence is what was actually done during that cleaning: whether the card was removed, whether the cooler was taken off, and whether compressed air, a brush, or a cloth was used, because each action points to a different layer of cause, from a loosened connector to dust moved into the wrong place, and the correct response is to stop, compare, and change one thing at a time rather than cleaning again.
What This Problem Is, and What It Is Not
The symptom is specific. Before cleaning, the machine and the card worked normally. After cleaning, something new appears: a fan that does not spin, a fan that makes an unusual noise, no picture at boot, a black screen and restart only under load, temperatures higher than before, or a fault that comes and goes. The new symptom may appear immediately, or it may show up a day or two later.
The entry condition matters, and it must be stated plainly at the start: this article applies only when the machine was normal before cleaning and faulty afterwards. That time order is itself the most important diagnostic clue. If the symptom already existed before cleaning, it is not the subject of this article, and the reader needs the guidance for that symptom instead. Cleaning did not cause a fault that was already there, and chasing the cleaning will waste the time that should go to the real cause.
The word cleaning here covers several different actions, and they must not be treated as one thing: blowing with compressed air or an air blower, wiping with a brush or cloth, taking the card out of the machine to clean it, and taking the cooler off to clean underneath it. The first diagnostic step in this article asks the reader to state exactly which of these were done, because each action has a different list of suspects. A reader who cannot say what was done will test at random, and random testing is how a small loosened connector turns into a larger problem.
The correct cleaning method itself is covered in a separate cleaning guide; this article is the after-the-event diagnosis for when something has already gone wrong, and it does not repeat that method.
This article also has neighbours, and the boundaries with them keep the diagnosis honest. A guide about moving a computer covers faults caused by transport vibration, where reseating is the whole story; here reseating is only one test step among several, because the cause is the cleaning action itself, not a journey. A guide about loose power connectors explains the general mechanism of contact resistance growing under load; this article borrows only the single trigger of a power plug disturbed during cleaning. A guide about core temperature being normal while the hotspot reading is far higher explains temperature-difference reading; this article borrows only the single branch where a disturbed cooler has worsened contact. A guide about choosing thermal pad thickness owns that subject; this article only notes that pad or paste condition may have changed after a cooler was removed. Fan-noise classification, fan-not-spinning diagnosis, and fan-curve adjustment each have their own guides; this article only handles the branches that begin after cleaning, and points to those guides for the wider subjects. Finally, a guide about idle fan stop explains that a fan standing still at idle is normal behaviour; this article repeats that split, because mistaking normal idle stop for cleaning damage is one of the easiest errors in this topic.
Why does this problem deserve its own article? Because cleaning is the most common well-meaning action that creates a fault. The natural reaction after cleaning damage is to clean again, harder, and that instinct usually makes things worse: dust is blown deeper, a loosened part is loosened further, and a second cleaning destroys the evidence of what the first one did. The value of this article is to stop that instinct. Stop, compare, and locate, before touching anything again.
How Cleaning Can Create a Fault: Six Layers
The layers must be kept separate. Mixing them together produces the vague conclusion that cleaning broke something, which helps nobody. Each layer has its own characteristic symptom, and the symptom points back to the layer.
Layer 1: Mechanical loosening
Cleaning involves touching, pressing, and pulling. A card can work slightly out of its slot, a power plug can sit without its latch fully engaged, a display cable can be left loose, or a fan power lead can be disturbed. The signature of this layer is a direct correspondence between the symptom and the place that was moved, and the fault often clears when the part is seated properly again. It is the most common layer and the cheapest to fix, which is why the diagnostic order starts here.
Layer 2: Air pressure on the fan
Compressed air blown directly at a fan blade can spin the fan far beyond its designed speed range. That overspeed can damage the bearing, deform or crack a blade, and drive back-voltage from the motor into the fan control circuit. The signature is abnormal fan behaviour with everything else working normally: a fan that does not spin, spins unevenly, or only makes noise at a particular speed. Prevention is not the subject of this article; recognition after the event is.
Layer 3: Dust moved, not removed
Dust does not vanish when it is blown. It relocates. Dust blown from fin surfaces can end up between slot contacts, inside a fan bearing, or packed deeper into the fins where it forms a felt-like mat. The signature follows the new location of the dust: dust between contacts gives intermittent contact faults; dust in a bearing gives noise or uneven rotation; dust packed deep into fins gives temperatures higher than before cleaning. This layer is easily misread as cleaning not done thoroughly enough, but the correct understanding is the opposite: the cleaning method moved the dust to the wrong place.
Layer 4: Static discharge
Handling a board without earthing, in a dry environment, can expose it to static discharge, and the resulting damage can be latent: the card does not necessarily fail immediately, but develops an intermittent fault or a fault in one function. Two points must be stated clearly. First, static damage is very hard to confirm from symptoms alone, and the diagnostic method is elimination: it is considered only after every other layer has been excluded. Second, touching the case once does not prove that no static event happened, because a single touch is not continuous earthing, and latent damage cannot be excluded by one gesture.
Layer 5: Moisture and liquid
Cleaning with a damp cloth or a cleaning agent, or cleaning in a humid environment and then switching on immediately, can leave residual moisture that causes a short circuit or later oxidation. The signature is a symptom appearing shortly after cleaning, in correspondence with the place that became wet. If moisture is suspected, repeated power-on attempts must stop immediately, because each attempt risks further damage. This is part of the inspection boundary later in this article.
Layer 6: Cooler disturbance, only where the cooler was removed
Removing a cooler changes screw tension, cooler position, and the condition of thermal pads and paste, and any of those changes can worsen contact between the core and the cooler. The signature is temperature higher than before cleaning, with the gap between core temperature and hotspot temperature widening. This layer may only be discussed where the cooler was actually removed. Where it was not removed, it must not be pulled into the diagnosis.
The Diagnostic Order: Seven Steps, in This Order
Order matters. Each step narrows the field before the next step is taken, and the sequence runs from the cheapest, least invasive check to the most involved one.
Step 1: Reconstruct what happened during cleaning
Answer five questions before touching the machine: was the card removed from the machine, was the cooler removed, was compressed air, a brush, or a cloth used, were the fan lead or power leads touched, and how long after cleaning was the machine switched on? Those five answers usually narrow six layers down to one or two, and this is the most time-saving step in the whole article. Skipping it guarantees random testing.
Step 2: Powered-off visual inspection, before switching on
With the power disconnected, look for the card seated fully in its slot, the power plug latch engaged, the display cable seated, the fan lead connected, fan blades free of cracks or missing corners, visible dust packed around the slot or contacts, and cooler screws obviously loose. This step needs no tools, but it must be done with the power off. A visual check that finds a loose latch or a cracked blade ends the search immediately.
Step 3: Restore one thing at a time, in this order
Work from outside to inside, from no disassembly to disassembly: the display cable first, then the power plug, then the card itself reseated in its slot, testing with a power-on after each single change. The reason for the order must be understood: if everything is reseated at once, the machine may recover, but nobody will ever know which part was at fault, and the next recurrence will require the whole procedure again. One change, one test, is slower per step and far faster overall.
Step 4: Manual fan test
With the power off, flick each fan blade gently by hand and feel whether it turns smoothly, sticks, wobbles, or scrapes. Then switch on and watch fan behaviour under load: a fan that never turns, turns unevenly, or only makes noise at one speed points to different layers, a loose lead, a bearing problem, or a deformed blade respectively. The idle-stop split must be applied here: a fan standing still at idle is normal behaviour, and the judgement must be made under load, not at idle.
Step 5: Temperature comparison, only for the hotter-than-before symptom
Under the same load as before cleaning, compare core temperature and the hotspot temperature gap against the pre-cleaning values. If the gap has widened clearly, the direction points to the cooler-disturbance layer. If temperature and the gap are unchanged while other symptoms exist, temperature is not the main line of enquiry, and time should not be spent circling around it.
Step 6: Card-versus-system isolation, last among the home tests
If all the steps above leave the symptom in place, the question becomes whether the fault follows the card or stays with the machine, and the method is a swap-based cross-test. The steps for that cross-test belong to a separate guide and are not repeated here; what matters here is the decision it produces, because it determines whether the card or the motherboard and slot area goes for inspection.
Step 7: The inspection boundary
Stop home testing and seek inspection in any of these cases: suspected moisture or liquid entry, a cracked or chipped fan blade, visible damage to slot pins or contacts, a temperature comparison pointing to cooler contact trouble that the reader cannot confidently restore, or an intermittent fault that remains after the mechanical layers have been excluded, which raises the possibility of latent static damage. Before inspection, do not repeatedly switch the machine on to test, and do not blow compressed air through it again.
| Symptom after cleaning | Most likely layer | First check |
|---|---|---|
| No picture at boot | Mechanical loosening | Display cable, then power plug, then card seating, one at a time |
| Black screen and restart only under load | Mechanical loosening of the power plug | Power plug latch and seating |
| Fan does not spin | Loose fan lead, or air-pressure damage | Fan lead connection, then manual blade test |
| Fan noise that was not there before | Air pressure on the fan, or dust in the bearing | Manual blade test, blade by blade |
| Temperature higher than before cleaning | Dust packed deep into fins, or cooler disturbance | Temperature comparison, then cooler history: was the cooler removed? |
| Intermittent fault, no pattern | Dust between contacts, or latent static damage | Powered-off visual inspection, then elimination of the mechanical layers |
| Fault appearing shortly after cleaning with any dampness involved | Moisture or liquid | Stop switching on and seek inspection |
Edge Cases Where the Conclusion Changes
A symptom that appears a day or two after cleaning does not exclude cleaning as the cause. Dust relocation and moisture oxidation can both have a delay, so a machine that seemed fine immediately after cleaning can still carry a cleaning-caused fault. The control is the cleaning history, not the time gap: ask what was done, not how long ago it was.
On a multi-fan card, only one fan may be affected. Air pressure reaches one blade and not another, so the fans must be tested individually by hand rather than assumed to share one fate. A single noisy fan on a three-fan card is a local finding, not a whole-cooler failure.
Noise that appears only at one particular speed is also a distinct pattern. A slightly deformed blade or dust in a bearing can be silent at idle and at full speed, and audible only at a resonance speed in between. The control is to sweep the fan through different speeds with a fan curve, and the curve-setting method belongs to a separate fan-curve guide, not to this article.
Laptop internal cleaning is outside the scope of this article, which covers desktop graphics cards. A laptop that develops a fault after internal cleaning involves many more small ribbon cables and connectors, and the only advice given here is to seek inspection directly rather than repeatedly opening and closing the machine.
When someone else did the cleaning, the Step 1 questionnaire cannot be answered fully. In that case the diagnosis runs in reverse: start from the symptom and work back to the layer, fan abnormality pointing to the air-pressure layer, loosening symptoms pointing to the mechanical layer, and worse temperatures pointing to the cooler layer. The article must not assume the reader knows the cleaning history; the reverse questionnaire is the fallback, not an afterthought.
Common Misconceptions, With Corrections
Cleaning is always beneficial, and more cleaning is always better. That is wrong. Cleaning is a disturbance, and a disturbance can loosen parts, relocate dust, and generate static. Whether cleaning helps or harms depends on how it is done and on the state it leaves behind, not on how many times it is repeated.
Cleaning again immediately will fix a fault caused by cleaning. That is wrong. If the fault is a loosened part or relocated dust, blowing again only pushes dust deeper and loosens the part further. The correct response is to stop, compare, and locate.
Spinning a fan blade at high speed with air is harmless fun. That is wrong. Overspeed rotation can damage the bearing and the motor, and that is exactly the air-pressure layer described above.
Touching the case once to discharge means static is impossible. That is wrong. A single touch is not continuous earthing, and static damage can be latent, appearing as an intermittent fault rather than immediate failure. One gesture cannot exclude it.
If the machine switches on, nothing was damaged. That is wrong. Intermittent contact faults, latent static damage, and slight blade deformation can all exist under a machine that switches on normally, and only show themselves later under load or at a particular fan speed.
Higher temperature after cleaning means the cleaning was not thorough enough. That is wrong. Higher temperature after cleaning most often means cooler contact has worsened or dust has been packed deeper into the fins, neither of which is fixed by blowing the surface again.
Stop Points and What to Record Before Seeking Inspection
Stop home testing if moisture is suspected, if a blade is cracked, if slot pins or contacts show visible damage, or if the fault persists after the mechanical layers have been excluded. Do not switch the machine on repeatedly to see whether the fault has gone away, and do not use compressed air again as a remedy.
Before seeking inspection, record the five Step 1 answers, what the powered-off inspection showed, which single changes were tried and what each one changed, the manual fan test result for each fan, and, where relevant, the temperature comparison. That record is what lets an inspection start from the layer already identified instead of repeating the whole sequence.
Inspection charges follow the published three-tier charges of HK$400–2,800, subject to a written quotation after inspection. For inspection in Hong Kong, the shop is Room 1209, Dali Plaza, Shek Mun. The telephone number is 2186 8010 and the WhatsApp number is 6558 6806. There is no on-site service, so the card or machine is brought to the shop.
Frequently Asked Questions
1. My card worked before cleaning and now shows no picture. Is the card dead?
Not necessarily, and the mechanical layer should be excluded first. A display cable, power plug, or card seating disturbed during cleaning is the most common cause of a new no-picture symptom, and each is checked one at a time in Step 3. Only after those checks fail does the diagnosis move to deeper layers.
2. Should I clean it again to see if that fixes it?
No. Cleaning again is the single most counterproductive step in this topic. If the fault is loosening or dust relocation, a second cleaning pushes dust deeper and loosens parts further, and it destroys the evidence of what the first cleaning did. Stop, compare, and locate instead.
3. One fan makes noise after cleaning but the others are fine. Is the whole cooler failing?
Usually not. Air pressure and dust affect individual fans differently, so one fan can be damaged while the others are untouched. Test each fan blade by hand, separately, and judge that fan on its own result rather than treating the cooler as a single unit.
4. My fan stands still at idle after cleaning. Did cleaning break it?
Not on that evidence alone. Idle fan stop is normal behaviour on many cards, and the judgement must be made under load: if the fan spins up under load, the idle stop is not a fault. Only a fan that fails to spin under load points to a real problem.
5. The fault only appeared two days after cleaning. Can cleaning still be the cause?
Yes. Dust relocation and moisture oxidation can both have a delay, so a gap of a day or two does not exclude cleaning. The control is the cleaning history, not the time gap: reconstruct what was done and match the symptom to a layer.
6. I touched the case before cleaning, so static cannot be the cause. Is that right?
No. A single touch is not continuous earthing, and static damage can be latent, showing up later as an intermittent fault. Static is considered only by elimination, after the mechanical, air-pressure, dust, and moisture layers have been excluded.
7. Temperatures are higher after cleaning. Does that mean I did not clean thoroughly enough?
No, and that misunderstanding leads to the worst remedy, which is blowing again. Higher temperature after cleaning more often means dust packed deeper into the fins or cooler contact worsened after the cooler was disturbed. The temperature comparison in Step 5 separates those two directions.
8. The noise only happens at one fan speed. What does that mean?
It points to a slightly deformed blade or dust in a bearing showing up at a resonance speed, silent at idle and at full speed. Sweeping the fan through different speeds with a fan curve is the control test, and the curve-setting method belongs to a separate fan-curve guide.
9. Someone else cleaned my machine and I do not know what they did. Can I still diagnose it?
Yes, by running the diagnosis in reverse. Start from the symptom and work back: fan abnormality points to the air-pressure layer, loosening symptoms point to the mechanical layer, and worse temperatures point to the cooler layer. The reverse questionnaire replaces the Step 1 history when that history is unavailable.
10. When should I stop testing at home and seek inspection?
Stop if moisture is suspected, if a blade is cracked or chipped, if slot pins or contacts show visible damage, if a temperature comparison points to cooler contact trouble you cannot confidently restore, or if an intermittent fault remains after the mechanical layers are excluded. In all of those cases, further home testing risks more damage than information.