GPU Thermal Paste Replacement: 12 Steps, 45 Min (2026)
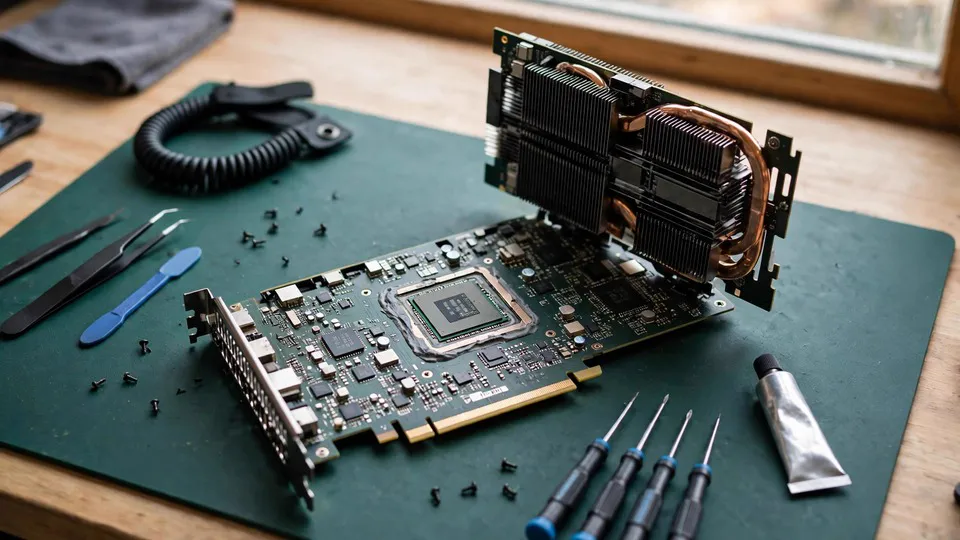
Key Summary
GPU thermal paste replacement takes about 45 minutes and costs HKD 80–150 in tools. Done right, it drops hotspot temperatures by 8–15°C on cards that have run 3+ years in Hong Kong's humid climate. Done wrong, it kills the card.
Introduction
I've replaced thermal paste on more graphics cards than I can count. Some came in running 105°C hotspots on a card rated for 83°C. Others came in because the owner watched a YouTube video, used too much paste, and shorted something. Here's the thing: repasting a GPU is one of the highest-value maintenance jobs you can do in Hong Kong's climate. But it's also one of the easiest ways to destroy a card if you rush it.
This guide is the version I wish every customer had read before they touched a screwdriver. It's the same 12-step process we use at ComputerKing when a card comes in for a thermal service. No filler, no sponsored paste recommendations. Just what works.
Why Does Your GPU Need New Thermal Paste in Hong Kong?
GPU thermal paste degrades faster in Hong Kong than in most places because of humidity and heat cycles. The stock paste on most cards dries out within 2–3 years of daily use here, and once it hardens, it stops transferring heat efficiently. I've measured hotspot deltas of 25–30°C on cards that were only 3 years old.
Hong Kong's average relative humidity sits between 70% and 85% for most of the year. That humidity doesn't directly attack the paste, but it does accelerate corrosion on the cold plate and pump-out of the paste under repeated thermal cycling. A card that runs 8 hours a day in a flat with no air conditioning will dry out its paste noticeably faster than one in a climate-controlled office.
Here's a simple test: if your GPU hotspot is more than 15°C above the core temperature under load, the paste or mounting pressure is suspect. If it's more than 20°C, stop gaming and repaste.
Is It Worth Repasting a GPU Yourself?
Repasting a GPU yourself is worth it if you have basic tools, patience, and a card that's out of warranty. It saves HKD 400–800 compared to a shop service, but the risk of damaging the card is real if you skip steps. For most Hong Kong users with a 3–5 year old card, the savings justify the effort.
In my experience, about 1 in 5 DIY repaste jobs that come into our shop have some issue: stripped screws, torn thermal pads, or paste smeared onto the PCB. None of these are fatal if caught early, but they turn a 45-minute job into a 2-hour repair.
If your card is still under warranty, don't repaste it yourself. Opening the cooler usually voids the warranty, and the manufacturer will reject the RMA. Send it in or live with the temps until the warranty expires.
What Tools and Materials Do You Need?
You need a precision screwdriver set, thermal paste, isopropyl alcohol (90%+), lint-free cloths or coffee filters, a plastic spudger, and thermal pads if your card uses them. Total cost in Hong Kong: HKD 80–150 if you buy everything, or HKD 30–50 if you already have tools.
Here's the exact list I keep on my bench:
- Precision screwdriver set (Phillips #0 and #1, Torx T6/T8 for some cards): HKD 40–80
- Thermal paste: a 2g tube of a reputable brand is enough for 2–3 cards, HKD 30–60
- Isopropyl alcohol 99%: HKD 15–25 for 100ml
- Lint-free cloths or unbleached coffee filters: HKD 10–20
- Plastic spudger or old credit card: HKD 10
- Thermal pads (if needed): HKD 30–80 depending on thickness
Don't buy the cheapest paste you can find. It's not about brand loyalty; it's about consistency. A paste that pumps out in 6 months wastes your afternoon.
The 12-Step GPU Thermal Paste Replacement Process
Step 1: Document Everything Before You Touch Anything
Take photos of the card from every angle, especially the backplate screws and any warranty stickers. If you break something, those photos tell you what it looked like before. I can't count how many times a customer's photos saved a repair.
Step 2: Remove the Card from the System
Power off, unplug the PSU, and press the power button for 5 seconds to discharge residual power. Remove the PCIe power cables, unscrew the bracket, and release the PCIe slot latch. Pull the card straight out, not at an angle.
Step 3: Clean the Card Externally
Use compressed air to blow dust out of the heatsink fins and fans. Do this outside or in a well-ventilated area. Hong Kong dust is fine and sticky, so a soft brush helps loosen it before you blow it out.
Step 4: Remove the Backplate (If Present)
Most modern cards have a backplate held by 4–8 screws. Keep the screws in a magnetic tray or a cup. Note which screws are longer; they usually go in specific locations.
Step 5: Disconnect Fan and RGB Headers
Before separating the cooler from the PCB, disconnect the fan cables and any RGB headers. These are fragile; use a plastic spudger, not metal tweezers. If a header feels stuck, wiggle it gently rather than pulling hard.
Step 6: Separate the Cooler from the PCB
Unscrew the spring-loaded screws around the GPU die in a diagonal pattern, a quarter turn at a time. Never fully remove one screw before loosening the others; uneven pressure can crack the die. Once all screws are out, lift the cooler straight up. If it's stuck, a gentle twist breaks the paste seal.
Step 7: Clean the Old Paste
Use isopropyl alcohol on a lint-free cloth to wipe the die and cold plate. Be gentle around the die edges and never use a metal tool. The old paste should come off in a few wipes; if it's rock hard, let the alcohol soak for 30 seconds.
Step 8: Inspect Thermal Pads and VRM Contact
Check the thermal pads on the VRAM and VRM areas. If they're torn, compressed, or oily, replace them. Measure the thickness with a caliper; wrong-thickness pads cause worse contact than old ones. This is where most DIY jobs go wrong.
Step 9: Apply New Thermal Paste
Apply a pea-sized dot in the center of the GPU die, or a thin line across the die. For a GPU, a small X or a single dot works well. Don't spread it manually; the mounting pressure does that. Too much paste is messy but not fatal; too little causes hotspots.
Step 10: Reassemble the Cooler
Lower the cooler straight down onto the PCB. Tighten the spring screws in a diagonal pattern, a quarter turn at a time, until they bottom out. Reconnect the fan and RGB headers. Reinstall the backplate.
Step 11: Test Before Full Reinstall
Put the card back in the system, connect power, and boot. Check that fans spin and the card is detected. Run a stress test like FurMark for 10 minutes and watch the hotspot temperature. A successful repaste usually shows an 8–15°C drop.
Step 12: Reassemble and Monitor
If temps look good, shut down, finish cable management, and close the case. Monitor temps for the first week. If the hotspot creeps back up, the mounting pressure may be uneven.
How Much Does a Professional GPU Repaste Cost in Hong Kong?
A professional GPU repaste in Hong Kong typically costs HKD 400–800 including labor, paste, and thermal pad replacement if needed. At ComputerKing, we charge HKD 500 for a standard repaste with premium paste, and HKD 650–800 if thermal pads need replacing. Turnaround is usually same-day or next-day.
If you're not comfortable opening a HKD 5,000+ card, that fee is cheap insurance. We've seen too many cards come in with bent cooler fins or scratched PCBs from DIY attempts.
| Service | DIY Cost | Shop Cost (HKD) | Time | Risk |
|---|---|---|---|---|
| Thermal paste only | HKD 30–60 | 400–500 | 45 min | Low–Medium |
| Paste + pads | HKD 80–140 | 550–800 | 60–90 min | Medium |
| Full thermal service + cleaning | HKD 100–160 | 600–900 | 90 min | Medium |
Common Mistakes That Kill Cards
Over-tightening screws is the number one killer. The spring screws are designed to bottom out; forcing them further cracks the die or strips the threads. The second most common mistake is using conductive paste on a card with exposed SMD components around the die. One smear and you have a short.
Another one: forgetting to reconnect the fan header. The card boots, overheats in 30 seconds, and shuts down. It's not fatal, but it scares people.
And please, don't use a hairdryer to "speed up" paste curing. It doesn't work and it can warp the PCB.
When Should You Just Replace the Card Instead?
If the card is older than 5 years, has other faults (artifacts, crashes, black screens), or the repair cost exceeds 30% of a replacement, don't repaste it. Put the money toward a new card. Repasting is maintenance, not resurrection.
Frequently Asked Questions
Q: How often should I replace GPU thermal paste?
A: Every 2–3 years in Hong Kong's climate, or whenever hotspot temps exceed core temps by more than 15°C under load.
Q: Can I use CPU thermal paste on a GPU?
A: Yes, any quality non-conductive paste works. Avoid liquid metal unless you have experience; it's conductive and corrodes aluminum.
Q: Will repasting void my warranty?
A: Usually yes. Check your manufacturer's policy. Some brands allow it if you don't damage anything, but most will reject RMA claims on opened cards.
Q: How do I know if my thermal pads need replacing?
A: If they're torn, oily, or leave residue on the PCB, replace them. Measure thickness before buying replacements; wrong thickness causes poor contact.
Q: What's a safe hotspot temperature after repasting?
A: For most cards, 75–85°C hotspot under load is normal. Anything above 95°C means something is wrong with the mount or paste.
Conclusion
Repasting a GPU is a 45-minute job that can add years to your card's life, especially in Hong Kong's climate. But it's not a race. Take photos, keep screws organized, and don't force anything. If you're not confident, that's what we're here for.
If you'd rather not risk it, or if your card is showing other symptoms like artifacts or crashes, bring it to ComputerKing. We've handled over 10,000 repair cases in Hong Kong, and we'll tell you honestly whether a repaste is all you need or if something else is going on. WhatsApp us at +852 2186 8010 to book an inspection.
*This article was written by the ComputerKing senior repair team, with over 15 years of computer repair experience in Hong Kong and 10,000+ cases handled. Last updated: 2026-10-29*