GPU Temperatures Creep Back Up Weeks After a Repaste? Thermal Paste Pump-Out, Thermal Cycling & Contact Diagnosis Guide
Key Takeaways
When a GPU runs cooler right after a repaste but temperatures slowly creep back up over weeks or months, the paste layer itself is often the suspect — not the card ageing. Repeated heating and cooling can gradually squeeze paste out from the centre, thinning the contact layer and letting temperatures climb again.
First, Define the Pattern: What Kind of Comeback Is This?
This article is about one very specific pattern, and the pattern has to be stated clearly at the start, or every diagnosis that follows will head in the wrong direction. After a repaste, temperatures under the same workload improve at first. Then, over a period measured in weeks or months, temperatures under that same workload slowly climb back, approaching or even reaching the levels seen before the repaste. The defining features are twofold. First, the rise is slow: it is a gradually rising trend line, not a sudden jump within a day. Second, the comparison must be like-for-like: the two sets of readings have to come from the same workload under the same environmental conditions, or there is no valid comparison at all.
That definition also rules out several different problems. High temperatures immediately after a repaste are not the pattern described here. A sudden jump within a single day is not the pattern described here. Higher readings after switching to a more demanding game or workload are not the pattern described here either. Each of those has its own diagnostic branch, covered in the boundary section below. The most important point is that a temperature rise is only a symptom, and several completely different causes can sit behind it. Seeing a rise and immediately concluding that the paste is at fault, or immediately repasting again, skips the entire job of diagnosis. The purpose of diagnosis is to separate those causes and find which one actually explains the time pattern of improving at first and then slowly getting worse.
Mechanism One: Thermal Paste Pump-Out — How Heating and Cooling Squeeze Paste Away
The layer of thermal paste between the graphics chip and the heatsink exists to fill microscopic gaps between two surfaces that no amount of polishing can make perfectly flat. Without paste filling those gaps, the air trapped inside them resists heat transfer. So the completeness of the paste layer is itself part of the cooling path: when coverage thins or gaps open up, heat transfer efficiency falls with it.
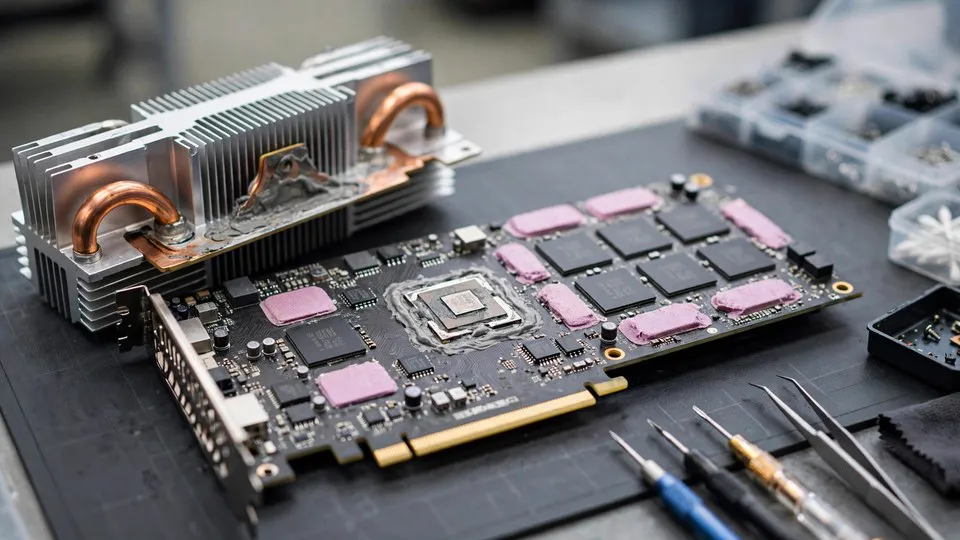
Every time the card powers up and powers down, and every time it moves between idle and heavy load, it goes through a heating and cooling cycle. The chip and the heatsink are made of different materials, so they expand by different amounts when heated and contract by different amounts when cooled, and the tiny gap between them shifts by a minute relative movement. A single cycle moves almost nothing, far too little to notice. But cycles accumulate. Over many cycles, paste is gradually squeezed out from the central pressed region toward the edges, the central coverage grows thinner, and excess paste piles up at the edges. The centre is exactly where the chip runs hottest, so thinning there matters most.
This is the pump-out effect, and it has three characteristics that must be stated clearly. First, it is cumulative, which is why the symptom is a gradual rise rather than a sudden failure; usage patterns with frequent power cycles and large load swings accumulate faster. Second, it is a displacement problem, not a decay problem: the paste itself may still be soft and workable, but it is no longer where it needs to be. Third, it depends on the characteristics of the paste: a paste that flows more readily under heat is easier to squeeze out under repeated pressing, while a paste that holds its shape better under heat is comparatively more resistant. This article describes only the direction of that relationship. It names no brands, no models, and no numerical values, and readers choosing a paste should go by the manufacturer's specification and characteristic descriptions rather than by rumoured rankings.
Mechanism Two: Paste Drying and Hardening — How It Differs from Pump-Out
Beyond pump-out, paste undergoes another change over time: drying and hardening. Pastes contain volatile components that slowly escape with time and repeated heating, leaving the paste hard and brittle and less able to fill gaps. Dried paste, seen when the heatsink is removed, tends to be hard throughout, cracked, even crumbling to powder — a completely different appearance from the thin-centre, thick-edge distribution of pump-out.
The reason for keeping drying and pump-out separate is that they point in different directions. Pump-out is a position problem, where paste has moved. Drying is a material ageing problem, where the paste itself is no longer suitable for filling gaps. The two can coexist: one layer of paste can be squeezed out at the edges while hardening at the same time, and removal can show signs of both. But lumping them together in diagnosis leads people to assume that one repaste settles both issues, while ignoring the follow-up question of whether pump-out will simply repeat. The accurate statement is that a repaste can address the coverage shortfall caused by both drying and pump-out, but if the main cause is thermal-cycle squeezing, and the new paste has similar characteristics and is applied the same way, the pump-out cycle may repeat — a point given its own section below.
One further point about drying: its speed depends on the operating environment. Sustained high-temperature operation, long periods powered on without shutdown, and poor case ventilation all put greater thermal stress on the paste, and ageing may proceed faster. This article gives no specific time figures, such as a fixed number of months before drying is expected, because drying speed varies with paste characteristics, usage patterns, and environment, and a fixed figure would only mislead. Temperature trends, not calendar dates, are the right basis for judgement.
Mechanism Three: Contact and Pressure — How Assembly Problems Differ from Pump-Out
A third cause to separate is the contact and pressure achieved during the original assembly. If heatsink screws are tightened unevenly, if the heatsink itself is not flat, or if paste is distributed unevenly during assembly, contact between chip and heatsink is poor from the very start. This situation has one important distinguishing feature: temperatures are already unsatisfactory immediately after the repaste, rather than improving at first and only worsening later. A different time pattern means a different cause.
Assembly problems also differ in what removal reveals. Uneven assembly pressure typically shows up as thick on one side and thin on the other, sometimes with one side having no paste at all, while pump-out shows the inward-to-outward pattern of a thin centre and piled-up edges. That distinction is useful, but it comes with a caveat: removing the heatsink destroys the existing paste distribution, so removal is a one-time inspection. Before removing, the decision should be deliberate, because whatever the result, fresh paste and reassembly are required before any further testing.
One easily overlooked point: assembly problems are not always a matter of human error. Ageing mounting hardware, screws losing their spring, and heatsinks deforming slightly after long-term heat exposure can all change pressure distribution over time. These are hardware condition changes, and inspection should cover the mounting hardware and screws together with the paste, not the paste alone.
Why the Comeback Is Gradual Rather Than Sudden
Many people ask why temperatures do not simply jump back all at once. The answer lies in the cumulative nature of pump-out. Each thermal cycle squeezes out an extremely small amount, far too little for any single cycle to register in a temperature reading. But hundreds or thousands of cycles add up: central coverage goes from complete to thin, from thin to locally gapped, and heat transfer efficiency declines step by step. The temperature trend line rises slowly precisely because the physical process behind it is itself slow and cumulative.
That time characteristic is itself a diagnostic clue. A temperature jump within a single day points to a sudden event, such as a fan stopping, an airflow path suddenly blocked, or an abrupt change in load or environment — not pump-out. High temperatures immediately after a repaste point to assembly or contact problems, not pump-out. Only the pattern of improving at first and then slowly worsening over weeks or months matches the cumulative nature of pump-out. That is why recording a temperature trend matters far more than any single reading. A single reading can only say how hot the card is right now; only a trend can say how the problem is developing.
Diagnostic Sequence: One Variable at a Time
Step One: Establish a Comparable Baseline
Fix one load test — the same program, the same scene, the same duration — and record the temperature readings together with the room temperature at the time of testing. This baseline is the anchor for every comparison that follows; without it, all later comparisons are meaningless. The baseline does not need to be elaborate. What matters is that test conditions stay identical every time. Record the date alongside each reading, so the trend becomes visible.
Step Two: Compare Against Ambient Temperature
Check whether the temperature rise tracks room temperature. Seasonal change and rising room temperature will raise readings on their own, with the cooling system completely unchanged. If the size of the rise roughly matches the rise in room temperature, the environmental explanation gains weight. If room temperature is unchanged and temperatures still climb slowly, the environmental explanation can be set aside. This step requires no hardware changes at all, only comparison of records.
Step Three: Compare Idle Against Load
Check whether idle temperatures and heavy-load temperatures are rising together, or only heavy-load temperatures are rising. Both rising together points to overall cooling capacity declining or to an environmental factor. Only heavy-load temperatures rising points to the high-heat transfer path, which raises the suspicion on paste coverage. The value of this step is narrowing the scope before the paste itself is blamed.
Step Four: Check Fans and Airflow
Check fan speed, dust on fan blades, and whether the case airflow path is obstructed. This step does not touch the paste at all; it exists purely to rule out the air-cooling side. Temperature rises caused by fan degradation usually affect idle temperatures as well and tend to track fan condition, a signature that differs from paste pump-out. When checking fans, change only one thing at a time — do not clean dust and change settings in the same step — and re-test against the same baseline after each change.
Step Five: Check Assembly Condition
Without removing the heatsink, check whether it has come loose or whether the mounting hardware shows any abnormality. A loose heatsink reduces contact pressure, and its symptoms can resemble pump-out, but the cause is entirely different. This step needs care: do not forcefully rock the heatsink or tighten screws at random, since incorrect tightening can itself create a new problem.
Step Six: Remove and Observe the Paste Distribution
Only consider removal after the earlier steps have ruled out their suspects. After removal, read the distribution: a thin centre with piled-up edges leans toward pump-out; a layer that is hard and cracked throughout leans toward drying; thick on one side and thin on the other leans toward uneven assembly pressure. The observation must be read together with the symptom trend, never used alone to reach a verdict. And remember that removal has already destroyed the original distribution, so fresh paste and reassembly are mandatory before any further testing.
Step Seven: Verify and Follow Up After a Repaste
After repasting, build a new baseline with the same load test, then record the trend regularly to see whether the rise repeats. Many people skip this step: temperatures look good after the repaste, so the problem is declared solved. But if the cause is thermal-cycle squeezing, and the new paste has similar characteristics and is applied the same way, the pump-out cycle may repeat, and temperatures may slowly climb again months later. Verification and trend follow-up are the only way to know whether the problem is truly resolved or merely reset for one more cycle.
| Symptom and trend | More likely explanation | Next step |
|---|---|---|
| Improves at first after a repaste, then slowly rises over weeks or months | Cumulative pump-out or drying process | Work through the diagnostic sequence, ruling out environment, load, fans, and assembly before observing the paste distribution |
| Already hot immediately after a repaste, never improved | Assembly contact or pressure problem | Check assembly and contact first, not paste characteristics |
| Sudden jump within a single day | Sudden event, such as a fan, airflow, load, or environment change | Look for the abrupt change, do not treat it as gradual pump-out |
| Idle and heavy-load temperatures rising together | Overall cooling capacity declining, or room temperature rising | Compare against room temperature and check fan and airflow condition |
| Only heavy-load temperatures rising, idle normal | High-heat transfer path problem, paste coverage suspicion rising | Run the baseline comparison, then check assembly and distribution in sequence |
| Rise tracks room temperature | Environmental variable, not necessarily a cooling system problem | Align room temperature before comparing; rule out seasonal change first |
| Only one sensor reading rising, others normal | Reading source or individual sensor problem | Verify the monitoring tool and sensor before blaming overall cooling |
| Removal shows thin centre, piled-up edges | Classic pump-out distribution | Repaste, build a new baseline, and follow the trend regularly |
| Removal shows a layer that is hard and cracked throughout | Drying as the main factor | Repaste, and note the operating environment when following the trend |
| Removal shows thick on one side, thin on the other | Uneven assembly pressure | Inspect mounting hardware and screws, and ensure even pressure on reassembly |
Boundary Cases: When It Is Not Pump-Out
High temperatures immediately after a repaste are not pump-out. Pump-out needs time to accumulate; immediate heat points first to assembly, contact, or a heatsink that was not refitted properly. A jump within a single day is not gradual pump-out; sudden changes call for checking fan stoppage, a suddenly blocked airflow path, or an abrupt load or environment change. A rise in only one sensor reading, with others normal, should first raise suspicion about the reading source or that individual sensor, not about overall cooling. A seasonal room temperature rise, with summer readings higher than winter readings, is an environmental variable, not a paste problem; comparisons must be aligned to room temperature. Normal idle temperatures with only heavy-load temperatures rising, versus idle and heavy-load temperatures rising together, are two different branches and must not be merged. And a rise seen after switching monitoring tools or test methods may simply reflect a different measurement method; measurement consistency must be confirmed before any comparison is drawn.
Why Repasting the Same Way Can Repeat the Cycle
This section covers the point most easily missed in the whole topic. A repaste can fix the immediate coverage shortfall, but if the cause is thermal-cycle squeezing, and the new paste has similar characteristics and is applied the same way as before, the physical conditions for pump-out have not changed at all. Thermal cycling continues, squeezing continues to accumulate, and months later temperatures may slowly climb again. The reader then wonders why the repaste did not work, when in fact the repaste did work — it merely reset one cycle without changing the conditions that drive the cycle.
Breaking the cycle has several possible directions. One is the paste characteristics direction: choosing a paste whose characteristics let it hold its shape better under heat and resist being squeezed out, judged by the manufacturer's specification and characteristic descriptions — this article gives no brand or ranking. Another is the assembly direction: ensuring even heatsink pressure and good contact, since uneven pressure itself worsens localised squeezing. A third is the usage pattern direction: reducing needless sharp load swings, although everyday use can never fully avoid power cycles and load changes — understanding the mechanism at least explains why trend follow-up matters so much. Whichever direction is chosen, building a new baseline after the repaste and following the trend regularly is mandatory; without it, there is no way to know whether the cycle has repeated.
Common Misconceptions
Misconception one: more paste is better. Wrong. Paste exists to fill microscopic gaps, and excess paste does not improve gap filling; it is simply easier to squeeze out to the edges. Excess is not a solution to pump-out. The correct direction is an appropriate amount with even coverage.
Misconception two: every paste lasts the same. Wrong. Pastes with different characteristics differ in pump-out resistance and drying speed. But this article gives no brand rankings or specific lifetime figures; readers should go by the manufacturer's specification and characteristic descriptions, not by rumour.
Misconception three: a repaste fixes every temperature problem. Wrong. Fan, airflow, environment, load, and assembly problems are not fixed by changing paste. Repasting without first separating the causes wastes a disassembly, and disassembly itself carries risk, so it should never be the first step.
Misconception four: pump-out proves the card is dying. Wrong. Pump-out is a physical phenomenon of the thermal interface layer, not damage to the chip itself. Interface problems and chip lifespan are two different things, and merging them leads people to needlessly replace a card that is itself healthy.
Misconception five: one repaste and the matter is closed forever. Wrong. If the cause is thermal-cycle squeezing, the same approach may repeat the cycle. A new baseline after the repaste and regular trend follow-up are needed to know whether the problem is truly resolved.
Misconception six: a small rise can be ignored, and only a large rise counts as a problem. Wrong. What matters is not the size of a single rise but the trend. A slow but sustained upward trend is itself the clue; waiting until the rise is large means the paste distribution may already have deteriorated badly. The trend is the standard of judgement, not any single reading.
When to Stop and Seek Help, and What Records to Bring
Stop further disassembly and testing if any of the following appear: a burning smell or abnormal noise from the card; all the comparisons in this article's sequence have been completed and the result still cannot be tied to one variable; or removal reveals damaged mounting hardware, stripped screws, or abnormal marks on the chip surface. These situations go beyond a paste replacement, and the card should be handed to inspectors to investigate from a wider angle.
When seeking help, bring records sufficient for the inspector to start directly from the located side: the temperature trend before and after the repaste, meaning how much it improved at first, how long before it started rising again, and how fast the rise proceeded; the baseline test conditions, meaning which program, which scene, and how long; how room temperature changed during testing; whether idle and heavy-load temperatures rose together or only heavy-load temperatures rose; the results of the fan and airflow checks; and the paste distribution seen on removal, whether thin centre, fully hardened layer, or thick on one side and thin on the other. Stated clearly, these are enough for the other party to judge the next step quickly.
If you live nearby, you are welcome to bring your records to HK GPU Fix for advice, at Shatin Dali Plaza Room 1209, phone 2186 8010, WhatsApp 6558 6806. When asking, explain the temperature trend, the baseline test conditions, and the paste distribution seen on removal, and that is enough for the other party to judge the next step quickly.
Frequently Asked Questions
Why do temperatures improve right after a repaste, then slowly get worse again?
Because the repaste immediately restores complete coverage, and heat transfer efficiency returns to its normal level. But if the cause is thermal-cycle squeezing, repeated heating and cooling slowly push paste from the centre toward the edges, central coverage grows thinner, and heat transfer efficiency declines step by step, so temperatures slowly climb again. It is a cumulative process, which is why the rise is gradual rather than sudden.
What is the difference between pump-out and paste drying?
Pump-out is a position problem: paste is physically squeezed away, and the paste itself may still be soft, but it is no longer where it needs to be. Drying is a material ageing problem: paste loses volatile components, turns hard and brittle, and loses its ability to fill gaps. On removal, pump-out typically shows a thin centre with piled-up edges, while drying typically shows a layer that is hard and cracked throughout. The two can coexist, but they need to be described separately because the thinking about follow-up differs.
How can I tell whether the rise is pump-out or an assembly problem?
Look at the time pattern. Assembly problems usually mean temperatures are already unsatisfactory immediately after the repaste, not improving at first and only worsening later. Pump-out has exactly the opposite time pattern: improvement at first, then a slow rise over weeks or months. The distribution seen on removal is another clue: uneven assembly pressure typically shows thick on one side and thin on the other, while pump-out typically shows a thin centre with piled-up edges.
Can fan or airflow problems mimic pump-out?
Yes, which is why the diagnostic sequence rules out the air-cooling side first. Fan degradation, dust on fan blades, and blocked case airflow cause temperature rises that usually affect idle temperatures as well and tend to track fan condition. Blaming the paste before checking fans and airflow is a common error that heads in the wrong direction.
Can room temperature changes be mistaken for pump-out?
Yes. Seasonal change and rising room temperature raise readings on their own, with the cooling system completely unchanged. Before comparing, align room temperature and record how it changed during testing. A rise that tracks room temperature points to an environmental variable; a rise with room temperature unchanged points to the cooling side.
Does applying extra paste prevent pump-out?
No. Excess paste does not improve gap filling and is simply easier to squeeze out to the edges. An appropriate amount with even coverage is the correct direction. Preventing pump-out should be approached through paste characteristics, even assembly pressure, and trend follow-up, not by applying more.
Does one more repaste settle the matter for good?
Not necessarily. If the cause is thermal-cycle squeezing, and the new paste has similar characteristics and is applied the same way, the pump-out cycle may repeat. After a repaste, a new baseline must be built and the trend followed regularly to know whether the cycle has repeated. Describing a repaste as a permanent fix would mislead readers into skipping that follow-up.
Does pump-out mean the card is about to fail?
No. Pump-out is a physical phenomenon of the thermal interface layer, not damage to the chip itself. Interface problems and chip lifespan are two different things, and merging them leads people to needlessly replace a card that is itself healthy. The correct approach is to work through the diagnostic sequence and address the interface layer, not to jump to a lifespan verdict.
If only one sensor reading is rising, is that still pump-out?
Do not conclude that quickly. A rise in only one sensor, with others normal, should first raise suspicion about the reading source or that individual sensor — verify the monitoring tool and the sensor before blaming overall cooling. Overall cooling problems usually show up across multiple related readings, so a single-sensor anomaly needs the measurement side ruled out first.
When should I stop disassembling the card myself?
Stop if there is a burning smell or abnormal noise, if the full comparison sequence has been completed and the result still cannot be tied to one variable, or if removal reveals damaged mounting hardware or abnormal marks on the chip surface. Disassembly itself carries risk, and situations beyond a paste replacement should be handed to inspectors to investigate from a wider angle, bringing the temperature trend, baseline conditions, and distribution records with you.