GPU Fan Replacement Guide: How to Tell the Fan Is the Fault, Match the Model & Test After Fitting
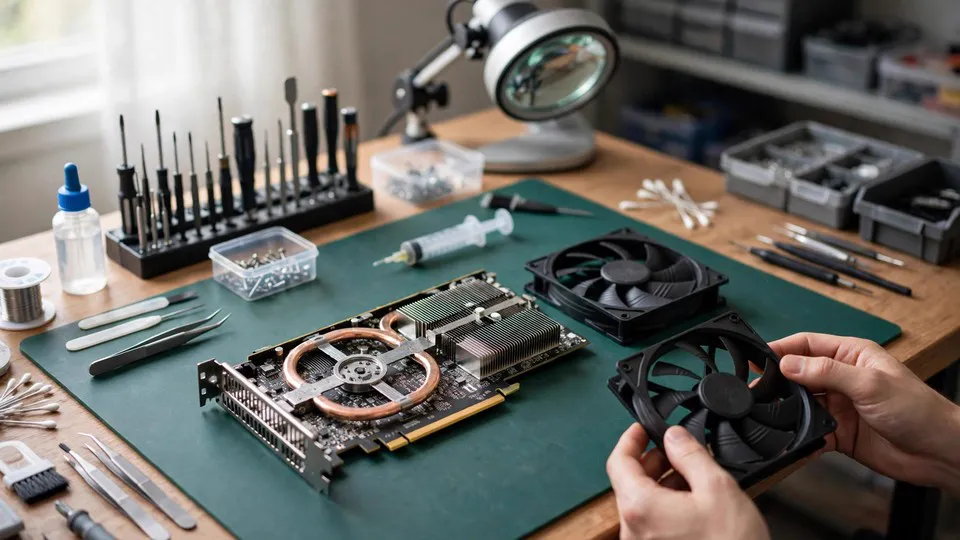
Key Takeaways
A faulty graphics card fan should be replaced only after software, fan-curve, and connection causes are ruled out. Matching the replacement means checking the old fan's model code, size, mounting-hole spacing, connector, voltage, current, and rotation direction — not the GPU name alone. After fitting, test speed, temperature, and noise under load.
The Fan's Job Inside the Cooling System
A graphics card cooler is usually made up of a heatsink, heat pipes, and one or more fans. The fan does not make cold air. It moves air across the heatsink fins, carrying away heat that the GPU core, the memory chips, and the power delivery components (VRM) have passed into the heatsink and heat pipes. The heatsink, heat pipes, and thermal pads do the heat transfer; the fan only moves the air that removes that heat.
Most consumer graphics cards use axial fans, which blow air downwards onto the heatsink. A smaller number of reference-design and compact cards use a blower fan, which draws air in from the end of the card and exhausts it out through the bracket. The two structures are replaced in different ways, and the steps in this guide apply mainly to the common axial-fan design. A blower card usually has a sealed airflow channel and a single blower unit, so replacing its fan often means dealing with the whole cooler assembly rather than swapping one fan on a shroud. If the card uses a blower, follow the guidance for that specific model instead of applying axial-fan steps to it.
Understanding this division of labour matters before a replacement. A new fan can only restore airflow. If the real problem is a heatsink clogged with dust, aged thermal paste, or a failing heat pipe, a new fan will spin correctly and the card will still run hot. That is why the confirmation steps below come before any discussion of buying a part.
How a Graphics Card Fan Works
Motor and bearings
A graphics card fan is a DC brushless motor powered from the card itself. The common bearing types are sleeve bearings and ball bearings, along with manufacturers' own named variants such as dual ball bearings or magnetic levitation designs. Brand marketing names for bearings differ between manufacturers and should not be treated as universal technical categories.
When a bearing wears, typical signs include unusual noise, stiff rotation, and a wobbling shaft. Noise diagnosis in detail is covered in a separate guide, so this article only uses those signs as supporting evidence that the fan itself is faulty, not as a full noise-diagnosis method.
Pins, tachometer signal, and PWM control
A standard four-pin fan follows the Intel four-wire PWM specification, and the principle is the same for case fans and graphics card fans — but a graphics card fan normally uses a small dedicated connector, not the larger four-pin header found on a motherboard. The standard pin order is:
- Pin 1: ground (GND, usually black)
- Pin 2: +12V power (usually yellow)
- Pin 3: tachometer or sense signal (usually green; two pulses per revolution, which software uses to calculate RPM)
- Pin 4: PWM control signal (usually blue; around 25 kHz, which the fan's built-in circuit uses to adjust speed)
A three-pin fan has only ground, +12V, and the tachometer signal, with no PWM pin; its speed can only be changed by varying the supply voltage. A two-pin fan has only ground and +12V, with no speed feedback and no PWM control; when powered it runs at full speed and the system cannot measure its speed.
Two distinctions are important. The tachometer signal only reports speed; it does not control anything. The PWM signal only issues a speed instruction; it does not supply power. A fan that spins while software shows 0 RPM may have a broken tachometer wire or a poor pin contact, and the fan itself may not be faulty. A fan that does not spin even though 12V power is present points more strongly towards the motor or bearing.
Critically, not every four-pin fan uses the same pinout. Some cards use a non-standard wire order, some fans have all four wires in black so the pins must be identified by connector position rather than colour, and some non-standard designs use 5V fans, which can be damaged by a 12V supply. Never assume that every four-pin fan shares the same pin definition, and never assume that every fan runs on 12V. Check the label on the old fan and the wiring of the card itself.
Zero RPM and the fan curve
Since around 2015, most graphics cards deliberately stop their fans at idle or low temperature, generally below about 50–60°C, although the exact threshold varies by card. This is a normal design feature, not a fault. Before concluding that a fan is faulty, observe it under load, with the core temperature raised above the threshold — for example above 70°C.
The fan curve is the card-level mapping between temperature and speed. On multi-fan cards, some designs share one control signal across all fans, while others give each fan its own channel. If one fan does not spin while the others spin normally, the fault is more likely in that fan, its cable, or its channel. If all fans stop together, the shared layer — curve setting, driver, power, or controller — should be suspected first. The mechanism of Zero RPM and the details of fan-curve tuning are covered in separate guides; this article uses them only as exclusion steps.
The same GPU model can use different fans
Two cards with the same GPU chip — for example, two RTX 4060 cards — can come from different brands, different sub-models, or different production batches, with different PCB shapes, coolers, fan sizes, and connectors. "RTX 4060 fan" is not a universal part. Matching must be based on the full graphics card model plus the fan's own model code, never on the GPU chip name alone.
Before Replacing: Confirm the Fan Itself Is Faulty
The premise of this guide is that the fan itself is faulty and needs replacing. Replacing a fan that is not the problem wastes money and leaves the real fault in place. Work through the checks below in order, from software to hardware, and from checks that need no disassembly to checks that do.
Rule out software and settings first
- Confirm it is not Zero RPM. Open GPU-Z or HWiNFO to read the temperature, then run a game or a stress test such as FurMark for a few minutes until the core temperature rises above roughly 55–60°C. The exact threshold varies by card, so no single number should be treated as a universal standard. If the temperature rises and the fan still shows 0 RPM, that is a real problem. If the fan starts spinning once the card is warm, the fan was simply following its normal stop behaviour.
- Test with a manual speed command. In MSI Afterburner or the card manufacturer's own utility, set the fan manually to about 60%. If the fan responds and spins, the problem lies in the curve or software, not in the fan. If it ignores the manual command completely, the hardware layer becomes the suspect.
- Check for conflicting software. Running several fan-control tools at once — Afterburner, GPU Tweak, iCUE, and similar utilities — can cause them to overwrite each other's commands, typically with the last one written winning, which can leave the fan locked at 0%. Keep only one fan-control tool and test again.
- Check the dual BIOS switch. Some cards, including certain Strix, Nitro+, and Red Devil models, have a dual BIOS switch whose position affects fan behaviour. Confirm the switch position and whether it was moved accidentally.
- Consider driver and VBIOS state. A faulty driver or a fan-control setting error can also stop a fan. Do not, however, treat every fan problem as a driver problem; driver configuration is a separate topic covered in its own guide.
Then check the physical and connection layer
Do these checks with the power disconnected.
- Flick each fan gently with a finger. A worn fan usually feels stiff, wobbles on its shaft, or stops much sooner than the other fans. A healthy fan should spin smoothly and keep turning for a few revolutions.
- Look for anything jamming the blades. A stray cable, a clump of dust, or a loose sticker can block a blade. That is an obstruction, not a faulty fan.
- Check that each fan connector is seated. On a multi-fan card, each fan usually has its own connector. A loose or poorly seated connector can stop a single fan. Press the connector itself firmly into place; never pull on the wires.
- One fan versus all fans. One fan not spinning while the others spin normally points towards that fan, its cable, or its channel. All fans stopping together while the rest of the card works normally points towards the shared control or power layer, and should not be described as "all the fans failed at once".
Positive evidence that the fan itself is faulty
The more of these that apply, the more confident the conclusion:
- The fan feels stiff or jammed when flicked by hand, or the shaft wobbles noticeably.
- It does not spin even with power and a PWM command present, or it starts and then stops immediately, showing difficulty starting.
- The other fans on the same card spin normally under the same command, while this one does not.
- Its speed reading is clearly lower than the other fans, or its speed does not change with the command.
- It is accompanied by bearing noise, used here only as supporting evidence.
Evidence against the fan being faulty
If any of the following apply, do not conclude that the fan is faulty:
- It stops at idle but spins under load. That is Zero RPM behaviour.
- It spins when set manually to about 60%. That points to software or curve settings.
- All fans stop together. Check the shared control layer first.
- The fan spins but temperatures stay high. The problem may be the heatsink, thermal paste, case airflow, or memory and VRM cooling, not the fan itself.
Boundary cases
- The fan spins but software shows 0 RPM. The tachometer wire may be broken or a pin may not be making contact. Do not condemn the fan on the software reading alone.
- The fan starts and stops intermittently. This may be a failing bearing, unstable power, or a controller channel problem. Do not jump straight to replacement; work through the exclusion steps above first.
- The fan runs at full speed at boot, or repeatedly starts and stops near the temperature threshold. These are distinct symptoms with their own diagnostic guides, and they are not covered in this article.
- Blower cards. A single blower fan with a sealed airflow channel is a different structure. Replacement usually involves the whole cooler assembly, and the axial-fan steps in this guide should not be applied directly.
Matching the Replacement Fan
The most reliable method is to read the model code printed on the label on the back of the old fan — for example, GA91S2U, FD5010U12S, or PLD10010S12HH — and search for that code together with the full graphics card model. Fans that look alike are not necessarily compatible. Each item below must be checked.
Size
Measure the fan diameter in millimetres. Common sizes include 75mm, 85mm, 87mm, 88mm, 90mm, and 95mm. Different fans on the same card can be different sizes, so measure each one. Also check the thickness: a fan that is too thick may press against the heatsink or prevent the shroud from fitting back on.
Mounting hole spacing
Measure the centre-to-centre distance between the screw holes on the fan frame — for example, 39mm or 40mm. Measure each fan individually; hole spacing cannot be inferred from diameter. Even a small difference can mean the fan cannot be screwed in. Some sellers list the hole spacing, such as 39mm for the GA91S2U, and it should be checked before buying.
Do not use glue as a normal way to fix a fan in place. Some guides mention it as a workaround, but it is not a proper replacement method: it is unstable, hard to service, and can damage the heatsink.
Connector: pin count, shape, and wire order
Pin count determines function. A two-pin connector supplies power only, with no speed feedback and no speed control. A three-pin connector adds the tachometer signal. A four-pin connector adds PWM control. Using the wrong pin count means losing function — for example, replacing a four-pin fan with a two-pin fan removes speed monitoring and speed control entirely.
Connector shape matters just as much. Graphics card fans usually use a small dedicated connector, much smaller than a motherboard fan header, and the shape and pin spacing can differ between brands and models. A fan cannot be assumed to fit simply because it has four pins.
Wire order matters too. The standard order is ground, +12V, tachometer, and PWM, but some cards do not follow the standard — wires may all be black, or the order may differ. Compare the old fan's wire order and connector shape, or look up the information for that specific card model. Never write off a mismatch by assuming all four-pin fans share the same pinout.
On multi-fan cards, the left, centre, and right fans may use different connectors or different cable lengths, and some are sold as a set. Buying a single fan may not be enough, and the position of each fan should be recorded when it is removed.
Voltage and current
Voltage must match. Graphics card fans are generally 12V DC, and the label will state it, for example "DC 12V 0.35A". A 5V fan must not be used in place of a 12V fan, and vice versa — the wrong voltage can damage the fan. This is why the claim that all fans are 12V is wrong: non-standard 5V designs exist, and the label on the old fan is the authority.
Current, measured in amps, reflects the fan's power draw. A small difference, such as 0.35A against 0.40A, is generally acceptable. A large difference needs care: a fan drawing far more current may exceed what the card's fan power channel can supply, while a fan drawing far less may not spin fast enough or move enough air.
Speed range and blade design
The speed range matters because an aftermarket fan can run at a very different speed from the original at the same PWM duty cycle. In one case reported in online discussion, an aftermarket fan ran at about 4,600 RPM at full speed against about 3,600 RPM for the original, and was noticeably louder until the fan curve was adjusted. A replacement fan does not guarantee the same speed behaviour, so the curve may need to be retuned after fitting.
Blade design also affects airflow and noise. The number of blades, their shape, and the direction of rotation all matter. Some multi-fan cards deliberately use counter-rotating fans, with neighbouring fans spinning in opposite directions to reduce turbulence. A fan with the wrong rotation direction cannot be substituted — it will move less air and make more noise.
Rotation direction cannot be changed by swapping the power wires. A DC brushless fan does not reverse by reversing polarity; connecting the wires incorrectly will only make it fail to spin or damage it. The correct approach is to buy a fan with the same rotation direction.
Matching checklist
| Item | What to check | What goes wrong if it does not match |
|---|---|---|
| Full graphics card model | Brand, series, sub-model, and version | Same GPU, different card — the fan can be completely different |
| Fan model code | Code printed on the old fan's label | The most reliable way to identify the part |
| Diameter and thickness | Millimetres, measured fan by fan | Will not fit, or presses against the shroud |
| Mounting hole spacing | Centre-to-centre distance of the screw holes | Cannot be screwed in |
| Connector pins, shape, and wire order | 2, 3, or 4 pins; small dedicated connector; wire order | Will not plug in; no speed feedback; no speed control; possible damage |
| Voltage | Must match, generally 12V | Wrong voltage can damage the fan |
| Current | Close to the original is best | Far too high may overload the fan channel; far too low may move too little air |
| Rotation direction and blades | Clockwise or anticlockwise; blade count | Less airflow, more noise |
| Position | Left, centre, or right | Different positions can have different specifications |
Original Fan or Aftermarket Fan
Original-model replacement parts
The advantage of a replacement with the same model code is that size, hole spacing, connector, voltage, current, speed characteristics, and rotation direction are all designed for that card, giving the highest compatibility and usually requiring little curve adjustment afterwards.
The disadvantage is availability. Manufacturers generally do not sell fans directly to the public, so the part must be found through authorised repair channels or third-party parts sellers. Older or less common cards may already be out of production and hard to find.
A further caution: in the parts market, a seller's claim of "original" does not guarantee a genuine original part. Do not trust the seller's label alone; check each item in the matching list above.
Aftermarket and universal fans
Aftermarket fans are easier to find and offer more choice, and are generally much cheaper than a whole replacement card. No specific part price can be quoted here, because there is no reliable source for a universal fan price. For context on service costs, the published three-tier repair service fee range on this site is HK$400–2,800; that is a service fee range, not a fan retail price.
The risks of aftermarket fans are:
- Looks can deceive. A fan that looks identical and has the same four-wire connector can still behave differently. In one case reported in online discussion, a fan from another card was fitted and would not start by itself after each reboot, needing to be reconnected while powered before it would spin. The problem was only resolved by buying a fan made for that specific model.
- Different speed characteristics. A fan that runs much faster than the original at full speed will be noticeably louder; one that runs slower may not cool enough.
- Variable bearing and material quality. No reliable figures exist comparing the lifespan of aftermarket and original fans, so no such comparison should be made.
- Different rotation direction or blade design, which affects airflow.
Choosing principles
- Prefer a replacement with the same model code, regardless of whether the seller calls it original or aftermarket. The code matching is what matters.
- Check every item in the matching list before buying. If the seller's page does not state the hole spacing, pin count, or current, do not buy.
- Buy a set when fans are sold as a set. On multi-fan cards, replacing the set together keeps speeds consistent and noise even, and fans of the same age may fail close together.
- Keep the old fan and the old screws until the new fan has passed testing. If the new fan does not fit, the old one is still there for comparison and for putting the card back as it was.
A last-resort alternative: case fans strapped to the heatsink
When no suitable replacement fan can be found, some people remove the shroud and strap one or two ordinary 92mm or 120mm case fans to the heatsink, a modification sometimes called a deshroud mod. This is a last resort, not an equivalent replacement, and its limits must be stated plainly:
- Case fans plug into the motherboard, not the graphics card, so they will not automatically follow GPU temperature unless a separate controller is used or the motherboard curve is set to follow GPU temperature — which not every motherboard supports.
- The card will not look like the original, and the heatsink is left exposed once the shroud is removed.
- Case fans have different sizes and air-pressure characteristics from the original fan, so the result varies.
- It should only be considered when a proper replacement cannot be found.
Replacement Principles and Steps
The steps below are principles and general points, not a screw-by-screw repair manual. Different models are built differently, and the exact disassembly method must follow the structure of that model. If unsure, seek professional repair rather than forcing the card apart.
Before starting
- Check the warranty first. Graphics card warranties generally run for two to three years, with some brands offering a longer period on registration. Within the warranty period, contact the manufacturer or the shop first about warranty service or RMA; some manufacturers will even send a replacement fan directly. Taking the card apart yourself may affect the warranty, but policies differ between brands — some require the card to be restored before RMA, others handle cases individually. Neither "taking it apart always voids the warranty" nor "taking it apart never affects the warranty" is correct. Check that brand's warranty terms first.
- Photograph everything. Before disassembly, photograph the front and back of the card, the position of each cable, and the position of each screw, so the card can be put back together correctly.
- Prepare tools and a workspace. A small cross-head screwdriver, a clean work surface, and basic static precautions — touching a metal object to discharge static, and avoiding working on carpet — are the usual starting point.
Removing the card
Shut the computer down, unplug the power cable, disconnect the graphics card power cables, remove the bracket screws, and press the PCIe slot latch before pulling the card out. Never force it.
On most cards, the fans are screwed to the plastic shroud, which is held by small screws from the back of the card. Removing the shroud usually does not require removing the heatsink or touching thermal paste. Some cards, however, require the heatsink to be removed before the fan can be reached. Those cases must follow the guidance for that model; do not assume every card works the same way.
Do not touch fan connectors while the power is still connected or the power cable is still plugged in. Do not spin a fan at high speed with a finger, and do not blow compressed air through a fan so that it spins freely at high speed — that can damage the bearing and can generate reverse current. Hold the blades still while cleaning.
Some newer cards, such as recent Sapphire Nitro+ models, fix each fan with a single screw and a direct plug-in connection, making removal unusually easy. That shows how much the difficulty varies between cards; it should not be presented as typical of all cards.
Removing the old fan
Lift the shroud slowly and do not pull: the fan cables are still connected to the card. To disconnect a connector, grip the connector itself, never pull the wire. These small connectors are fragile, and pulling the wire can break the wire core or damage the socket.
Keep the screws in order and do not mix them up — screws in different positions can be different lengths.
Some cards have fans that are not independently replaceable: the fan frame is moulded into the shroud, or the fan is held by clips or adhesive rather than screws. In those cases, replacing the fan may mean replacing the whole shroud, or there may be no replacement part at all — in one case reported in online discussion, a Zotac GT440 had its fan frame cast into the shroud and the manufacturer did not supply the part after the warranty expired. State this boundary clearly rather than assuming every fan can be swapped on its own.
Fitting the new fan
Fit the new fan in the same position, with the cable routed along the same side and the same path. Plug in every fan connector — it is easy to miss one, and the fan that is left unplugged will not spin, leaving the card to overheat quickly under load.
Before refitting the shroud, check that no cable touches any blade, and flick each fan by hand to confirm it turns smoothly with nothing in the way. Do not overtighten the screws; the plastic frame can crack. Then refit the shroud, refit the card, and reconnect the power cables.
Testing After Fitting
A replacement is not finished when the fan spins. Post-fit testing must cover speed, temperature, and noise under load, plus fan-curve tuning — not just "it spins".
Immediate checks after powering on
After booting into the system, open GPU-Z or HWiNFO. Every fan should show a speed reading. Note that a card with Zero RPM may show 0 at idle, so a zero reading at idle alone is not a failure — the judgement comes once the temperature rises. Visually confirm that every fan is spinning in the same direction, and that no blade touches a cable or the shroud. Listen for any abnormal noise; this is a pass-or-fail check, not a full noise diagnosis.
Load testing
Run FurMark or an actual game for 20–30 minutes, monitoring temperature and fan speed. Fan speed should rise as temperature rises, and the temperature should level off rather than climbing without stopping.
As a general reference, most modern graphics cards aim for a target temperature of about 82–85°C, and FurMark is an extreme load that is harsher than ordinary gaming, so its temperatures should not be treated as everyday temperatures. No single number can be given as "the temperature after replacement should be X°C" — different cards, cases, and room temperatures all differ. One warning sign from testing guidance is a fan speed that does not change while the temperature keeps rising; that points to a problem.
Tuning the fan curve
Because a new fan can have different speed characteristics from the original, the fan curve may need to be set again after fitting. If the new fan is too loud, flatten the curve; if temperatures run high, raise it. Curve tuning itself is a separate topic, covered in its own guide, so it is only noted here as a step that may be needed after a replacement.
If the new fan is clearly louder than the old fan at the same setting, first check whether it was fitted in the wrong direction or whether a blade is touching something. Do not immediately assume that an aftermarket fan is simply loud by nature.
Longer-term observation
Over the first few days, watch the idle temperature, the gaming temperature, and the noise level, and note whether the fan ever stops intermittently or whether the speed reading suddenly drops to zero. If the fan spins but temperatures stay high, the problem may not be the fan — dust in the heatsink, aged thermal paste, poor case airflow, or memory and VRM cooling problems are all possible. Never claim that replacing the fan will always fix overheating, and never invent a figure for how many degrees a replacement should reduce temperatures.
When Replacement Is Not Worth It
- Within the warranty period. Use warranty service or RMA first instead of taking the card apart. Some manufacturers will repair the card free of charge or send a replacement fan.
- The card is already old or low-end. If the card's performance already lags behind what is needed, or a replacement card is planned soon, the time and cost of a fan replacement may not be worth it. No hard cut-off in years or model can be given, because no reliable source supports one.
- The heatsink or PCB has problems at the same time. The fan is only one part of the cooling system. If the heatsink is bent, a heat pipe has failed, or the PCB has a power or controller fault, replacing the fan alone will not solve the problem.
- The fan is not independently replaceable. If the fan frame is moulded into the shroud, the manufacturer does not supply a replacement, or the whole shroud must be changed and cannot be bought, a fan replacement may not be feasible. Replacing the whole cooler or the card may be the realistic options.
- No suitable replacement can be found. If the hole spacing, connector, and voltage all fail to match, do not force an unsuitable fan into place. Forcing it can damage the card or the fan. Seek a professional repair assessment instead of making do.
- The fan was never the problem. If the checks above point to software, curve settings, power, or the controller, replacing the fan is wasted money.
Common Mistakes
- "The fan does not spin, so the fan is faulty." Wrong. Zero RPM, curve settings, conflicting software, driver problems, power, and the controller can all stop a fan. Run the exclusion checks first.
- "If it looks the same, it fits." Wrong. Size, hole spacing, connector, voltage, speed, and rotation direction can each differ. In one case reported in online discussion, a fan that looked identical would not start by itself after a reboot.
- "The same GPU model means the fan is interchangeable." Wrong. Different brands and sub-models of the same GPU can use completely different fans.
- "Four pins means four pins — if it plugs in, it works." Wrong. Graphics card fans use small dedicated connectors, and pin spacing, shape, and wire order vary between cards. Matching pin count does not mean matching wire order.
- "Swapping the power wires reverses the fan." Wrong. A DC brushless fan cannot be reversed by swapping wires; incorrect wiring will only stop it or damage it.
- "Faster is always better." Wrong. A fan that runs much faster than the original will be much louder, and higher speed does not improve cooling in proportion. The fan curve needs to be tuned to match.
- "A case fan strapped on is the same as replacing the fan." Wrong. A case fan does not follow GPU temperature automatically, and its appearance and air-pressure characteristics differ. It is a last resort only.
- "Replacing the fan will definitely fix overheating." Wrong. Overheating can come from the heatsink, thermal paste, case airflow, or memory and VRM cooling.
- "Taking the card apart always voids the warranty" — or "never affects it". Both are wrong. Policy varies by brand; check that brand's warranty terms.
- "Glue will hold the fan in place." Wrong. Glue is not a proper fixing method; it is unstable, hard to service, and can damage the heatsink.
- "The fan does not spin but the card still works, so it can be ignored." Wrong. Running under load with a missing fan can send temperatures up sharply and risks damage. Even light use should be monitored for temperature, and gaming should not be attempted until the fan is fixed.
Frequently Asked Questions
How do I know the fan itself is faulty, rather than a software or settings problem?
Work through the exclusion checks first. Let the card warm up under load past the Zero RPM threshold and see whether the fan starts; set the fan manually to about 60% in a control utility and see whether it responds; keep only one fan-control tool running; and flick each fan by hand with the power off. A fan that stays still with power and a manual command present, feels stiff or wobbles, and is the only fan on the card not spinning is most likely faulty itself. A fan that spins on a manual command points to software or curve settings instead.
Can I buy a replacement fan using only the GPU model name?
No. Cards with the same GPU chip can use completely different fans. The reliable identifier is the model code printed on the label on the back of the old fan, together with the full graphics card model — brand, series, sub-model, and version. Size, hole spacing, connector, voltage, current, and rotation direction must all be checked against the old fan.
What happens if I fit a fan with the wrong connector or voltage?
A fan with the wrong pin count loses function: a two-pin fan in place of a four-pin fan removes speed feedback and PWM control. A connector with the wrong shape or pin spacing may not plug in at all, and a wire order that does not match can leave the fan without speed feedback or damage it. The wrong voltage is the most serious mismatch — a 5V fan supplied with 12V, or a 12V fan supplied with 5V, can be damaged. Check the label and the wire order before fitting.
Does replacing a fan void the graphics card warranty?
It depends on the brand. Warranties generally run for two to three years, and policies differ: some manufacturers require the card to be restored to its original state before RMA, while others handle cases individually. Check that brand's warranty terms before taking the card apart, and use warranty service first while the card is still covered.
My new fan is much louder than the old one. Is that normal?
Not necessarily. An aftermarket fan can run at a very different speed from the original at the same PWM setting, so the fan curve may need to be retuned after fitting. Before accepting the noise, check that the fan is fitted in the correct direction and that no blade is touching a cable or the shroud. If the speed characteristics differ greatly from the original, the curve is the first thing to adjust.
How long should I test a new fan after fitting it?
Check immediately after booting that every fan spins and shows a speed reading, then run a game or FurMark for 20–30 minutes and watch the temperature level off while the fan speed rises with temperature. Keep observing over the first few days for intermittent stopping, sudden speed readings of zero, or temperatures that stay high despite the fan spinning. A fan that spins is only the first check; speed, temperature, and noise under load are the real test.
What if I cannot find a fan that matches my card?
Do not force an unsuitable fan into place — a wrong hole spacing, connector, or voltage can damage the card or the fan. Options are to search by the old fan's model code through parts sellers or authorised repair channels, to consider replacing the fan set together if they are sold as a set, or to seek a professional repair assessment. Strapping case fans to the heatsink is a last resort only, and it will not follow GPU temperature automatically.
Should I replace all the fans on a multi-fan card at once?
It is often sensible to do so. Fans on the same card are the same age, so when one fails the others may not be far behind, and replacing the set together keeps speeds consistent and noise even. This applies when the fans are sold as a set or when matching parts are available for each position — remember that the left, centre, and right fans on one card can have different specifications, so each position must be matched separately.
Getting Help
A fan replacement is straightforward when the part matches and the card can be opened safely, and it is the wrong repair when the fault sits elsewhere. If the checks above leave any doubt — a connector that does not match, a fan frame moulded into the shroud, a card still under warranty, or temperatures that stay high after the fan spins — the sensible step is a professional assessment rather than forcing a part that does not fit. HK GPU Fix is at Room 1209, Dali Plaza, Shek Mun. For enquiries, call 2186 8010 or WhatsApp 6558 6806.