Graphics Card Doesn't Fit Your Case? Length, Thickness, Slot Position & Cable Bend Clearance Check Guide
Key Takeaways
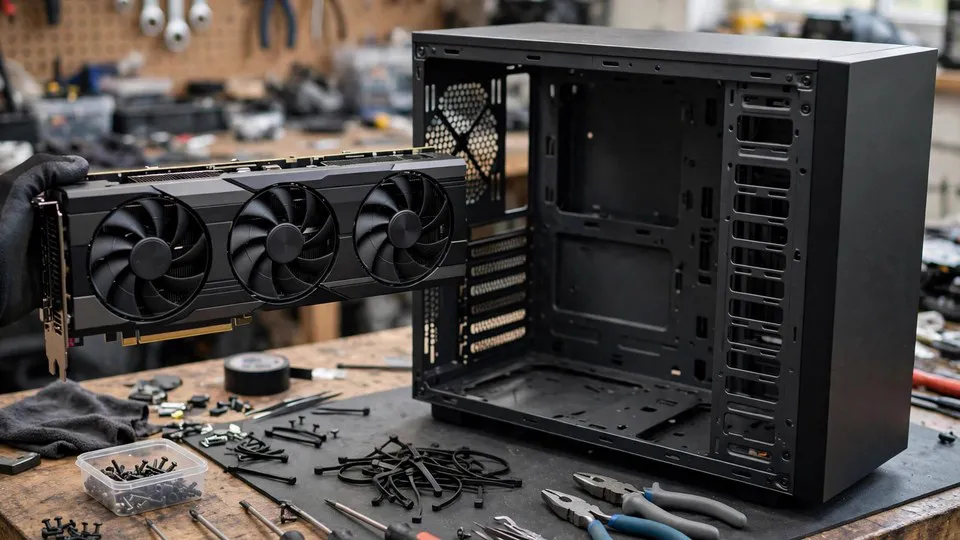
A graphics card fits only when four separate comparisons all pass: length against the case's configured maximum, thickness in millimetres against the slots it will cover, slot position against what sits below, and height plus power-cable bend space against the side panel. Comparing exact card and case models, in the case's as-configured state, prevents most surprises before purchase.
Why One Number Is Not Enough
A graphics card and a case each publish dimensions, but the two specification sheets do not always measure or name the same thing, and neither sheet necessarily describes the case as it will actually be configured, with its fans, radiator, or drive cage fitted. That is why a card can look like a fit on paper and still fail in the machine.
Fit is therefore not one number. It is four separate comparisons, and all four must pass: length, thickness in slots, slot position and what sits below it, and height together with side-panel and power-cable bend space. A card that passes length alone can still fail on thickness because it blocks a needed card below, on height because the side panel presses its cable, or on cable bend space because the plug cannot sit straight. Checking only the length figure is a frequent reason for a surprise at installation time.
The central teaching point of this guide is comparison discipline: compare the exact card model, meaning the same brand and the same cooler design, against the exact case model. Do not compare a graphics chip name against a case size class. Two cards built around the same chip can differ greatly in length and cooler thickness, and two cases both described as mid-towers can differ greatly in graphics card clearance. A chip name and a size class are not dimensions.
Reading the Two Specification Sheets
Start on the card maker's specification page and record three numbers: length, thickness in millimetres and in slot count where both are given, and height, meaning the dimension from the edge that carries the PCIe connector up to the top edge of the cooler. Be careful here, because makers label these three numbers inconsistently, presenting length, width, and height in different orders. Identify each dimension by what it measures, not by its label alone. If a card page gives only a slot label such as 2.5-slot without a millimetre thickness, find the millimetre figure before treating a tight clearance as a pass.
Then turn to the case maker's specification page and record the maximum graphics card length, the number of expansion slots, and any separate graphics card thickness or height limit. Small cases often state a thickness or height limit; ordinary mid-towers often do not state a height limit at all, which is why the physical side-panel test described later in this guide matters. Where the case maker publishes different length figures for different configurations, use the figure that matches the configuration as it will actually be built, not the largest figure on the page.
Finally, check the assumptions behind the case figure. Some case figures assume empty front space, while others assume the included fans fitted. If a front radiator or all-in-one liquid cooler is planned, use the case maker's with-radiator figure if one is published. If none is published, measure the radiator plus fan stack yourself and subtract that measured thickness from the empty-case figure. Presenting a fixed deduction for every build would be misleading, because radiator and fan thicknesses vary; the correct method is to measure the actual stack that will be fitted.
Measuring a Case You Already Own
If the case is already on the desk, a physical measurement settles what a specification page leaves ambiguous. Measure from the inside of the rear panel, where the card bracket sits, to the nearest obstruction at the height of the top PCIe slot. That obstruction may be a front fan frame, a radiator, or a drive cage, whichever is closest at that height. If the tape measure reads in inches, convert at 25.4 millimetres per inch.
The rule of method is simple, and it deliberately avoids a magic number: the card number must be smaller than the case number, with room left over for installation and cables. The margin exists for a practical reason, not as a decoration. A card that is only just shorter than the clearance leaves no room to plug cables into the end of the card, or to get fingers and connectors in during installation. Sources disagree on how large that spare room should be, which is why this guide teaches the comparison method and the reason for leaving room rather than presenting any single millimetre figure as a universal standard.
Branch 1: Length and What Eats Into It
Case maximum graphics card length is measured from the rear PCIe bracket to the first obstruction in front of the card. Everything that intrudes into that line reduces the usable length. In order of likelihood, the intruders are front fans, a front-mounted radiator plus its fans, a fixed drive cage, and a power supply shroud or other internal structure that intrudes at card height.
Removable or repositionable drive cages are a boundary case. If the cage can be removed or moved, the usable length changes, but that depends entirely on the specific case design. Check whether the particular case allows it; do not assume that every cage can move. Similarly, a front radiator changes the published figure: the same case has a different usable length with a radiator fitted than with empty front space. That change is the point, not any single example figure, and readers should always use the figure for their own configuration.
The failure symptom that separates this branch is physical and unmistakable: the card cannot be seated because its far end hits something before the bracket reaches the rear panel, or the bracket cannot be screwed in without the card end pressing hard on a fan, radiator, or cage. If the card seats cleanly and the bracket screws in without pressure at the far end, the length branch has passed, and attention should move to thickness.
Branch 2: Thickness in Slots and What the Label Hides
Expansion-slot pitch is about 20 millimetres, with sources giving 20.32 millimetres and rounding it to 20. This gives the familiar approximations: a 2-slot card is about 40 millimetres thick, a 2.5-slot card about 50 millimetres, and a 3-slot card about 60 to 61 millimetres. These approximations are useful for a first look, but they are not exact, and the rounding is where trouble hides.
Makers round differently. One maker's card measuring 72 millimetres may be labelled 3.6-slot, while another maker's card measuring 61.6 millimetres is labelled 3-slot. Two cards carrying similar-sounding labels can therefore differ by more than 10 millimetres. When clearance is tight, compare the millimetre thickness, not just the slot label, and count how many rear expansion slots and motherboard slots the cooler will actually cover.
| Slot label | Approximate thickness | What to count |
|---|---|---|
| 2-slot | About 40 mm | Two rear brackets and two motherboard slot positions |
| 2.5-slot | About 50 mm | Two rear brackets, but the cooler overhangs into a third slot position |
| 3-slot | About 60 to 61 mm | Three rear brackets and three motherboard slot positions |
| Above 3-slot | Compare millimetres, not the label | Every slot position the cooler covers, including any overhang |
What thickness blocks is concrete: the PCIe slots directly below the card on the motherboard, the rear expansion-slot brackets in the case, and, in compact cases, bottom fan mounts or the case floor. A 2.5-slot card typically uses two rear brackets but its cooler overhangs into a third slot's space, so a card in that third slot may not fit even though only two brackets are used. The bracket count and the cooler footprint are different things, and the cooler footprint is what decides whether the slot below stays usable.
In a standard 7-slot ATX mid-tower, thickness rarely prevents the card itself from fitting; it matters because it decides which lower slots remain usable. In a case that only exposes three expansion slots, the situation is stricter: a card thicker than three slots does not fit at all, regardless of length. There is also a brief airflow nuance worth noting without turning this into a cooling article: if the card's fans sit almost against the case bottom or a power supply shroud, intake is restricted. At least one vendor setup guide asks for 3-slot space even for a 2-slot card so its intakes have room. Treat that as a prompt to check for breathing room below the fans, not as a pass or fail rule for fit.
Branch 3: PCIe Slot Position and What Sits Below
For a single card, the normal position is the primary PCIe x16 slot, usually the topmost full-length slot closest to the processor. Sources agree this is normally the slot wired for full x16 lanes direct to the processor. Lower full-length-looking slots are often wired for fewer lanes electrically, commonly x8 or x4, and the motherboard manual is the authority for each individual board. Slot position matters for fit, not only for performance, because it decides where the card's cooler lands relative to other slots, to M.2 or chipset heatsinks below, and to the case floor.
Moving a thick card one slot lower to make room is not a free fix. It may put the card in a slower slot, and it may move its fans closer to the floor or power supply shroud. Before choosing that workaround, check the manual for the lane wiring of the lower slot, and check the new fan position against the case floor.
The practical check is a count. From the chosen slot, count downwards how many slot positions the card's thickness covers, and list what is actually installed, or planned, in each covered position: a capture card, a sound card, a Wi-Fi card, a USB expansion card, or nothing. If nothing is installed below, thickness blocking is harmless. If something is installed below, the conflict is real even though the card itself fits. This is also why the thickness branch and the slot position branch must be checked together: thickness alone says how much space the cooler occupies, and slot position alone says what that space contains.
Three boundary cases complete this branch. First, a motherboard with only one x16 slot offers no slot-choice workaround at all. Second, a lower slot that is physically x16 but electrically x4 will accept the card physically, but the reader should know the lane difference before choosing it as a workaround. Third, a vertical mount changes the constraint entirely, because the limiting measurement becomes distance from the side glass rather than length. Vertical mounts are a different measurement problem and are flagged here only, not developed, because riser behaviour belongs to a separate topic.
Branch 4: Height, Side-Panel Clearance, and Power-Cable Bend Space
Height here means the card's dimension from the PCIe slot up to the top edge of the cooler, plus whatever sits on that top edge. Most importantly, that includes the power connectors, and their position decides which space they consume. Two positions must be distinguished. End-mounted connectors, at the far end of the card facing the front of the case, consume length space and need room beyond the card end to plug in. Top-edge connectors, facing the side panel, consume side-panel space and need room for the plug plus its cable bend.
For straight 16-pin 12VHPWR and 12V-2x6 cables, the widely cited manufacturer guidance is to allow roughly 35 millimetres of straight cable run out of the connector before any bend, to avoid bending sharply right at the plug, and to avoid closing a side panel over a cable it presses on. That figure is presented here as the widely cited guidance for straight 16-pin cables, not as a universal standard for every cable and adapter. Angled cables and adapters are designed to change the bend geometry, and the specific graphics card and cable maker's instructions take precedence over any general figure. No failure statistic is attached to this guidance in this article, because none is reliably sourced.
Eight-pin, meaning 6+2-pin, connectors are more forgiving of a bend than 16-pin connectors, but the same principle applies: the plug must seat fully flush, with no visible gap, and the side panel must not press the cable sideways or push the plug out of square. A plug that looks latched but is pushed sideways by the panel is not a satisfactory fit.
The practical test is straightforward. With the panel off, seat the plug fully, route the cable with a gentle curve, then offer the side panel up without forcing it. If the panel touches, flexes, or presses the cable, that is a failed fit. The remedies are to reroute, to use a different cable or adapter suited to the layout, or to reconsider the case and card pairing. Forcing the panel closed is never the remedy, and neither is bending a cable hard at the plug or running a card with a partially seated plug.
In slim or compact cases, the case maker may publish a graphics card height limit; if one is published, compare card height plus connector height against it. In ordinary mid-towers the height limit is rarely published, so the side-panel test above is the check.
The Decision Order
Work through the four comparisons in this sequence, and do not skip ahead to a remedy before all four have been checked.
- Exact card model dimensions against the exact case model's maximum graphics card length, in the case's as-configured state, with fans, radiator, and cage as they will actually be.
- Millimetre thickness against the slot positions covered, and what is installed below.
- Slot position: primary x16 slot first, and the motherboard manual checked before any lower slot is used as a workaround.
- Height and cable space: connector position, end or top edge, straight-run room, and the side-panel test without force.
- Only if all four pass is the pairing a fit. If any fails, the remedies are a different card variant with the same chip but a slimmer or shorter cooler, a different case, moving or removing an obstruction only if the case design allows it, or a suitable cable or adapter for the connector geometry. Forcing, bending a cable hard at the plug, and leaving a panel pressing on a cable are not remedies.
Whether the card is already owned or not yet bought, the same four checks apply; only the remedies differ. With a card already owned, the realistic options are case, cable, and position changes. With a card not yet bought, picking a different variant first is usually the simplest remedy.
Common Misconceptions
Same chip means same size. It does not. Cooler designs differ greatly between models built around the same chip, and the chip name tells nothing about length or thickness.
Mid-tower means any card fits. It does not. Mid-towers differ in graphics card clearance, and a front radiator changes the figure for the same case.
The slot label is exact. It is not. Slot labels such as 2.5, 3, and 3.6 are rounded differently by different makers, so millimetres must be compared when clearance is tight.
It screwed in, so it fits. Not necessarily. A card can be screwed in while its cable is pressed by the side panel or its end is hard against a fan. That is not a satisfactory fit.
A lower PCIe slot is just as good. Not necessarily. Lower full-length slots are often wired with fewer lanes, and the motherboard manual must be checked.
An angled adapter fixes any tight cable. It does not. An adapter changes geometry but cannot compensate for incomplete seating or a panel that still presses on the connection.
Length is the only measurement that matters. It is not. Length, thickness, slot position, and height with cable space are four separate comparisons, and any one of them can fail a pairing that passes the other three.
Boundary Cases Worth Knowing
An older case with no published graphics card length figure is not a dead end: measure physically, from the rear bracket to the nearest obstruction at top-slot height, as described above. A removable drive cage changes usable length only as far as that specific case's design allows; verify it rather than assuming it. A vertical mount replaces the length question with a side-glass distance question and needs its own measurement. And a card that is already owned is checked the same way as a card not yet bought, with the remedy list narrowing to case, cable, and position options.
One distinction is worth a single sentence: sag after installation, where a heavy card droops in its slot over time, is a different, post-install issue from the pre-install fit checks in this guide, and it is not covered here.
When to Stop and Seek Inspection
Stop and seek hands-on help when the four checks cannot be completed because a specification figure is missing and cannot be measured, when a connector cannot be seated fully flush no matter how the cable is routed, or when any proposed remedy would involve forcing a panel, bending a cable hard at the plug, or modifying the case or card. Those are not acceptable next steps.
Inspection is available at the Shatin shop: Dali Plaza, Room 1209, Shatin. Telephone 2186 8010. WhatsApp 6558 6806. Bring the exact card model, the exact case model, the measured or published figures for all four comparisons, and a note of which comparison failed. That note lets inspection start from the failed comparison rather than repeating the whole checklist.
Frequently Asked Questions
Why does my card not fit when the case is a mid-tower?
Because mid-tower is a size class, not a clearance figure. Cases in the same class differ in maximum graphics card length, and a front radiator, front fans, or a drive cage reduces the usable length further. Compare the exact card model against the exact case model's maximum length in its as-configured state.
Is the slot label enough when checking thickness?
No, when clearance is tight. Makers round slot labels differently, so a 3-slot label can hide a thickness difference of more than 10 millimetres against another maker's 3-slot card. Compare millimetre thickness and count the slot positions the cooler will cover.
Can I just move the card to a lower PCIe slot to make room?
Only after checking the motherboard manual. Lower full-length slots are often wired for fewer lanes, and moving the card lower can also put its fans closer to the case floor. The manual is the authority for each board, and the new fan position must be checked too.
How much spare length should I leave?
There is no single universal figure, because published guidance disagrees. Leave room for installation access and for cables at the card end, and treat the comparison method in this guide, not a single millimetre number, as the rule.
The side panel closes but touches the power cable. Is that a fit?
No. If the panel touches, flexes, or presses the cable, the fit has failed. Reroute the cable, use a cable or adapter suited to the layout, or reconsider the pairing. Never force the panel closed over a pressed cable.
Does an angled adapter solve every tight cable problem?
No. An adapter changes the bend geometry, which helps in some layouts, but it cannot fix a plug that is not fully seated or a panel that still presses on the connection. The plug must seat fully flush, and the panel must close without pressing the cable, with or without an adapter.